58
Basic Setup
05
Play ZONE Setup
VSX-1130 only
You can select what zone to play when playing via AirPlay and
Bluetooth
equipped devices as well as when play-
ing audio content on equipment in the home network in DMR mode.
!
For playable DLNA-compatible network devices, see
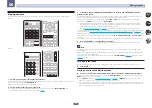
1 Select ‘Play ZONE Setup’ from the Network Option menu.
2 Select the zone in which you want to play the audio contents.
3 When you’re finished, press RETURN.
You will return to the
Network Option
menu.
Notes
!
If another zone is on, it may not be possible to play the audio contents. In this case, turn the other zone off,
then play the audio contents.
!
MAIN/HDZONE
at
ZONE Setup
must be set to
HDZONE
in order to use the
HDZONE
function (
).
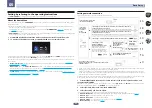
Automatically conducting optimum sound tuning (Full Auto MCACC)
The Full Auto MCACC Setup measures the acoustic characteristics of your listening area, taking into account
ambient noise, speaker connection and speaker size, and tests for both channel delay and channel level. When
Measurement Type
is
Expert
, in addition to this, Standing Wave, Reverb chracteristics, Full Band Phase
Control (VSX-1130 only) and EQ are measured. After you have set up the microphone provided with your system,
the receiver uses the information from a series of test tones to optimize the speaker settings and equalization for
your particular room.
Important
!
Make sure the microphone and speakers are not moved during the Full Auto MCACC Setup.
!
Using the Full Auto MCACC Setup will overwrite any existing settings for the MCACC preset you select.
!
Before using the Full Auto MCACC Setup, the headphones should be disconnected.
!
With factory default settings, the on-screen display will be output from all HDMI output terminals and dis-
played on any TV connected via HDMI cable.
VSX-1130 only:
You can change where the screen is output in the
MAIN/HDZONE
(
) and HDMI out-
put (
) settings.
CAUTION
!
The test tones used in the Full Auto MCACC Setup are output at high volume.
1 Press
u
STANDBY/ON to switch on the receiver and your TV.
Make sure that the TV’s video input is set to this receiver.
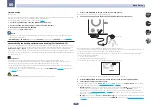
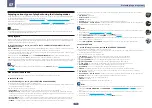
2 Connect the microphone to the MCACC SETUP MIC jack on the front panel.
Microphone
Tripod
Make sure there are no obstacles between the speakers and the microphone.
If you have a tripod, use it to place the microphone so that it’s about ear level at your normal listening position. If
you do not have a tripod, use some other object to install the microphone.
Install the microphone on a stable floor. Placing the microphone on any of the following surfaces may make
accurate measurement impossible:
!
Sofas or other soft surfaces.
!
High places such as tabletops and sofa tops.
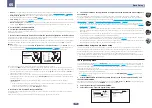
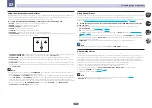
The Full Auto MCACC display appears once the microphone is connected.
Speaker System
: 7.2ch/5.2.2ch
Exit
2a.Full Auto MCACC
Return
START
EQ Type
: SYMMETRY
SP to ceiling
:
– – –
MCACC
: M1.MEMORY 1
Dolby Enabled Speaker :
NO
Measurement Type :
Expert
!
If you leave the GUI screen for over five minutes, the screen saver will appear.
3 Press MAIN RECEIVER to switch the remote control to the receiver operation mode.
4 Select the parameters you want to set.
When the speaker system is not
7.2ch/5.2.2ch
(VSX-1130)/
5.2ch
(VSX-830), set
Speaker System
before measur-
ing full auto MCACC. For details, see
.
!
Speaker System
– Shows the current settings. When this is selected and
ENTER
is pressed, the speaker
system selection screen appears. Select the proper speaker system, then press
RETURN
to return.
If you are planning on bi-amping your front speakers, or setting up a separate speaker system in another
room, read through
and make sure to connect your speakers as neces-
sary before continuing to step 4.
!
EQ Type
– When you select
Expert
for
Measurement Type
, set the correction method of the frequency char-
acteristics of the viewing environment. Usually, set
SYMMETRY
. For details, see
Summary of Contents for VSX-1130-K
Page 1: ...Operating Instructions AV Receiver VSX 1130 K VSX 830 K ...
Page 152: ......

