background image

81

Playback with NETWORK features

08

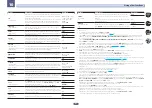
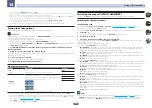
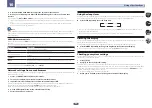
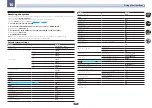
About playable file formats

The NETWORK feature of this receiver supports the following file formats. Note that some file formats are not 
available for playback although they are listed as playable file formats. Also, the compatibility of file formats var-
ies depending on the type of server. Check with your server to ensure the compatibility of file formats supported 
by your server.

!

  Internet radio playback may be affected by the Internet communications environment, and in this case play-

back may not be possible even with the file formats listed here.

!

  With MP3, WAV, AAC, FLAC, AIFF and Apple Lossless files, when music files with the same format, sampling 

frequency, quantization bit number and number of channels are played successively, they are played with no 
gap.

 Gapless playback is not possible when the format is being converted (transcoded) by the server.

 Gapless playback is not possible in the DMR mode.

 When AAC or MP3 format is used, sound is reproduced with the minimum gap. If you are conscious about 

gaps, use WAV or FLAC files.

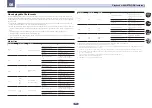
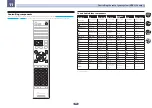
Music files

Category

Extension

Stream

MP3
<a>

.mp3

MPEG-1 Audio Layer-3

Sampling frequency

32 kHz, 44.1 kHz, 48 kHz

Quantization bitrate

16 bit

Channel

2 ch

Bitrate

8 kbps to 320 kbps

VBR/CBR

Supported/Supported

WAV

.wav

LPCM

Sampling frequency
<b>

32 kHz, 44.1 kHz, 48 kHz, 
88.2 kHz, 96 kHz, 176.4 kHz, 
192 kHz

Quantization bitrate

16 bit, 24 bit

Channel

2 ch, 5.0 ch, 5.1 ch
<c>

WMA

.wma

WMA2/7/8/9
<d>

Sampling frequency

32 kHz, 44.1 kHz, 48 kHz

Quantization bitrate

16 bit

Channel

2 ch

Bitrate

5 kbps to 320 kbps

VBR/CBR

Supported/Supported

AAC

.m4a 
.aac


.3gp


.3g2

MPEG-4 AAC LC
MPEG-4 HE AAC

Sampling frequency

32 kHz, 44.1 kHz, 48 kHz

Quantization bitrate

16 bit

Channel

2 ch

Bitrate

16 kbps to 320 kbps

VBR/CBR

Supported/Supported

Apple Lossless

.m4a 
.mp4

Apple Lossless

Sampling frequency

32 kHz, 44.1 kHz, 48 kHz, 
88.2 kHz, 96 kHz, 176.4 kHz, 
192 kHz

Quantization bitrate

16 bit, 24 bit

Channel

2 ch

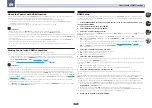
Category

Extension

Stream

FLAC
<e>

.flac

FLAC

Sampling frequency
<b>

32 kHz, 44.1 kHz, 48 kHz, 
88.2 kHz, 96 kHz, 176.4 kHz, 
192 kHz

Quantization bitrate

16 bit, 24 bit

Channel

2 ch, 5.0 ch, 5.1 ch
<c>

AIFF

.aiff 
.aif

.aiff 
.aif

Sampling frequency

32 kHz, 44.1 kHz, 48 kHz, 
88.2 kHz, 96 kHz, 176.4 kHz, 
192 kHz

Quantization bitrate

16 bit, 24 bit

Channel

2 ch

DSD
<f>

.dff
.dsf

DSDIFF
DSF

Sampling frequency

2.8224 MHz, 5.6448 MHz
<g>

Quantization bitrate

1 bit

Channel

2 ch

“MPEG Layer-3 audio decoding technology licensed from Fraunhofer IIS and Thomson multimedia.”

b  32 kHz, 176.4 kHz and 192 kHz support 2-channel audio sources only.

!

 When playing the 5.0 channel or 5.1 channel file in the sub zone, only the front left and right sound is played. Multichannel 

playback is only available with the main zone.


!

 Audio for 5.0 ch and 5.1 ch for wireless connection can be played only when the sampling frequency is 48 kHz or below.

d  Files encoded using Windows Media Codec 9 may be playable but some parts of the specification are not supported; specifi-

cally, Pro, Lossless, Voice.

e  Uncompressed FLAC files are not supported. Pioneer does not guarantee playback.
f  DSD files cannot be played in the sub zone.
g  5.6448 MHz is only compatible with VSX-1130.


Summary of Contents for VSX-1130-K

Page 1: ...Operating Instructions AV Receiver VSX 1130 K VSX 830 K ...

Page 2: ...ead these instructions Keep these instructions Heed all warnings Follow all instructions Do not use this apparatus near water Clean only with dry cloth Do not block any ventilation openings Install in accordance with the manufacturer s instructions Do not install near any heat sources such as radiators heat registers stoves or other apparatus including amplifiers that produce heat Do not defeat th...

Page 3: ...el set the dial and leave it there BE SURE TO OBSERVE THE FOLLOWING GUIDELINES Do not turn up the volume so high that you can t hear what s around you Use caution or temporarily discontinue use in potentially hazardous situations Do not use headphones while operating a motorized vehicle the use of headphones may create a traffic hazard and is illegal in many areas S001a_A1_En WARNING Store small p...

Page 4: ...cting your equipment In case of VSX 830 Connecting your equipment 38 Rear panel 38 Determining the speakers application 38 Placing the speakers 39 Connecting the speakers 40 Installing your speaker system 40 About the audio connection 41 About HDMI 42 Connecting your TV and playback components 42 Connecting a satellite cable receiver or other set top box 44 Connecting other audio components 45 Con...

Page 5: ...ng components 96 12 The MCACC PRO VSX 1130 Advanced MCACC VSX 830 menu Making receiver settings from the MCACC PRO VSX 1130 Advanced MCACC VSX 830 menu 99 Automatic MCACC Expert 99 Manual MCACC setup 101 Checking MCACC Data 103 Data Management 104 13 The System Setup and Other Setup menus Making receiver settings from the System Setup menu 106 Manual speaker setup 106 MHL Setup 108 The Other Setup...

Page 6: ... VSX 1130 page 39 VSX 830 Connecting the speakers page 24 VSX 1130 page 40 VSX 830 Installing your speaker system page 24 VSX 1130 page 40 VSX 830 Bi amping your speakers page 26 VSX 1130 page 41 VSX 830 j 4 Connecting the components About the audio connection page 27 VSX 1130 page 41 VSX 830 VSX 1130 only About the video converter on page 27 Connecting your TV and playback components page 28 VSX ...

Page 7: ...7 Features 8 Checking what s in the box 10 Installing the receiver 11 Loading the batteries 11 Operating range of remote control unit 11 Before you start ...

Page 8: ...d broadcasts This function is particu larly effective when playing multi channel music containing low frequency effects LFE Full Band Phase Control VSX 1130 only The further advanced Full Band Phase Control technology focuses on the group delay in the speaker network filter and compensates with special digital signal processing DSP to adjust the phase of each unit as well as the group delay for ea...

Page 9: ...channel Music File playback This receiver enables multi channel music file playback with a resolution of up to 96 kHz 24 bit Playback of WAV and FLAC files via the front USB port and network is supported DSD File Music playback via Network Front USB and HDMI Playback of high sound quality DSD music DSD files and DSD discs SACDs is supported High Resolution Music Playback High resolution music file...

Page 10: ...Checking what s in the box Please check that you ve received the following supplied accessories Setup microphone cable 5 m 16 4 ft Remote control unit AAA size IEC R03 dry cell batteries to confirm system operation x2 AM loop antenna FM wire antenna CD ROM Quick start guide Safety Brochure Warranty sheet Note The user s manual explains the operation using mainly illustrations of VSX 1130 In additi...

Page 11: ...not use or store batteries in direct sunlight or other excessively hot place such as inside a car or near a heater This can cause batteries to leak overheat explode or catch fire It can also reduce the life or perfor mance of batteries CAUTION Incorrect use of batteries may result in such hazards as leakage and bursting Observe the following precautions Never use new and old batteries together Ins...

Page 12: ...12 Remote control In case of VSX 1130 13 Remote control In case of VSX 830 14 Display 16 Front panel 17 Controls and displays ...

Page 13: ...perform operations on the TV to which the TV INPUT button is assigned The TV can be operated with these buttons regardless of the input set for the remote control s operation mode page 93 6 Receiver Control buttons STATUS Displays the IP address and information such as selected set functions and input signals on the display page 90 OUT P OUTPUT PARAMETER Switches the output terminal of the HDMI si...

Page 14: ...tening volume To adjust the main zone sound volume press MAIN RECEIVER first and then press this button When in the sub zone press the SUB ZONE CONTROL button first and then press this button 17 MUTE Mutes the sound or restores the sound if it has been muted adjusting the volume also restores the sound To mute the main zone sound volume press MAIN RECEIVER first and then press this button When in ...

Page 15: ...ing the input function buttons The BD DVD and CD operation using the component control buttons are limited only to Pioneer components The controls above these buttons can be accessed after you have selected the corresponding input function but ton BD DVD and CD These buttons also function as described below Press TUNER first to access Use TUNE can be used to find radio frequencies and PRESET can b...

Page 16: ... Listening mode indicators ALC Lights when the ALC Auto level control mode is selected page 71 AUTO SURROUND Lights when the Auto Surround feature is switched on page 71 STREAM DIRECT Lights when Direct Pure Direct is selected page 72 ADV SURROUND Lights when one of the Advanced Surround modes has been selected page 72 STANDARD Lights when one of the Standard Surround modes is switched on page 71 ...

Page 17: ...ls BAND Switches between AM and FM radio bands page 67 TUNER EDIT Use with TUNE i j PRESET k l and ENTER to memorize and name stations for recall page 67 TUNE i j Find radio frequencies page 67 PRESET k l Find preset stations page 67 7 Remote sensor Receives the signals from the remote control page 11 8 MASTER VOLUME dial 9 PHONES jack Use to connect headphones When the headphones are connected th...

Page 18: ...ource page 35 or connect a USB device for audio and photo playback page 35 16 HDMI 5 INPUT terminal VSX 1130 only Use for connection to a compatible HDMI device Video camera etc page 35 17 DIMMER VSX 830 only Dims or brightens the display page 90 18 ECO VSX 830 only Use to switch the eco mode type page 72 ...

Page 19: ...nnecting a satellite cable receiver or other set top box 30 Connecting other audio components 31 Connecting the subwoofer 32 Connecting AM FM antennas 32 Making MULTI ZONE connections 33 Connecting to the network through LAN interface 34 Connecting an iPod 35 Connecting a USB device 35 Connecting an MHL compatible device 35 Connecting an HDMI equipped component to the front panel input 35 Connecti...

Page 20: ...of the respective devices Rear panel 1 1 TV SAT CBL 1 1 TOP MIDDLE SURROUND SURROUND BACK CENTER 5 2 2ch 5 2ch SPEAKER B DIGITAL IN 5 2 2ch HDZONE BI AMP FRONT R L R L R L R L Single B A OUT IN MHL BD 6 1 6 4 3 2 1 OUTPUT 5 V 0 9 A MAX ASSIGNABLE ASSIGNABLE ASSIGNABLE OPTICAL COAXIAL IR PR PB Y ASSIGNABLE COMPONENT VIDEO FMUNBAL 75 AM LOOP SUBWOOFER PRE OUT 1 2 DVD ANALOG1 CD ASSIGNABLE L R L R SA...

Page 21: ...nd right front speakers L R the center speaker C the left and right top middle speakers TMdL TMdR the left and right surround speakers SL SR the left and right surround back speakers SBL SBR and the subwoofers SW 1 SW 2 It is not possible to produce sound simultaneously from the surround back speakers and the top middle speakers This surround system produces a more true to life sound from above Th...

Page 22: ...he OUT P button For details see Switching the speaker terminals on page 88 Playback of Dolby Atmos requires a connection with surround back speakers However when SP d A B ON or Speaker B is selected Dolby Atmos playback is not possible E 5 2 channel surround system Front Bi amping connection High quality surround Speaker System setting Front Bi Amp SR SL SW2 C Front Bi Amp SW1 L R Bi amping connec...

Page 23: ...The Top Middle speakers should be directed straight down rather than directed at a central listener position We recommend that the top middle speakers be installed slightly forward from right above Some tips for improving sound quality Where you put your speakers in the room has a big effect on the quality of the sound The following guidelines should help you to get the best sound from your system...

Page 24: ... bass sound to achieve more powerful sound reproduction In this case the same sound is output from the two subwoofers Banana plug connections If you want to use speaker cables terminated with banana plugs screw the speaker terminal fully shut then plug the banana plug into the end of the speaker terminal Installing your speaker system At the very least front left and right speakers only are necess...

Page 25: ...peaker System setting 7 2ch 5 2 2ch Speaker Setting Dolby Sp Front TOP MIDDLE SURROUND SURROUND BACK CENTER 5 2 2ch 5 2 ch SPEAKER B 5 2 2ch HDZONE BI AMP FRONT R L R L R L R L Single B SUBWOOFER PRE OUT 1 2 7 2 ch AUDIO OUT A TOP MIDDLE SURROUND SURROUND BACK CENTER 5 2 2ch 5 2ch SPEAKER B 5 2 2ch HDZONE BI AMP FRONT R L R L R L R L Single B SUBWOOFER PRE OUT 1 2 7 2ch AUDIO OUT A LINELEVEL INPUT...

Page 26: ...rformance Your speakers must be bi ampable to do this having separate termi nals for high and low and the sound improvement will depend on the kind of speakers you re using TOP MIDDLE SURROUND SURROUND BACK CENTER 5 2 2ch 5 2ch SPEAKER B 5 2 2ch HDZONE BI AMP FRONT R L R L R L R L Single B SUBWOOFER PRE OUT 1 2 7 2ch AUDIO OUT A TOP MIDDLE SURROUND SURROUND BACK CENTER 5 2 2ch 5 2ch SPEAKER B 5 2 ...

Page 27: ...devices must be connected through composite connections If several video components are assigned to the same input function see The Input Setup menu on page 59 the converter gives priority to HDMI component then composite in that order VIDEO IN VIDEO MONITOR OUT COMPONENT VIDEO IN Y PB PR HDMI IN HDMI OUT High picture quality Video signals can be output Terminal for connection with source device T...

Page 28: ...lus Dolby TrueHD and DTS HD Master Audio To take advantage of these formats however make sure that the component connected to this receiver also supports the corre sponding format Use a High Speed HDMI TM Cable If an HDMI cable other than a High Speed HDMI TM Cable is used it may not work properly When an HDMI cable with a built in equalizer is connected it may not operate properly Signal transfer...

Page 29: ...terminal The HDMI OUT 2 terminal outputs 4K 60p 4 4 4 24 bit video when MAIN HDZONE is set to MAIN When it is set to HDZONE the 4K 60p 4 4 4 24 bit video is not output Connecting your DVD player with no HDMI output This diagram shows connections of a TV with HDMI input and DVD player or other playback component with no HDMI output to the receiver 1 1 TV SAT CBL 1 1 DIGITAL IN MHL BD 6 1 6 4 3 2 1 ...

Page 30: ...to output video signals to both HDMI and other video output composite etc simultaneously and it may be necessary to make video output settings Please refer to the operating instructions supplied with your player for more information If you want to listen to the sound of the TV over the receiver connect the receiver and TV with audio cables page 28 When connecting to a DVD player with an optical di...

Page 31: ...AXIAL OPTICAL HDMI DVI compatible monitor STB If you use an optical digital audio cable or RCA analog audio cable you ll need to tell the receiver which digital input you connected the set top box to see The Input Setup menu on page 59 Connecting other audio components This receiver has both digital and analog inputs allowing you to connect audio components for playback When you set up the receive...

Page 32: ... terminal then release the tabs to secure the AM antenna wires 3 Fix the AM loop antenna to the attached stand To fix the stand to the antenna bend in the direction indicated by the arrow fig a then clip the loop onto the stand fig b If you plan to mount the AM antenna to a wall or other surface secure the stand with screws fig c before clipping the loop to the stand Make sure the reception is cle...

Page 33: ...d Upon ship ment from the factory the input terminals are assigned to DVD SAT CBL HDMI 3 HDMI 4 HDMI 5 and HDMI 6 in order starting from terminal HDMI IN 1 The video audio signals of the RCA analog input terminals the digital input terminals OPTICAL and COAXIAL and the COMPONENT VIDEO input terminals cannot be up converted and output to the HDZONE When any of the HDMI 3 to HDMI 6 MHL inputs is sel...

Page 34: ...net radio stations you must sign a contract with an ISP Internet Service Provider beforehand When connected in this way you can play audio files stored on the components on the local network including your computer 1 NETWORK NETWORK WAN 3 2 1 LAN Internet Modem Router LAN cable sold separately to LAN port to LAN port Computer NAS Connect the LAN terminal on this receiver to the LAN terminal on you...

Page 35: ...e device Switch the receiver into standby then connect your USB device to the USB terminal on the front panel of this receiver This receiver does not support a USB hub For instructions on playing the USB device see Playing a USB device on page 65 Connecting an MHL compatible device An MHL compatible mobile device can be connected to enjoy 3D Full HD videos high quality multi channel audio and phot...

Page 36: ...R IN jack of another component to the IR OUT jack on the rear of this receiver to link it to the IR receiver Please see the manual supplied with your IR receiver for the type of cable necessary for the connection Plugging in the receiver Only plug in after you have connected all your components to this receiver including the speakers CAUTION Handle the power cord by the plug part Do not pull out t...

Page 37: ...2 Connecting your TV and playback components 42 Connecting a satellite cable receiver or other set top box 44 Connecting other audio components 45 Connecting the subwoofer 46 Connecting AM FM antennas 46 Connecting to the network through LAN interface 47 Connecting an iPod 47 Connecting a USB device 47 Connecting an MHL compatible device 48 Plugging in the receiver 48 Connecting your equipment In ...

Page 38: ... OUT ANTENNA ASSIGNABLE Note The input functions below are assigned by default to the receiver s different input terminals Refer to The Input Setup menu on page 59 to change the assignments if other connections are used Input function Input Terminals HDMI Audio BD BD DVD IN 1 SAT CBL IN 2 HDMI 3 IN 3 HDMI 4 IN 4 HDMI 5 MHL IN 5 TV OPTICAL CD COAXIAL Determining the speakers application This unit p...

Page 39: ...the best sound from your system The subwoofer can be placed on the floor Ideally the other speakers should be at about ear level when you re listening to them Putting the speakers on the floor except the subwoofer or mounting them very high on a wall is not recommended For the best stereo effect place the front speakers 2 m to 3 m 6 ft to 9 ft apart at equal distance from the TV If you re going to...

Page 40: ...terminal and insert exposed wire 3 Tighten terminal 1 2 3 10 mm 3 8 in Notes Please refer to the manual that came with your speakers for details on how to connect the other end of the speaker cables to your speakers Use an RCA cable to connect the subwoofer It is not possible to connect using speaker cables If you have two subwoofers the second subwoofer can be connected to the SUBWOOFER 2 termina...

Page 41: ... be removed when you are bi amping the speakers or you could severely damage the amplifier See your speaker manual for more information If your speakers have a removable crossover network make sure you do not remove it for bi amping Doing so may damage your speakers Bi wiring your speakers Your speakers can also be bi wired if they support bi amping With these connections the Speaker System settin...

Page 42: ... signal transfers This receiver supports SACD Dolby Digital Plus Dolby TrueHD and DTS HD Master Audio To take advantage of these formats however make sure that the component connected to this receiver also supports the corre sponding format Use a High Speed HDMI TM Cable If an HDMI cable other than a High Speed HDMI TM Cable is used it may not work properly When an HDMI cable with a built in equal...

Page 43: ...tions on connections and setup for the TV If the TV to be connected using HDMI supports 4K 60p you can switch the 4K 60p signal output setting in accordance with TV performance When the 4K 60p setting is changed to 4 4 4 the video image may not be output normally unless the HDMI cable supports 4K 60p 4 4 4 24 bit 18 Gbps transmission In such a case select 4 2 0 page 89 You cannot input 4K 60p 4 4 ...

Page 44: ... analog video cable for video signal input Depending on the player it may not be possible to output video signals to both HDMI and other video output composite etc simultaneously and it may be necessary to make video output settings Please refer to the operating instructions supplied with your player for more information If you want to listen to the sound of the TV over the receiver connect the re...

Page 45: ...HDMI IN HDMI OUT DIGITAL OUT COAXIAL OPTICAL HDMI DVI compatible monitor STB When connecting to a satellite cable TV tuner with an optical digital audio cable or a coaxial digital audio cable performing input terminal settings are are necessary page 59 Connecting other audio components This receiver has both digital and analog inputs allowing you to connect audio components for playback When you s...

Page 46: ...nal then release the tabs to secure the AM antenna wires 3 Fix the AM loop antenna to the attached stand To fix the stand to the antenna bend in the direction indicated by the arrow fig a then clip the loop onto the stand fig b If you plan to mount the AM antenna to a wall or other surface secure the stand with screws fig c before clipping the loop to the stand Make sure the reception is clear 4 P...

Page 47: ...ending on your Internet environment When using a broadband Internet connection a contract with an Internet service provider is required For more details contact your nearest Internet service provider Connecting an iPod This receiver has a dedicated iPod terminal that will allow you to control playback of audio content from your iPod using the controls of this receiver 5V 1A iPod iPhone USB cable i...

Page 48: ...ompatible device see Playing an MHL compatible device on page 66 Do not place the MHL device on this unit which has the power turned on Plugging in the receiver Only plug in after you have connected all your components to this receiver including the speakers CAUTION Handle the power cord by the plug part Do not pull out the plug by tugging the cord and never touch the power cord when your hands ar...

Page 49: ...settings of this receiver 50 Setting with a special application Start up Navi 50 Perform settings using the AVNavigator built into this receiver 50 Setting by referring to the operating instructions 52 Basic Setup ...

Page 50: ...nteractive mode By simply following the screen prompts to connect and set the unit highly accurate initial settings can be performed easily Additionally in order to use various functions easily contents linked to the receiver can be used Operating Environment AVNavigator can be used in the following environments Windows PC Microsoft Windows Vista Windows 7 Windows 8 Windows 8 1 Mac OS X v 10 9 or ...

Page 51: ...hat on the Home screen tap AVNavigator or the icon iPad iPhone iPod touch When using an Android device from Google Play Store download iControlAV5 which is a free application After launching iControlAV5 follow the instructions on the screen After that on the Home screen tap the icon 3 Select and use the desired function AVNavigator includes the following functions Wiring Navi Guides you through co...

Page 52: ... wired LAN If you do not have a router Directly connecting your smart phone to this receiver Wireless Direct D G C B A H E F Connecting the router with this receiver with your iPhone iPod touch or iPad iOS version 7 1 or later The wireless LAN settings for iPhone iPod touch or iPad can be applied to this receiver Connecting the router with this receiver with your iPhone iPod touch or iPad iOS vers...

Page 53: ... the Network Connection menu 8 Select the DHCP setting you want When you select ON the network is automatically set up and you do not need to follow Steps 9 Proceed with Step 10 If there is no DHCP server on the network and you select ON this receiver will use its own Auto IP function to determine the IP address The IP address determined by the Auto IP function is 169 254 X X You cannot listen to ...

Page 54: ...n 5 Press HOME MENU 6 Select Network Bluetooth from the HOME MENU 7 Select Network Connection from the Network Bluetooth menu 8 Select Wireless from the Network Connection menu 9 Select Wireless Accessory Config WAC Wireless Accessory Configuration mode is a mode that allows you to set the network settings by operating this receiver as a Wi Fi access point 10 Select START then press ENTER The SSID...

Page 55: ...int to which the wireless LAN is to be connected with i j and press ENTER The PIN code will be shown 2 Check the PIN code of this receiver 3 Enter the PIN code in the access point Enter in the access point whose indicated PIN code is shown within two minutes after closing the PIN code confirmation screen Success or failure of connection will be indicated on the screen The PIN code input method var...

Page 56: ...displayed when WAC is active 10 Select OK then press ENTER 11 Select Pioneer Setup this receiver from the list of wireless LAN connections on your computer Pioneer Setup xxxxxxxx will be shown in the SSID field xxxxxxxx represents a number unique to each product For your computer iPhone tablet computer or wireless equipment refer to the respective user s manual Because this connection is not encry...

Page 57: ...ng you want to adjust If you are doing this for the first time you may want to adjust these settings in order Network Standby Even when the unit is in standby mode it is possible to turn on the power of the unit from iControlAV5 page 57 Friendly Name The name of the receiver displayed on a computer or other device connected to the network can be changed page 57 AirPlay Password Set the password to...

Page 58: ...DMI out put page 89 settings CAUTION The test tones used in the Full Auto MCACC Setup are output at high volume 1 Press u STANDBY ON to switch on the receiver and your TV Make sure that the TV s video input is set to this receiver 2 Connect the microphone to the MCACC SETUP MIC jack on the front panel Microphone Tripod Make sure there are no obstacles between the speakers and the microphone If you...

Page 59: ...3 to 10 minutes 9 The Full Auto MCACC Setup procedure is completed and the Home Menu menu reappears automatically Be sure to disconnect the microphone from this receiver upon completion of the Full Auto MCACC Setup The settings made in the Full Auto MCACC Setup should give you excellent surround sound from your system but it is also possible to adjust these settings manually using The MCACC PRO VS...

Page 60: ... selecting the input using ALL DVD and other inputs can be still be selected directly with the input function buttons 7 When you re finished press RETURN You will return to the System Setup menu Input function default and possible settings The terminals on the receiver generally correspond to the name of one of the input functions If you have con nected components to this receiver differently from...

Page 61: ...is played on any TV connected via HDMI cable VSX 1130 only You can change where the screen is output in the MAIN HDZONE page 110 and HDMI out put page 89 settings 1 Press u STANDBY ON to switch on the receiver and your TV Make sure that the TV s video input is set to this receiver for example if you connected this receiver to the VIDEO jacks on your TV make sure that the VIDEO input is now selecte...

Page 62: ...62 Playing a source 63 Playing an iPod 64 Playing a USB device 65 Playing an MHL compatible device 66 Listening to the radio 67 Music playback using Bluetooth wireless technology 68 Basic playback ...

Page 63: ...nnel playback is being performed prop erly For details see Auto Surround ALC and Stream Direct with different input signal formats on page 127 When multi channel speakers more than the two front left and right channels are connected straight decoding is performed so the input signal s format name for example TrueHD DTS HD MSTR or DTS HD HI RES is displayed If the display does not correspond to the...

Page 64: ...s iPod USB on the remote control to switch the receiver to the iPod USB When the display shows the names of folders and files you re ready to play music from the iPod Playing back audio files stored on an iPod To navigate songs on your iPod you can take advantage of the GUI screen of your TV connected to this receiver You can also control all operations for music in the front panel display of this...

Page 65: ...is 9 Note that non Roman characters in the playlist are displayed as 1 Use i j to select a folder then press ENTER to browse that folder To return to the previous level any time press RETURN 2 Continue browsing until you arrive at what you want to play then press d to start playback Copyrighted audio files cannot be played back on this receiver DRM protected audio files cannot be played back on th...

Page 66: ...z 88 2 kHz 96 kHz 176 4 kHz 192 kHz Quantization bitrate 16 bit 24 bit Channel 2 ch Category Extension Stream DSD e dff dsf DSDIFF DSF Sampling frequency 2 8224 MHz 5 6448 MHz f Quantization bitrate 1 bit Channel 2 ch a MPEG Layer 3 audio decoding technology licensed from Fraunhofer IIS and Thomson multimedia b 176 4 kHz and 192 kHz support 2 channel audio sources only c Files encoded using Window...

Page 67: ...sets If you often listen to a particular radio station it s convenient to have the receiver store the frequency for easy recall whenever you want to listen to that station This saves the effort of manually tuning in each time This receiver can memorize up to 63 stations stored in seven banks or classes A to G of 9 stations each 1 Tune to a station you want to memorize See Listening to the radio on...

Page 68: ...ng the unit with the Bluetooth capable device or when the pairing data on the device has been erased for any reason Pairing is a step required to allow communication using Bluetooth wireless technology to be carried out Pairing is performed the first time that you use the unit and the Bluetooth capable device together In order to allow communication using Bluetooth wireless technology to take plac...

Page 69: ...echnology enabled device or this unit including products supported by this unit If there is something obstructing the path between this unit including devices supported by this unit and the device equipped with Bluetooth wireless technology such as a metal door concrete wall or insulation con taining tinfoil you may need to change the location of your system to prevent signal noise and interruptio...

Page 70: ...es of playback using the listening modes 71 Selecting MCACC presets 73 Choosing the input signal 73 Better sound using Phase Control 73 Better sound using Phase Control and Full Band Phase Control 74 Listening to your system ...

Page 71: ... channel sound surround back or front wide especially suited to movie sources Neo 6 MUSIC Up to 7 1 channel sound surround back or front wide especially suited to music sources STEREO The audio is heard with your sound settings and you can still use the audio options With multichannel sources if you have connected surround back top middle front wide speakers you can select according to format EXT ...

Page 72: ...only with the BT AUDIO input PHONES SURR ECO MODE 1 and ECO MODE 2 can be selected Using Stream Direct Use the Stream Direct modes when you want to hear the truest possible reproduction of a source All unneces sary signal processing is bypassed and you re left with the pure analog or digital sound source Processing differs depending on the input signal and whether or not surround back speakers are...

Page 73: ...sound will be heard through your TV not from this receiver When set to DIGITAL HDMI or AUTO only selected DIGITAL or HDMI the indicators light according to the signal being decoded see Display on page 16 Better sound using Phase Control This receiver s Phase Control feature uses phase correction measures to make sure your sound source arrives at the listening position in phase preventing unwanted ...

Page 74: ...e characteristics between channels ensure better surround sound integration for multichannel setting Upon shipment from the factory the Phase Control function is in on status If you perform Full Auto MCACC page 58 or Full Band Phase Ctrl of Auto MCACC page 99 the Full Band Phase Control function is automatically turned on after measurement By turning Full Band Phase Control on the Phase Control fu...

Page 75: ...75 Introduction 76 Playback with Network functions 77 About network playback 79 About playable file formats 81 Playback with NETWORK features ...

Page 76: ...d PC with iTunes 10 2 2 or later To use AirPlay select your receiver on your iPod touch iPhone iPad or in iTunes 1 The receiver s input will switch automatically to AirPlay when AirPlay is in use 2 The following operations can be performed when in AirPlay mode Adjustment of the receiver s volume from iPod touch iPhone iPad or iTunes Pause resume next previous track and shuffle repeat from the remo...

Page 77: ... When o or p is pressed at the list screen the page switches To return to the playback screen from the list display press DISP 3 Repeat step 2 to play back the desired song For detailed operating instructions refer to the section shown below Internet radio stations See Listening to Internet radio stations on page 77 Pandora See Listening to Pandora Internet Radio on page 78 Spotify See About the S...

Page 78: ...this case they are registered on the receiver as favorite broadcast stations and can be played Listening to Pandora Internet Radio Pandora is personalized internet radio that is designed to help you discover new music you ll love mixed in with music you already know For details check the website http www pandora com You must have a registered account in order to listen to songs using Pandora Inter...

Page 79: ...r selected press Fav Favorite The selected song or Internet radio station is then registered in the Favorite Note To delete tracks or Internet radio stations that have been registered set the input to FAVORITES select the track or station to be deleted then press the CLR button About network playback The network playback function of this unit uses the following technologies Windows Media Player Se...

Page 80: ...ver a network Playback may stall when the PC is switched off or any media files stored on it are deleted while playing content If there are problems within the network environment heavy network traffic etc content may not be displayed or played properly playback may be interrupted or stalled For best performance a 100BASE TX connection between player and PC is recommended If several clients are pl...

Page 81: ...z 44 1 kHz 48 kHz Quantization bitrate 16 bit Channel 2 ch Bitrate 5 kbps to 320 kbps VBR CBR Supported Supported AAC m4a aac 3gp 3g2 MPEG 4 AAC LC MPEG 4 HE AAC Sampling frequency 32 kHz 44 1 kHz 48 kHz Quantization bitrate 16 bit Channel 2 ch Bitrate 16 kbps to 320 kbps VBR CBR Supported Supported Apple Lossless m4a mp4 Apple Lossless Sampling frequency 32 kHz 44 1 kHz 48 kHz 88 2 kHz 96 kHz 176...

Page 82: ...MI function 83 Making Control with HDMI connections 83 HDMI Setup 83 Before using synchronization 84 About synchronized operations 84 Sound Retriever Link 84 Cautions on the Control with HDMI function 84 Control with HDMI function ...

Page 83: ...ut not with a TV connected to the HDMI OUT 2 terminal HDMI Setup You must adjust the settings of this receiver as well as the connected Control with HDMI compatible compo nents in order to make use of the Control with HDMI function For more information see the operating instruc tions for each component 1 Press MAIN RECEIVER to switch the remote control to the receiver operation mode and then press...

Page 84: ... s input is switched to a component other than one connected by HDMI The operations below can also be used on Pioneer Control with HDMI compatible TVs When the receiver s volume is adjusted or the sound is muted the volume status is displayed on the TV s screen When the OSD language is switched on the TV the receiver s language setting also switches accordingly Sound Retriever Link These are autom...

Page 85: ...RAMETER 88 HDMI 4K 60p signal output setting 89 Changing the channel level while listening 89 Using the MULTI ZONE controls 89 Network settings from a web browser 90 Using the sleep timer 90 Dimming the display 90 Checking your system settings 90 Resetting the system 91 Using other functions ...

Page 86: ... does Option s BASS b Adjusts the amount of bass c 6 to 6 dB d Default 0 dB TREBLE b Adjusts the amount of treble c 6 to 6 dB d Default 0 dB S RTRV Auto Sound Retriever c With the Auto Sound Retriever function DSP processing is used to compensate for the loss of audio data upon compression improving the sound s sense of density and modulation Also when a player supporting the Sound Retriever Link ...

Page 87: ...hannel base LEGACY to decode when playing back Dolby Atmos content OBJECT LEGACY a VSX 1130 only b The adjustment can be made only when TONE is set to ON c The default value changes depending on the type of input page 91 When ON is selected the Sound Retriever effect is optimized based on the bitrate information of the contents input to the USB memory audio and INTERNET RADIO PANDORA Spotify MEDIA...

Page 88: ...utput of speaker terminals or HDMI terminals to be played Switching the speaker terminals In case of VSX 1130 If you selected 7 2ch 5 2 2ch 7 2ch SB FW or Speaker B at Speaker system setting on page 106 you can switch between speakers using the OUT P button If you selected Front Bi Amp or HDZONE the button will simply switch your main speaker terminals on or off 1 Press OUT P You can perform the s...

Page 89: ...RN 6 Press u STANDBY ON to switch on the receiver and your TV Make sure that the TV s video input is set to this receiver Changing the channel level while listening Using the channel level settings you can adjust the overall balance of your speaker system an important factor when setting up a home theater system 1 Press CH LV 2 Use i j to select the channel you wish to adjust 3 Adjust the volume u...

Page 90: ...ttp the receiver s IP address from a web browser You can display the IP address of the unit on the unit s display by pressing the STATUS button on the remote control When connected with the receiver the AVNavigator menu screen appears in the browser 4 On the AVNavigator menu screen select Network Setup 5 Select the item you want to set Using the sleep timer The sleep timer switches the receiver in...

Page 91: ...ON SIDE Crossover 80Hz X Curve OFF DIMMER Brightest Inputs See Input function default and possible settings on page 60 Input Volume Absorber All Inputs 0dB HDMI HDMI Audio AMP Control OFF Control Mode OFF ARC Audio Return Channel OFF Standby Through OFF 4K 60pBD 4 2 0 4K 60pH1 HDMI IN 1 4 2 0 Setting Default 4K 60pH2 HDMI IN 2 4 2 0 DSP Power On Level LAST Volume Limit OFF Mute Level FULL Phase Co...

Page 92: ...ing signals from other remote controls 94 Erasing one of the remote control button settings 94 Erasing all learnt settings that are in one input function 94 Using All Zone Standby 95 Setting the switching time for the receiver operation mode 95 Resetting the remote control settings 95 Controlling components 96 Controlling the rest of your system VSX 1130 only ...

Page 93: ...ol Mode Setup on page 110 1 Press and hold RCU SETUP then press 4 for three seconds Release the button after the LED flashes once The LED continues to flash To cancel the preset setup mode press RCU SETUP 2 Press the number button for the receiver Receiver 1 to Receiver 4 you wish to operate For example to operate Receiver 2 press 2 If the LED lights for one second the setting has been successfull...

Page 94: ...to free up more memory note that some signals may take more memory than others Note that interference from TVs or other devices will sometimes result in the remote control learning the wrong signal Some commands from other remote controls cannot be learned but in most cases the remotes just need to be moved closer together or farther apart 5 To program additional signals for the current component ...

Page 95: ...ration mode to operate this unit You can set to automatically switch to AV amplifier operation mode when a certain period of time elapses after remote operation of each input function is finished See Setting the switching time for the receiver operation mode on page 95 1 Press and hold RCU SETUP then press 5 for three seconds The LED flashes once 2 Press the number buttons of the time you wish to ...

Page 96: ... OFF POWER ON OFF POWER ON OFF POWER ON OFF POWER ON OFF Number buttons numerics numerics numerics numerics numerics numerics CLR dot KURO LINK CLEAR ENTER CLASS CH ENTER CH ENTER ENTER ENTER ENTER EXIT INFO EXIT TOP MENU TOP MENU LIST TOOLS GUIDE EPG USER MENU TOOLS a GUIDE GUIDE i j k l i j k l i j k l i j k l i j k l i j k l ENTER ENTER ENTER ENTER ENTER ENTER HOME MENU HOME MENU HOME MENU HOME...

Page 97: ... k l i j k l e g m n ENTER ENTER SACD SETUP b RETURN d d d d d e e e e e g g g g g m m m m m n n n n n o o o o o p p p p p AUDIO AUDIO PURE AUDIO b DISP DISPLAY INFO TIME b a Controls for MD b Controls for SACD TV Projector Button s TV Projector u SOURCE POWER ON 1 MOVIE 2 STANDARD 3 DYNAMIC 4 USER1 5 USER2 6 USER3 7 COLOR 8 SHARP 9 GAMMA 0 COLOR CLR SHARP ENTER CLASS COLOR TEMP EXIT INFO i j k l ...

Page 98: ...iver settings from the MCACC PRO VSX 1130 Advanced MCACC VSX 830 menu 99 Automatic MCACC Expert 99 Manual MCACC setup 101 Checking MCACC Data 103 Data Management 104 The MCACC PRO VSX 1130 Advanced MCACC VSX 830 menu ...

Page 99: ... VSX 830 menu then press ENTER If the Advanced MCACC screen is not displayed refer to Making receiver settings from the MCACC PRO VSX 1130 Advanced MCACC VSX 830 menu on page 99 2 Select the parameters you want to set Use i j to select the item then use k l to set Auto MCACC The default is ALL recommended but you can limit the system calibration to only one set ting to save time if you want When d...

Page 100: ...peakers that affect the phase dipole speakers reflective speakers etc Reverse Phase may be displayed even if the speakers are properly connected If Reverse Phase is displayed the speaker s wiring and may be inverted Check the speaker connections If the connections were wrong turn off the power disconnect the power cord then reconnect properly After this perform the Auto MCACC procedure again If th...

Page 101: ... you may want to keep the level around 0 0dB so that you ll have plenty of room to adjust the other speaker levels After pressing ENTER test tones will be output 3 Select each channel in turn and adjust the levels 12 0 dB as necessary Use k l to adjust the volume of the speaker you selected to match the reference speaker When it sounds like both tones are the same volume press j to confirm and con...

Page 102: ...ed press RETURN You will return to the Manual MCACC setup menu Notes Changing the frequency curve of one channel too drastically will affect the overall balance If the speaker bal ance seems uneven you can raise or lower channel levels using test tones with the TRIM feature Use k l to select TRIM then use i j to raise or lower the channel level for the current speaker Speaker Setting channels set ...

Page 103: ...ing from the following time periods in milliseconds 0 20ms 10 30ms 20 40ms 30 50ms 40 60ms 50 70ms and 60 80ms This setting will be applied to all channels during calibration When you re finished select START It will take about 2 to 4 minutes for the calibration to finish After the Acoustic Calibration Equalization is set you are given the option to check the settings on screen Checking MCACC Data...

Page 104: ...ing optimum sound tuning Full Auto MCACC on page 58 or Automatic MCACC Expert on page 99 either of which you should have already completed 1 Select Data Management from the MCACC PRO VSX 1130 Advanced MCACC VSX 830 menu then press ENTER 2 Select the setting you want to adjust Memory Rename Name your MCACC presets for easy identification see Renaming MCACC presets on page 104 MCACC Memory Copy Copy...

Page 105: ...tem Setup menu 106 Manual speaker setup 106 MHL Setup 108 The Other Setup menu 109 Making network settings using Safari 111 Using Safari to set a friendly name 111 Using Safari to update the firmware 111 The System Setup and Other Setup menus ...

Page 106: ...at this screen 2 Select the setting you want to adjust If you are doing this for the first time you may want to adjust these settings in order Speaker System Specifies how you are using your surround back speaker terminals and B speaker termi nals page 106 Speaker Setting Specifies the size and number of speakers you ve connected page 107 Channel Level Adjusts the overall balance of your speaker s...

Page 107: ...ly or select SMALL to send bass frequencies to the other speakers or subwoofer If you didn t connect front wide speakers choose NO the front wide channel is sent to the front speakers You can adjust this setting only when Speaker System setting is 7 2ch SB FW If the surround speakers are set to NO this setting will automatically be set to NO Surr Select LARGE if your surround speakers reproduce ba...

Page 108: ...peaker Distance For good sound depth and separation from your system you need to specify the distance of your speakers from the listening position When Dolby Enabled Speaker is used specify the distance reached by the speaker sound reflected at the ceiling page 25 The receiver can then add the proper delay needed for effective surround sound 1 Select Speaker Distance from the Manual SP Setup menu ...

Page 109: ...en the power was last turned off When the power is turned on the volume is set to minimum level 80 0dB to 12 0dB Specify the volume to be set when the power is turned on in steps of 0 5 dB It is not possible to set a volume level greater than the value specified at Volume Limit setup see below 3 Select the Volume Limit setting you want Use this function to limit the maximum volume The volume canno...

Page 110: ...ely Default ON both the main zone and HDZONE 1 Select On Screen Display Setup from the Other Setup menu 2 Select and set the main zone or HDZONE VSX 1130 only for which you wish to change the setting 3 Select the On Screen Display setting you want 4 When you re finished press RETURN You will return to the Other Setup menu Notes The on screen display is only displayed for video output from the HDMI...

Page 111: ... name 1 Launch Safari on your computer 2 Press Bookmark icon Click Bonjour list a and then select this receiver s name Friendly Name b in Bookmark If Bonjour list is not displayed access the IP address http the receiver s IP address from Safari 3 On the AVNavigator menu screen select Network Setup 4 Click Friendly Name 5 Input a friendly name then press Apply Note This setting for the network has ...

Page 112: ...n screen is displayed If you continue the firmware update press OK Once the firmware update process starts you cannot stop it Wait until the file is uploaded about one minute may be required depending on your LAN connection environment a b 7 The firmware upload status screen is displayed The upload process finished successfully will be shown when the update is completed Once updating is completed ...

Page 113: ...14 Other audio problems 115 BT AUDIO 116 Video 116 Settings 116 Professional Calibration EQ graphical output 117 Display 117 Remote control 117 HDMI 118 MHL 119 Built in AVNavigator 119 USB interface 119 iPod 120 Network 120 Wireless LAN 122 FAQ ...

Page 114: ...hile holding down ENTER on the front panel press u STANDBY ON to set this receiver to the standby mode Use TUNE i j to select D SAFETY cOFFd and then use PRESET k l to select 1 or 2 select D SAFETY cOFFd to deactivate this feature If the power switches off even with 2 switched on turn down the volume With 1 or 2 on some features may be unavailable If there is very little low frequency information ...

Page 115: ...ent Other audio problems Symptom Remedy Broadcast stations cannot be selected automatically or there is considerable noise in radio broad casts Fully extend the FM wire antenna adjust the position for best reception and secure to a wall etc Use an outdoor antenna for better reception see pages 32 46 Adjust the position and direction of the AM antenna Noise may be caused by interference from other ...

Page 116: ...mptom Remedy The Auto MCACC Setup continually shows an error The ambient noise level may be too high Keep the noise level in the room as low as pos sible see also Problems when using the Auto MCACC Setup on page 59 If the noise level cannot be kept low enough you will have to set up the surround sound manually page 106 When using only one surround back speaker connect it to the SURROUND BACK L Sin...

Page 117: ...nd making settings When the input is a 3D signal OSD cannot be displayed Even through the input is switched DIGITAL does not light Check the digital connections and make sure that the digital inputs are assigned cor rectly see The Input Setup menu on page 59 When playing Dolby Digital or DTS sources the receiver s format indica tors do not light Check that the player isn t set up so that Dolby Dig...

Page 118: ...tact the manufacturer for support Symptom Remedy Synchronized operation not possible using Control with HDMI function Check the HDMI connections The cable may be damaged Select ON for the Control Mode with HDMI setting see HDMI Setup on page 83 Turn the TV s power on before turning on this receiver s power Set the TV side Control with HDMI setting to on see TV s operating instructions VSX 1130 onl...

Page 119: ...and enter it correctly in the browser page 57 Receiver settings cannot be made from a browser JavaScript is disabled on the inter net browser Enable JavaScript The browser is not compatible with JavaScript Use an internet browser that is compatible with JavaScript USB interface Symptom Cause Remedy The folders files stored on a USB memory device are not displayed The folders files are currently st...

Page 120: ...ss is not properly set Switch on the built in DHCP server function of your router or set up the network manually according to your network environment page 52 The IP address is being automati cally configured The automatic configuration process takes time Please wait Symptom Cause Remedy The audio files stored on components on the net work such as a PC cannot be played back Windows Media Player 11...

Page 121: ...ponents on the network and consult with your network service provider if necessary page 52 The broadcasts from an Internet radio station are stopped or inter rupted There are cases where you cannot listen to some Internet radio stations even when they are listed in the list of Inter net radio stations on this receiver page 77 Symptom Cause Remedy This unit cannot be selected from the Spotify appli...

Page 122: ...e set The IP address settings of this receiver do not match the settings of the wireless LAN router and the like Check the IP address settings including DHCP settings of this receiver If the receiver s DHCP setting is ON turn the receiver s power off then turn the power back on Check that the IP address for this receiver matches the settings of the wireless LAN router If the receiver s DHCP settin...

Page 123: ...ce 125 Surround sound formats 126 Auto Surround ALC and Stream Direct with different input signal formats 127 Speaker Setting Guide 128 About messages displayed when using network functions 129 Important information regarding the HDMI connection 129 Cleaning the unit 129 Glossary 130 Features index 132 Specifications 133 Preset code list 134 Additional information ...

Page 124: ...Connect logo are trademarks of HTC Corporation About iPod AirPlay works with iPhone iPad and iPod touch with iOS 4 3 3 or later Mac with OS X Mountain Lion or later and PC with iTunes 10 2 2 or later USB works with iPhone 6 Plus iPhone 6 iPhone 5s iPhone 5c iPhone 5 iPhone 4s iPhone 4 iPhone 3GS iPod touch 4th through 5th generation and iPod nano 4th through 7th generation Made for iPod and Made f...

Page 125: ...e this list of conditions and the following disclaimer Redistributions in binary form must reproduce the above copyright notice this list of conditions and the follow ing disclaimer in the documentation and or other materials provided with the distribution Neither the name of the Xiph org Foundation nor the names of its contributors may be used to endorse or promote products derived from this soft...

Page 126: ...UTE GOODS OR SERVICES LOSS OF USE DATA OR PROFITS OR BUSINESS INTERRUPTION HOWEVER CAUSED AND ON ANY THEORY OF LIABILITY WHETHER IN CONTRACT STRICT LIABILITY OR TORT INCLUDING NEGLIGENCE OR OTHERWISE ARISING IN ANY WAY OUT OF THE USE OF THIS SOFTWARE EVEN IF ADVISED OF THE POSSIBILITY OF SUCH DAMAGE Surround sound formats Below is a brief description of the main surround sound formats you ll find ...

Page 127: ...ve Multichannel signal formats In case of VSX 1130 Input signal format Auto Surround PURE DIRECT DIRECT ALC Rendering Mode OBJECT Rendering Mode LEGACY Surround Back speaker s Connected Dolby Surround EX Dolby Surround Dolby Digital Dolby Digital Plus Dolby Surround Dolby Digital Plus Dolby Digital Plus Dolby TrueHD Dolby Surround Dolby TrueHD Dolby TrueHD DTS HD Master Audio ES 6 1 channel flagge...

Page 128: ...inted towards the listening position the sound field will seem cramped Testing by the Pioneer Multi channel Research Group has shown that a good sense of sound positioning can be achieved by pointing all the speakers towards an area 30 cm 12 inches to 80 cm 31 inches behind the listening position between the surround speakers and the listening position However the sense of sound positioning can di...

Page 129: ...tibility information If you aren t receiving HDMI signals properly through this receiver from your component please try one of the following configurations when connecting up Configuration A Use component video cables to connect the video output of your HDMI equipped component to the receiver s component video input The receiver can then convert the analog component video signal to a digital HDMI ...

Page 130: ...games DTS HD Master Audio DTS HD Master Audio is a technology that delivers master audio sources recorded in a professional studio to listeners without any loss of data preserving audio quality DTS HD High Resolution Audio A high definition audio technology by which signals can be transferred over HDMI cables DTS ES DTS ES the ES stands for Extended Surround is a decoder that is capable of decodin...

Page 131: ... in the U S and or other countries Use an application licensed by Microsoft Corporation to author distribute or play Windows Media formatted content Using an application unauthorized by Microsoft Corporation is subject to malfunction Windows Media Player 11 Windows Media Player 12 Windows Media Player is software to deliver music photos and movies from a Microsoft Windows computer to home stereo s...

Page 132: ...ack using the listening modes on page 71 Dialog Enhancement See Setting the Audio options on page 86 Internet radio See Listening to Internet radio stations on page 77 vTuner See Listening to Internet radio stations on page 77 DLNA See About network playback on page 79 AirPlay See Using AirPlay on iPod touch iPhone iPad and iTunes on page 76 Wireless LAN See Connecting to the network through LAN i...

Page 133: ... iPod terminal USB Integrated Control Section VSX 1130 only Control IR terminal ø 3 5 Mini jack MONO IR signal High Active High Level 2 0 V Network Section Wired LAN terminal 10 BASE T 100 BASE TX Network Section Wireless WLAN standards IEEE 802 11a IEEE 802 11b IEEE 802 11g IEEE 802 11n Frequency band 2 4 GHz band 2 412 GHz to 2 462 GHz Channel 1 to Channel 11 5 GHz band 5 180 GHz to 5 240 GHz 5 ...

Page 134: ...Focus 0074 Initial 0091 Insignia 0085 0086 Inteq 0099 Janeil 0012 JBL 0101 JC Penney 0000 0004 0005 0006 0010 JCB 0002 Jensen 0004 0006 JVC 0007 0010 0044 Kawasho 0002 0004 0006 KEC 0104 Kenwood 0004 0006 0100 KLH 0106 Kloss Novabeam 0008 0012 KTV 0008 0100 0104 0110 LG 0005 0052 0078 0097 Logik 0001 Luxman 0004 0006 LXI 0000 0006 0101 0102 Magnavox 0004 0006 0019 0020 0037 0042 0100 0101 Majestic...

Page 135: ...019 Sanyo 1001 1002 Sears 1001 1003 1004 Sharp 1012 Shogun 1002 Singer 1004 Sonic Blue 1026 Sony 1006 1009 1017 1021 Stack 1017 STS 1004 Sylvania 1004 1005 Symphonic 1005 Systemax 1017 Tagar Systems 1017 Tandy 1001 Tashiko 1003 Teac 1005 Technics 1004 Teknika 1003 1004 1005 Tivo 1016 1020 1021 1022 1025 TMK 1002 Toshiba 1015 1017 1028 Totevision 1002 1003 Touch 1017 UltimateTV 1031 Unitech 1002 Ve...

Page 136: ...02 6003 DirecTV 6070 6110 6062 6113 6060 6059 6114 6115 6116 Dish Network System 6002 6089 Dishpro 6002 6089 Echostar 6002 6089 6003 Expressvu 6002 Hughes Network Systems 6113 6114 6115 6116 JVC 6003 Motorola 6032 Philips 6113 6114 Proscan 6110 Samsung 6114 Sonicview 6055 6107 Sony 6062 Star Choice 6032 Tivo 6113 6114 6115 6116 Cable Set Top Box Pioneer 0297 6028 6029 6095 6099 6325 6328 6329 ABC ...

Page 137: ..._EnFr PIONEER HOME ELECTRONICS CORPORATION 1 1 Shin ogura Saiwai ku Kawasaki shi Kanagawa 212 0031 Japan PIONEER ELECTRONICS USA INC P O BOX 1540 Long Beach California 90801 1540 U S A TEL 800 421 1404 PIONEER ELECTRONICS OF CANADA INC 340 Ferrier Street Unit 2 Markham Ontario L3R 2Z5 Canada TEL 1 877 283 5901 905 479 4411 PIONEER EUROPE NV Haven 1087 Keetberglaan 1 B 9120 Melsele Belgium TEL 03 5...

Page 138: ...Quick Start Guide Guide rapide Guía de inicio rápido Register your product at http www pioneerelectronics com US http www pioneerelectronics ca Canada AV Receiver Récepteur AV Receptor AV VSX 1130 K ...

Page 139: ... used batteries please comply with governmental regulations or environmental public institution s rules that apply in your country area What s in the box Thank you for buying this Pioneer product This Quick Start Guide includes instructions for basic connections and operations to allow simple use of the receiver For detailed descriptions of the receiver see the Operating Instructions provided on t...

Page 140: ...ettings Use a smartphone tablet Network connection is required Follow the guidance of the built in AVNavigator to perform connection and initial settings Use a Mac PC Network connection is required Follow the instructions in the booklet to perform connection and initial settings LAN LAN If you have an iPhone or iPad Please search for Start up Navi app in the App Store If you have an Android device...

Page 141: ...Wi Fi refer to the Setting network connection in the CD ROM s operating instructions Plugging in the receiver After connecting to a LAN connect the power cord of the receiver to a power outlet Plug the AC power cord into a convenient AC power outlet Turning the power on Press 1STANDBY ON to switch on the receiver and your computer Wait a few minutes after turning the power on before performing the...

Page 142: ...ter are properly connected 3 Enter number in 2 above in the field in Internet Explorer shown below and then press the ENTER key Example Input Format 192 168 0 124 With a Windows PC you can use the following method to launch AVNavigator Launch Explorer and then right click VSX 1130 displayed in the Network folder then click View device webpage About using Wiring Navi Wiring Navi starts when Wiring ...

Page 143: ... For details see Connecting your equipment of the operating instructions To play Dolby Atmos you need to connect the speaker of either the Top middle Surround back or Front wide The sound is produced from one of the Top middle and Surround back speakers depending on the listening mode etc The Dolby Enabled Speaker can be used in place of the Top middle speaker Refer to the operating instructions f...

Page 144: ...A TOP MIDDLE SURROUND SURROUND BACK CENTER FRONT R L R L R L R L Single B SUBWOOFER PRE OUT 1 2 AUDIO OUT 5 2 2ch 5 2ch SPEAKER B 5 2 2ch HDZONE BI AMP 7 2ch LINELEVEL INPUT Subwoofer SW Front Right R Surround Right SR Surround Left SL Front Left L Center C Surround back Right SBR Surround back Left SBL CAUTION These speaker terminals carry HAZARDOUS LIVE voltage To prevent the risk of electric sh...

Page 145: ...or the TV Connecting antennas FMUNBAL 75 AM LOOP ANTENNA 2 1 Plugging in the receiver Only plug in after you have connected all your components to this receiver including the speakers CAUTION Handle the power cord by the plug Do not pull out the plug by tugging the cord and never touch the power cord when your hands are wet as this could cause a short circuit or electric shock Do not place the uni...

Page 146: ...MCACC screen appears on your TV Speaker System 7 2ch 5 2 2ch Exit 2a Full Auto MCACC Return START EQ Type SYMMETRY SP to ceiling MCACC M1 MEMORY 1 Dolby Enabled Speaker NO Measurement Type Expert 2 Press MAIN RECEIVER on the remote control then press the ENTER button Automatic measuring will start Measuring will take about 3 to 12 minutes 3 Follow the instructions on screen Automatic setting is co...

Page 147: ... 4 Start the playback component s playback E g Start playback of the Blu ray Disc player 5 Use VOLUME to adjust the volume level When no sound is emitted increase the volume to approximately 30 dB Note When the sound is not produced from the center speaker rear speaker and subwoofer refer to Frequently asked questions in the booklet When the remote control does not work refer to the Frequently ask...

Page 148: ...eset turn off the power and press down the STANDBY ON button on the front panel for 5 seconds or more The power turns off in 5 seconds after the power is turned on The receiver s setting will be maintained Also try replugging the power cord of the connecting devices To produce sound from TV Refer to page 8 of the booklet to perform connection and setting To play press the TV button to switch to TV...

Page 149: ...onics com In Canada Aux Canada http www pioneerelectronics ca S018_B1_EnFr PIONEER HOME ELECTRONICS CORPORATION 1 1 Shin ogura Saiwai ku Kawasaki shi Kanagawa 212 0031 Japan PIONEER ELECTRONICS USA INC P O BOX 1540 Long Beach California 90801 1540 U S A TEL 800 421 1404 PIONEER ELECTRONICS OF CANADA INC 340 Ferrier Street Unit 2 Markham Ontario L3R 2Z5 Canada TEL 1 877 283 5901 905 479 4411 PIONEE...

Page 150: ...RPH 1HWZRUN HDWXUHV SSOH LU3OD HUWLÀHG 1 HUWLÀHG 7 RQQHFW HUWLÀHG LQGRZV RPSDWLEOH 0XVLF LOH 3OD EDFN 6HHN YLD 1HWZRUN 86 SSOH RVVOHVV 9 03 0 6 N LW XGLR SOD EDFN SSOH RVVOHVV 9 Multi Channel 5 1ch 5 0ch Audio Playback WAV 2 FLAC 3 DSOHVV 3OD EDFN IRU SSOH RVVOHVV 9 03 3DQGRUD QWHUQHW 5DGLR 6SRWLI LJLWDO 0XVLF 6WUHDPLQJ 6HUYLFH 5HDG QWHUQHW 5DGLR ZLWK Y7XQHU RQYHQLHQFH HDWXUHV L3RG LJLWDO 7UDQVPLV...

Page 151: ...R LV D FHUWLÀFD WLRQ PDUN RI WKH L L OOLDQFH 7KH OXHWRRWK ZRUG PDUN DQG ORJRV DUH UHJLVWHUHG WUDGHPDUNV RZQHG E OXHWRRWK 6 QF DQG DQ XVH RI VXFK PDUNV E 3 21 5 25325 7 21 LV XQGHU OLFHQVH 1 WKH 1 RJR DQG 1 HUWLÀHG DUH WUDGHPDUNV VHUYLFH PDUNV RU FHUWLÀFDWLRQ PDUNV RI WKH LJLWDO LYLQJ 1HWZRUN OOLDQFH 7 WKH 7 ORJR DQG 7 RQQHFW DUH UHJLVWHUHG WUDGHPDUNV RI 7 RUSRUDWLRQ Y RORUµ LV D WUDGHPDUN RI 6RQ R...

Page 152: ......

Page 153: ...des MCACC Setup Mikrofons im Hauptd isplay des Gerats Please wait angezeigt wird trennen Sie das MCACC Setup Mikrofon warten Sie ca eine Minute und versuchen Sie dann erneut das Mikrofon anzuschlier3en Bluetooth Wenn Sie zur PIN Code Eingabe aufgefordert werden geben Sie 0000 ein Dieses Gerat erlaubt keine andere PIN Code Einstellung als 0000 Italiano Prestare attenzione a quando si collega il mic...

Page 154: ...posed speaker wire strands do not touch the exposed wire from any other speaker cord OK G 10mm 3 8 in 118E Make sure that exposed speaker wire does not extend outside the speaker terminal and touch any other wire Make sure that exposed speaker wire does not touch the rear panel screws etc CD Remove about 10 mm 3 8 in of the plastic insulation and twist together the exposed speaker wire l Unscrew t...

Page 155: ...ezar a utilizarlo Por favor consulte el manual de instrucciones acerca de c6mo actualizarlo Gentile cliente Ia ringraziamo per aver acquistato questa prodotto Pioneer Per poter utilizzare il prodotto al meglio delle sue funzionalita le raccomandiamo effettuare l aggiornamento all ultima versione di software disponibile prima di iniziare ad utilizzarlo Sui manuale d uso potra trovare le indicazioni...

Page 156: ...r une copie une diffusion une transmission publique une traduction une vente un pret ou toute autre action non autorisee qui sort des limites de utilisation personnelle ou d une citation comme defini par les lois sur les droits d auteur peut etre soumise ades actions penales L autorisation d uti liser ce CD ROM est donnee sous licence de PIONEER HOME ELECTRONICS CORPORATION Avis de non responsabil...

Page 157: ...by the manufacturer or sold with the apparatus When a cart is used use caution when moving the carVapparatus combination to avoid injury from tip over 13 Unplug this apparatus during lightning storms or when unused for long periods of time 14 Refer all servicing to qualified service personnel Servicing is required when the apparatus has been damaged in any way such as power supply cord or plug is ...

Page 158: ...rt normal pourrait au contraire etre excessif et contribuer a endommager votre ou ie de laGon permanente Le reglage de votre materiel aun volume securitaire AVANT que votre ou ie s adapte vous permettra de mieux vous proteger CHOISISSEZ UN VOLUME SECURITAIRE Reglez d abord le volume aun niveau inferieur Montez progressivement le volume jusqu a un niveau d ecoute confortable le son doit etre clair ...

Page 159: ...El interruptor de Ia alimentaci6n JSTANDBY ON de este aparato no coria por completo toda Ia alimentaci6n de Ia toma de corriente de CA Puesto que el cable de alimentaci6n hace las funciones de dispositivo de desconexi6n de Ia corriente para el aparato para desconectar toda Ia alimentaci6n del aparato debera desenchufar el cable de Ia toma de corriente de CA Por lo tanto asegurese de instalar el ap...

Page 160: ...USA au de POC sans que vous deviez payer pour les pieces ou les travaux de reparation Les pieces induses en vertu de Ia presente garantie peuvent Ire neuves ou remises aneuf au cholx de PUSA ou de POC LAPR SENTE GARANTIELIIMTt ES APPUQUEAUPROPRifTAIRE INITlALAINSIQU A TOUTPROPRIETAIRESUBS QUENTDU PRESENTPRODUITPIONEERPENDANTLAPERIOOEDEGARANTIE ACONDITIONQUE LE PROOUITAIT TEACHETECHEZUN OISTRIBUTEU...

Reviews: