XC-Z9
39
5
6
7
8
5
6
7
8
C
D
F
A
B
E
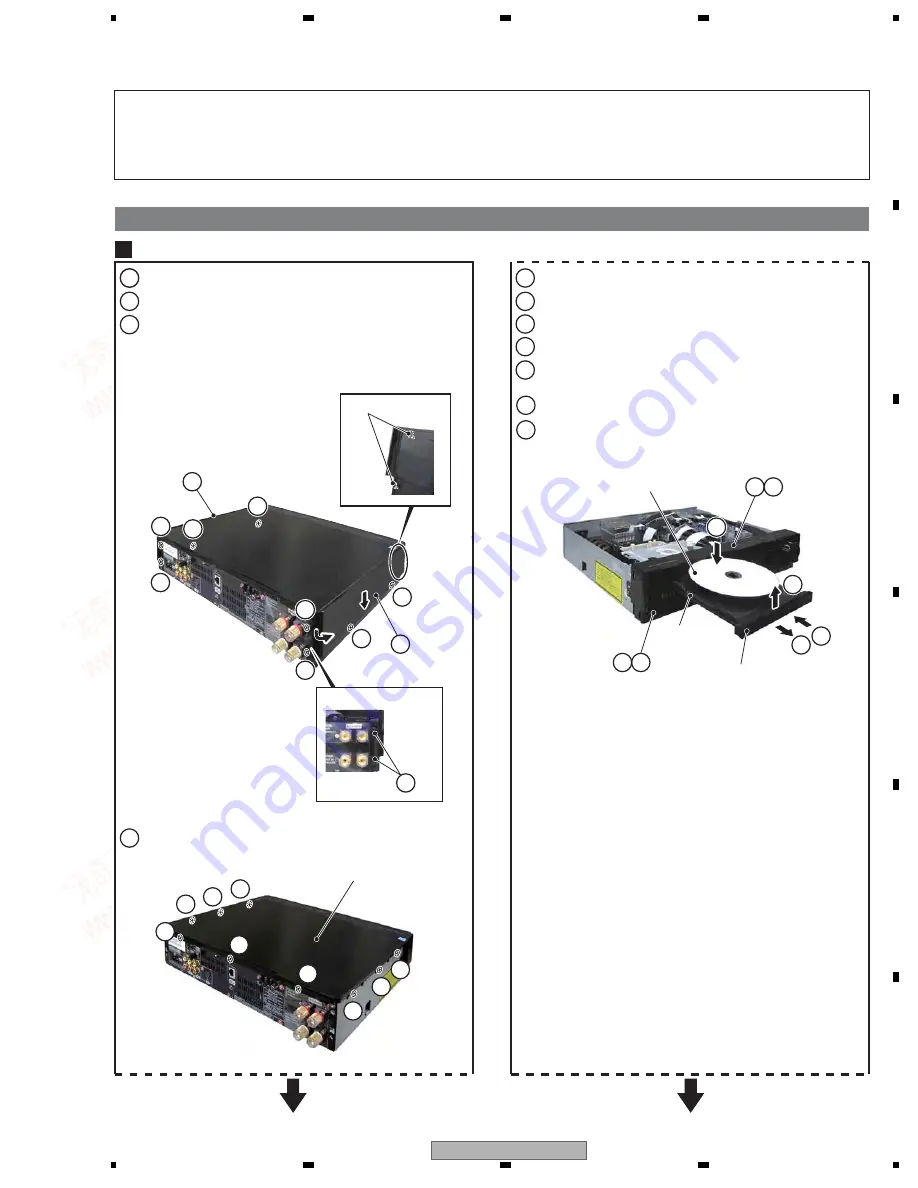
7. DISASSEMBLY
1
7
8
9
10
11
Remove the cushion seal.
Side Panel, Top Panel Assy, Tray Panel
1
6
9
8
7
Tray Panel
Test disc
Tray
2
Top Panel Assy
5
6
Turn on the power by pressing the STANDBY/ON (
) button.
Press the OPEN/CLOSE (
) button to open the tray.
Remove the Tray Panel.
Insert the test disc.
Press the OPEN/CLOSE (
) button to close the tray.
(Test disk is clamped.)
Turn off the power by pressing the STANDBY/ON (
) button.
Unplug the power cord.
1
2
Remove the 8 screws.
Slide the left and right side panels down and to the rear
to remove them.
Caution: Do not damage the 2 hooks on the back of the left
and right side panels.
3
Remove the 9 screws and lift off the Top Panel Assy.
2
2
2
2
2
2
2
Hooks
1
3
3
10
5
6 9
4
4
4
4
Diagnosing Each Board
Note 1:
Do NOT look directly into the pickup lens. The laser beam may cause eye injury.
Note 2:
Even if the unit shown in the photos and illustrations in this manual may differ from your product, the procedures
described here are common.
Note 3:
For performing the diagnosis the DVDM ASSY, the following jigs for service is required:
• Cable for service (GGF1157) (When diagnosing side B, GGD1425 is also required.)
www. xiaoyu163. com
QQ 376315150
9
9
2
8
9
4
2
9
8
TEL 13942296513
9
9
2
8
9
4
2
9
8
0
5
1
5
1
3
6
7
3
Q
Q
TEL 13942296513 QQ 376315150 892498299
TEL 13942296513 QQ 376315150 892498299


