background image

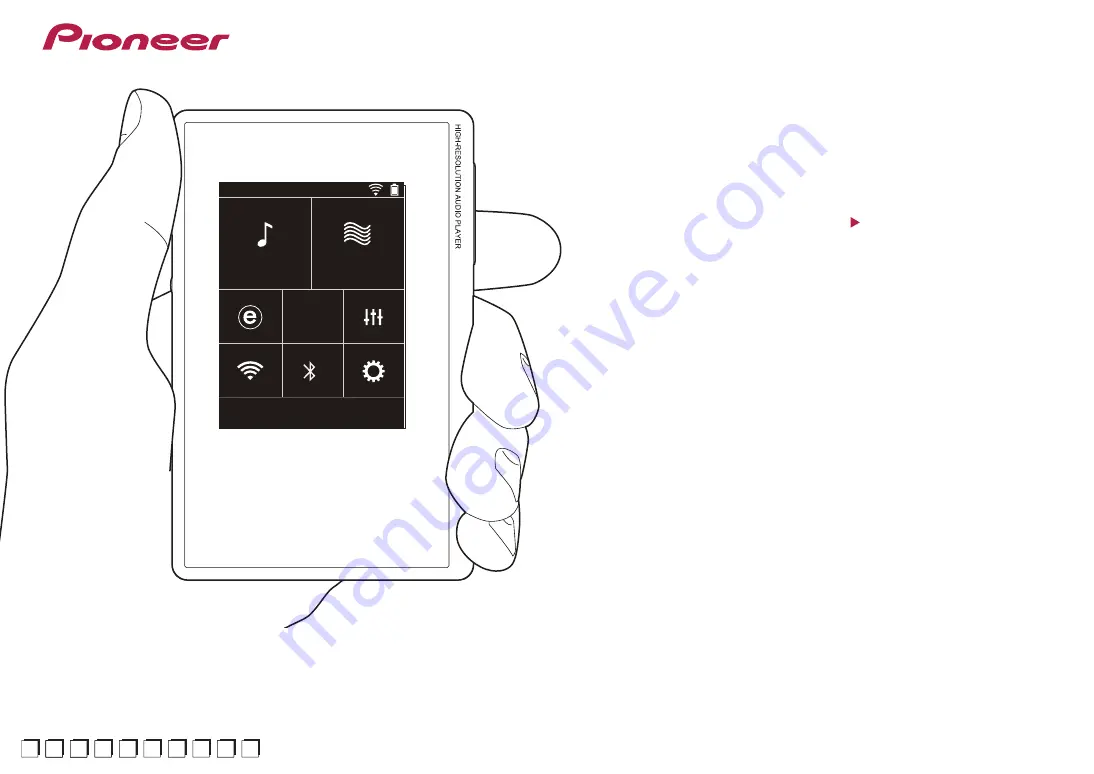
Music

Balanced

Streaming

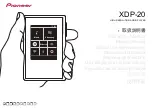
XDP-20

HIGH RESOLUTION AUDIO PLAYER

取扱説明書

Instruction Manual

Mode d’emploi

Manual de instrucciones

Manuale di istruzioni

Bedienungsanleitung

Grundläggande bruksanvisning

Руководство по эксплуатации

使用手冊

使用手册

En

En

De

En

Es

En Fr

It

Ru

Sv

Cs

Ct

Ja

Summary of Contents for XDP-20

Page 1: ...H RESOLUTION AUDIO PLAYER 取扱説明書 Instruction Manual Mode d emploi Manual de instrucciones Manuale di istruzioni Bedienungsanleitung Grundläggande bruksanvisning Руководство по эксплуатации 使用手冊 使用手册 En En De En Es En Fr It Ru Sv Cs Ct Ja ...

Page 2: ...sic from the Library 14 Creating a play list 16 Using network services 17 Connecting BLUETOOTH 18 Line Out 19 USB Output 20 Advanced Setup 21 Various settings 21 Audio Adjust 24 Customizing the Home screen 26 Software Update 27 Supplementary Information 29 Supplementary Information 29 Others 30 Entering text 30 General Specifications 31 Cautions for use 32 Before Start Part Names Initial Setup Pla...

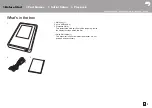
Page 3: ...s the main unit Peel off the temporary film on the display first then attach this film 0 Quick Start Guide 1 This document is an online instruction manual It is not included as an accessory Before Start Part Names Initial Setup Playback Advanced Setup Supplementary Information Others 1 2 3 ...

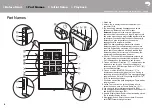
Page 4: ...single ended operation however 4 Line Out You can switch the headphone output to the line output mode to connect external equipment Line Out is displayed on the status bar when this is on 5 Turn on or off the Wi Fi feature is displayed on the status bar when this is on Connection settings are necessary to use Wi Fi features Refer to 2 Wi Fi P7 for connection settings 6 Turn on or off the BLUETOOTH...

Page 5: ...nductor 0 This unit is compatible with headphone sets with control buttons but not all headphones are guaranteed to work 0 This unit does not support simultaneous use of the balanced headphone jack and the headphone jack Using both jacks at the same time may result in damage 19 Charging lamp This lights white when charging starts It turns off when recharging finishes If the unit is in a state that...

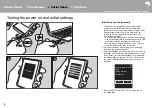
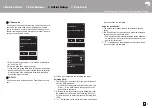
Page 6: ...th this unit 0 You can also recharge while the unit is on The time for recharging may increase in this case 2 The power comes on automatically when recharging starts and the initial settings start 3 Select the language you want to use first Flick the list of languages up or down then tap the language you want to use When you select the language a confirmation for the initial settings is displayed ...

Page 7: ...g SSID 1 Tap the SSID of the access point you want to connect from the SSID displayed 0 If the SSID of the access point is not displayed tap Other in the SSID list and follow the on screen instructions to configure 2 After tapping the field for entering the password enter the password of the access point then tap Connect For details on how to enter text refer to Entering text P30 3 is displayed on...

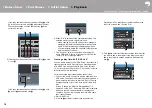
Page 8: ...arlier install the latest version before continuing Perform the following procedure when the unit is on 1 Start your computer and download the installer for X DAP Link from the following site http jp pioneer audiovisual com support av_pc compo dap x daplink download Double click setup exe to install Follow the on screen instructions to install A shortcut is created on the desktop after installatio...

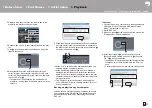
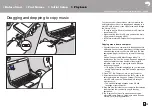
Page 9: ... copy destination specified in step 3 If the copy destination was selected by clicking 3 put check marks in the column 6 to the left of the music files to be added By clicking the check button 7 at the very top of the list you can either select or deselect all tracks 0 If there are already copied music files in the copy destination the check button is automatically selected If there are music file...

Page 10: ...s 1 3 0 or later When using version 1 3 0 or earlier install the latest version before continuing Perform the following procedure when the unit is on 1 Connect this unit to a computer with the supplied micro USB cable Connect so the wider side of the plug is down when inserting into this unit s micro USB port You may damage the plug or jack if you try to insert it the wrong way Screen Change to US...

Page 11: ...o delete the xdaplink folder from the built in storage of this unit 11 Tap Unmount on this unit s screen and unplug the micro USB cable Refer to Loading playlists P16 for how to load playlists Backing up playlists on your computer You can back up playlists you have created on this unit to your computer using X DAP Link The playlists you have backed up can be restored by transferring them from X DA...

Page 12: ...0 Irrespective of the storage selected as the restore destination the playlist is restored automatically as a playlist for this unit 5 Select the playlist file you want to restore at 8 then put a check mark next to Send backup Playlist to the device at 9 at the right of the screen Note that if there is a playlist with the same name on this unit when you restore a playlist the playlist is overwritt...

Page 13: ...de is displayed so tap Yes Do not tap Unmount displayed when you tap this until the transfer of the playlist is complete If you do tap it unplug the micro USB cable then connect it again 0 If AutoPlay or similar is displayed on your computer select Open folder to view files and then proceed to step 3 2 Open PC My Computer etc on your computer 3 Select the save destination from the list To copy to ...

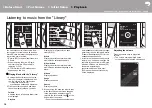
Page 14: ...s by genre 3 When you tap the track you want to play in the list of tracks the screen changes to the play screen and play starts To return to the list of tracks tap at the bottom left of the screen 0 Do not connect headphones that have an impedance outside the rated range as this may result in damage Refer to General Specifications P31 for the headphone specifications 0 At the time of purchase the...

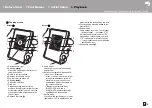
Page 15: ...P24 10 Switch output between Headphone Line Out or Bluetooth 0 When Line Out is selected output through the headphone jack is at maximum volume so do not use headphones Adjust the volume on the connected device 0 Bluetooth is displayed when BLUETOOTH is on and a BLUETOOTH wireless technology enabled device is connected 11 Shuffle mode You can switch shuffle play on or off by tapping this is displa...

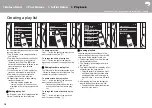
Page 16: ... want to edit next To delete a track from a play list Tap at the top right of the track you want to delete then tap 0 Tracks are not deleted from the unit even if you delete them from a play list To change the order of tracks in a play list Tap at the top right of the track you want to reorder then tap Loading playlists Load the playlist files transferred to the built in storage of this unit or to...

Page 17: ...lete stations you have registered from your favorites The menu displayed depends on the service currently selected A menu is displayed by tapping at the bottom right of the screen while playing a station and then tapping in the middle of the screen Regarding the TuneIn Radio Account Creating an account on the TuneIn Radio website tunein com and logging in from the unit allows you to automatically ...

Page 18: ...ces list 4 Pairing will end after a short time 5 Tap Library or Online in the home screen 0 This unit can store the data of up to eight paired devices When connecting after the first time 1 Tap in the home screen 2 Tap Bluetooth and tap the device you want to connect in Paired Devices Canceling a connection 1 Tap in the home screen 2 Tap Bluetooth 3 Tap at the top right of the device you want to d...

Page 19: ...e 1 Connect the device to this unit through the headphone jack 2 Turn on the power of this unit and select Line Out in the home screen to turn Line Out on Line Out is displayed on the status bar on the screen when this is on 0 When Line Out is on output through the headphone jack is at maximum volume so do not use headphones Adjust the volume on the connected device Before Start Part Names Initial...

Page 20: ... Headphone amplifier XPA 700 DAC HA300 0 If the attached USB DAC does not support DoP stream playback and attached devices may be adversely affected Connecting a device 1 Connect this unit to the device you are connecting using an OTG cable etc Make sure you plug the cable in the right way up when connecting You may damage the plug or jack if you try to insert it the wrong way 2 Turn on the power ...

Page 21: ...ration you can get a larger output and the high voltage is not grounded together with the small signal so you can anticipate a superior effect in the quality of the music Because you get a larger output you can drive headphones with a higher impedance ACG The basic operating method is the same as Balanced mode but uses technology to even more forcefully fix grounding standards so you can enjoy a s...

Page 22: ...nt the card first Format SD Card You can initialize a micro SD card All the data on the card will be deleted when you initialize it so make sure you save data you want to keep to a computer etc To initialize after tapping the micro SD card to be initialized tap Format Confirm Physical Buttons Operations while Holding When set to Enable even when you press and hold the play pause button P5 to lock ...

Page 23: ...via Network or via SD Card You can not select if there is no software update Device Information Software Version The current software version is displayed MAC Address The MAC address of this unit This value is specific to the component and cannot be changed Serial Number The unique identifier for this unit License Displays a guide to our privacy policy and the licenses for open source software Cer...

Page 24: ...s Select Off default value 1 2 3 4 or 5 Upsampling Mode The sampling frequencies of the tracks played are upsampled for output Select Off default value 96k 88 2k or 192k 176 4k Hi bit 32 On 16bit or 24bit audio is re quantized to 32 bit so that a smoother more refined sound is realized Off default value When this function is not to be used Digital Filter By modifying the filter characteristics of ...

Page 25: ... Before Start Part Names Initial Setup Playback Advanced Setup Supplementary Information Others 25 En 0 If you change the lock range and the sound is interrupted adjust to the Normal or Wide ends ...

Page 26: ...you want to change 2 In the Select a Short cut button screen tap the feature you want to display in the home screen Features that are already displayed in the home screen will be displayed in gray and you will be unable to select them Select None if you do not want to place a button Before Start Part Names Initial Setup Playback Advanced Setup Supplementary Information Others Library Line Balanced...

Page 27: ...on regardless of legal theory and whether arising in tort or contract In no event will we be liable to you or any third party for any special indirect incidental or consequential damages of any kind including but not limited to compensation reimbursement or damages on account of the loss of present or prospective profits loss of data or for any other reason whatsoever Updating the Firmware via Net...

Page 28: ...e micro SD card into a card slot either 1 or 2 on this unit 5 Tap in the home screen 6 Tap Software Update 7 After tapping Update Now the software update starts when you tap via SD Card 0 You will not be able to select via SD Card if there is no software update 8 Completed is displayed when the update is complete 0 If Faliled to Update screen is displayed the update has failed Redo from the beginn...

Page 29: ...t there may be additions or changes to the settings and operation available compared to what is in the instruction manual For information about the settings and operations that have been added or changed see the following references Supplementary Information Click here Before Start Part Names Initial Setup Playback Advanced Setup Supplementary Information Others ...

Page 30: ...ursor 5 Change the type of text 6 Confirm the text you entered 7 Switches between upper and lower cases 0 This unit enables input of the alphabet symbols and numbers only Before Start Part Names Initial Setup Playback Advanced Setup Supplementary Information Others abc _ def 123 ghi jkl mno pqrs ʻ aA tuv wxyz 2 4 5 6 7 3 1 ...

Page 31: ...tible with 4 conductor remote control impedance 16 to 300 Headphone jack balanced output 4 conductor φ 2 5 mm impedance 32 to 600 Do not connect headphones that have an impedance outside the rated range as this may result in damage 1 micro USB port B type combined charging and data transfer Gain switch Low Normal High Continuous play time Times shown are a guide Playback times depend on settings F...

Page 32: ... microphone input 0 This unit does not support simultaneous use of the balanced headphone jack and the headphone jack Using both jacks at the same time may result in damage 0 Take care that dust and foreign objects do not get into the entrance of the micro SD card slot as this can cause a malfunction 0 Do not press down with force on the unit when the unit is placed with the screen facing down Thi...

Page 33: ...ademarks of Sony Corporation All other trademarks are the property of their respective owners Toutes les autres marques commerciales sont la propriété de leurs propriétaires respectifs El resto de marcas comerciales son propiedad de sus respectivos propietarios Tutti gli altri marchi di fabbrica sono di proprietà dei rispettivi proprietari Alle anderen Warenzeichen sind Eigentum ihrer jeweiligen E...

Reviews: