22
> Before Start
> Part Names
> Initial Setup
> Playback
Advanced Setup
| Supplementary Information | Others
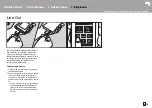
or "Variable". When "Variable" is selected, volume can be adjusted on this unit. If you
select "Fixed", adjust the volume on the connected external device.
"Off (default value)": Line output is not enabled
∫
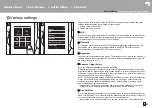
Audio
Gain
: You can select the headphone output level to suit your headphones.
Select "High (default value)", "Normal", or "Low".
0
Lower the volume first if you intend to select "High".
0
When connecting a pair of headphones for the first time, set to "Low" and change the
volume level gradually.
Volume Limiter
: You can set an upper limit for the maximum volume so that the volume
does not increase too much. Select between "0" and "60 (default value)".
USB Audio
(We plan to provide for the USB Auido function through firmware updates for
this product.): DSD format music files can be output in DoP format via USB. Note that DSD
is not output if "Output DSD" is set to off.
0
If the attached USB-DAC does not support DoP stream, playback and attached devices
may be adversely affected.
Output DSD: "On" / "Off (default value)"
∫
Music Library Sync
Auto sync
: When this is on, music files you have copied to this unit from a computer or
music files on a micro SD card are automatically synchronized with the library.
"On (default value)": When this function is to be used
"Off": When this function is not to be used
Sync Now
If "Auto sync" is off, tap this to manually synchronize the music files with the library. You can
select "Sync All" or "Sync Added Songs" after tapping this.
Sync All: Select to synchronize all transferred tracks.
Sync Added Songs: Select to synchronize only tracks that have been added.
∫
SD Card
Unmount SD Card
: You can unmount a micro SD card. The card can be damaged or may
stop working properly if you fail to unmount the card first.
Format SD Card
: You can initialize a micro SD card. All the data on the card will be deleted
when you initialize it, so make sure you save data you want to keep to a computer, etc. To
initialize, after tapping the micro SD card to be initialized, tap "Format" - "Confirm".
∫
Physical Buttons
Operations while Holding
When set to "Enable", even when you press and hold the play/pause button (P5) to lock
operations on this unit, the Volume keys and side buttons for play (P5), etc., can still be
used. Tap this to change the settings for "Volume" and "Side Buttons".
Volume: "Disable (default value)" / "Enable"
Side Buttons: "Disable (default value)" / "Enable"
∫
Home
You can change the buttons displayed in the home screen to buttons for features you prefer.
0
Change the buttons displayed in the home screen from the home screen. Refer to
"Customizing the Home screen" (P26) for how to change.
∫
Power Management
Auto Display Off
: The unit's LCD automatically switches off when the specified time
elapses with no operations.
Select "Off", "15 seconds", "30 seconds (default value)", "1 minute", "2 minutes", or "5
minutes".
Auto Power Off
: The unit's power automatically switches to "Off" when the specified time
elapses with no operations.
Select "Off (default value)", "10 minutes", "30 minutes", or "60 minutes".
Pioneer DuoRemote App
: This restricts connections between the "Pioneer DuoRemote
App" smartphone app and this unit. By setting to "Disable", the amount of battery consumed
can be reduced even when BLUETOOTH is on.
"Enable (default value)": To enable connection with "Pioneer DuoRemote App".
"Disable": To disable connection with "Pioneer DuoRemote App".
∫
Passcode
Passcode Lock
: Set a four-digit pass code to protect this unit. (This is not set by default)
Change Passcode
: Change the number for the set pass code. This can not be selected if a
pass code has not been set.
0
If you enter the wrong pass code three times, a message appears asking if you want to
initialize the unit's settings. Even if the settings are initialized copied music files are not


