9
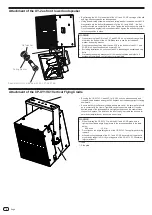
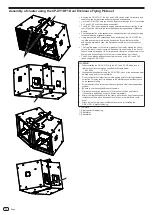
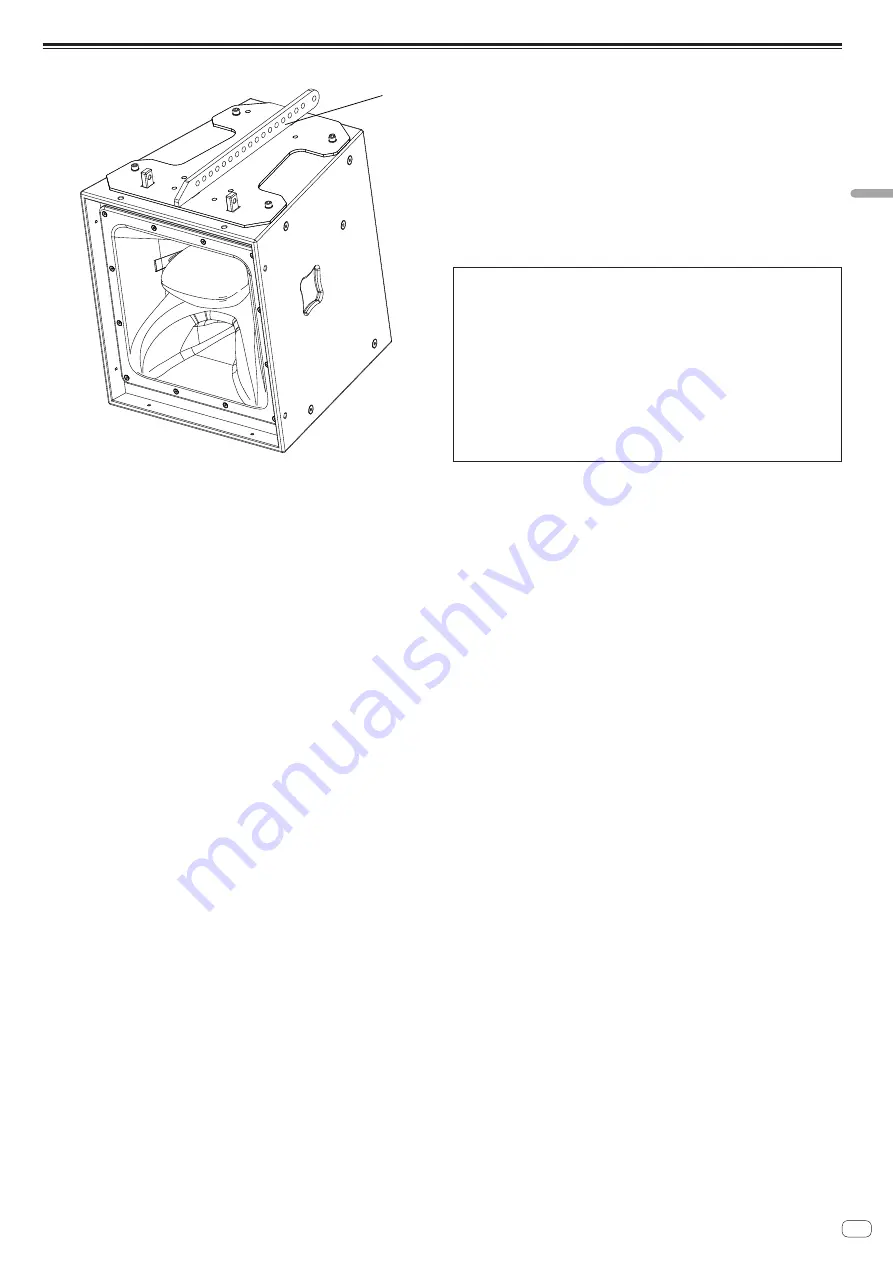
Attachment of the CP-XY1DF1 as Variable Angle Bracket
1
!
By attaching the CP-XY1DF1 to each XY-1 or XY-2E unit, the unit’s vertical
position can be adjusted while it is suspended.
!
Using the supplied M10 socket head bolts, bolt through the CP-XY1DF1 the
top-plate into the enclosure. Ensure that both the flat and spring washers are
used - the flat washer should be in contact with the top-plate. The top-plate
works on the centre of gravity of the enclosure.
!
The top-plate works on the centre of gravity of the cluster. Moving the pickup
point to the rear of the enclosure will add down-tilt, and moving to the front of
the enclosure will apply up-tilt. For larger down-tilt angles, position the pivot on
the last hole and use the point on the rear or underside as a pull-back.
!
The XY-2 can also be added to the bottom surface of the XY-1 or XY-2E with the
CP-XY1DF1 attached.
WARNING
!
When installing the CP-XY1DF1 with the XY-1 and XY-2E, make sure to
tighten the bolts to the torques specified in the table below.
M10 bolts
: 15 N·m
!
Do not attempt to use this product with components other than the specified
speaker.
!
Be sure to use the supplied accessory screws.
!
Flat washer and spring washer out of the reach of children and infants. If
accidentally swallowed, contact a doctor immediately.
!
After mounting the speaker with the cradle, never loosen any of its accessory
installation screws, since the speaker could fall or other accidents could
occur.
!
Attach a wire to a rigging point different from those for installing the
CP-XY1DF1 to prevent swaying.
1
Top-plate
Mo
un
tin
g an
d ri
gg
in
g o
pti
on
s
Engb

