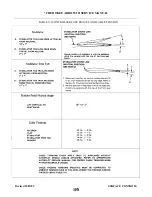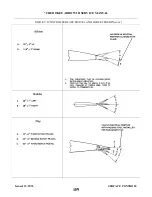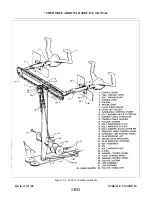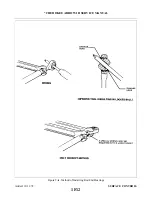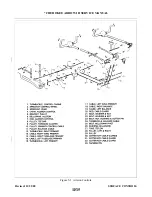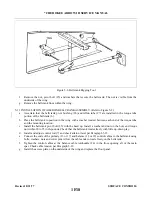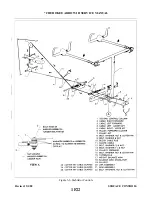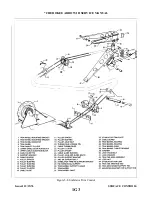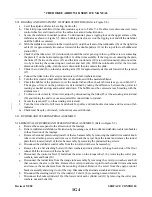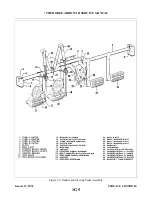
5-6. INSTALLATION OF CONTROL COLUMN ASSEMBLY. (Refer to Figure 5-1.)
a.
The tee bar assembly may be installed in the airplane by the following procedure:
1. Swing the tee bar assembly into place from the right side of the cabin and secure with attaching
bolts (15), washers and nuts inserted in through each side of the floor tunnel.
2. Place link assembly end (31) into the lower end of the tee bar assembly (5) and secure with bolts,
washer, nut and cotter pin (16).
tee bar (5), position pulleys and secure with bolt, washers and nut (14).
4. Install the control wheel per Step b.
5. Place the control wheels in neutral (centered) position and install the aileron control chains (7 and
6. Loosen the connecting bolts (22) of the idler sprockets (19 and 21) to allow the chain to fit snug
around the control wheel sprockets and over the idler sprockets.
7. Connect the aileron control cables (12) to the ends of the chains (7 and 8) with bolts, bushings,
8. Adjust the chain turnbuckle (9) between the two control wheel sprockets to allow the control
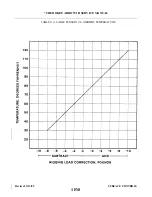
wheels to be neutral and obtain proper cable tension as given in Table V-I. It may be necessary, in
order to have both control wheels neutral, to set the chain turnbuckle to neutralize the wheels and
then set cable tension with the turnbuckles located under the floor panel aft of the main spar as
instructed in Paragraph 5-12. Before safetying the turnbuckle, check that when the ailerons are
neutral, the control wheels will be neutral and the chain turnbuckle centered. Also, the aileron
bellcranks should contact their stops before the control wheel hits its stop. Maintain .030 to .040
clearance between sprocket pin and adjustable stop bolts on tee bar.
9. Set stabilator cable tension with the turnbuckle in the aft section of the fuselage and instructions
given in Paragraph 5-16. Check safety of all turnbuckles upon completion of adjustments.
10. Tighten the connecting bolts (22) of the idler sprockets (19 and 21).
11. Install the floor tunnel plate trim covers by placing the tunnel plate into position for installation
and secure with the appropriate screws. Roll the carpet into place and install the rudder trim cover
and knob.
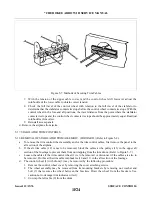
b. Either control wheel assembly may be installed by the following procedure:
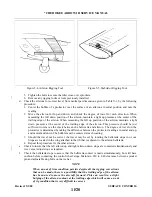
1. Insert the control wheel tube through the instrument panel.
2. Should wires for the various Autopilot systems need to be installed in the control tube, route them
through the hole in the forward side of the tube and out of the small hole in the forward side.
Position the rudder grommet in the hole in the side of the tube.
3. On the left control tube install the stop (6).
4. Connect the control wheel tube (2) to the flexible joint (4) of the tee bar assembly. If the control
cables and/or chains have not been removed or loosened, place the ailerons in neutral and install
the control tube on the flexible joint to allow the control wheel to be neutral. Install bolt, washer
and nut (3) and tighten.
Issued: 12/15/76
1F14
* CHEROKEE ARROW III SERVICE MANUAL
SURFACE CONTROLS
Summary of Contents for ARROW III
Page 4: ...THIS PAGE INTENTIONALLY LEFT BLANK 1A4...
Page 12: ...THIS PAGE INTENTIONALLY LEFT BLANK 1A12...
Page 94: ...Figure 4 2 Wing Installation Revised 2 13 89 1D22 CHEROKEE ARROW III SERVICE MANUAL STRUCTURES...
Page 171: ...lH3 INTENTIONALLY LEFT BLANK...
Page 172: ...lH4 INTENTIONALLY LEFT BLANK...
Page 286: ...THIS PAGE INTENTIONALLY LEFT BLANK Revised 2 13 89 2A8...
Page 528: ...INTENTIONALLY LEFT BLANK 2K10 THRU 2L24 2K10...

