NOTE
Where a question may arise as where to reconnect hose, line or wire, the
item at the separation should be identified (tagged) to facilitate
reinstallation. Open fuel, oil, vacuum lines and fittings should be covered to
prevent contamination.
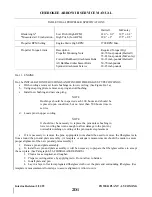
k. Disconnect both lines from the oil cooler.
1. Disconnect the magneto “P” leads at the magnetos.
m. Disconnect the engine vent tube at the engine.
n. Disconnect the engine oil temperature lead at the aft end of the engine.
o. Disconnect the tachometer drive cable at the engine.
p. Untie the ignition harness, hoses and lines at the aft end of the engine.
q. Disconnect the vacuum pump lines at pump and remove fittings from pump.
r. Disconnect the oil pressure line at the engine.
s. Disconnect the static and fuel flow line at the right rear engine baffle.
t. Disconnect the manifold pressure line at the right rear side of the engine.
u. Disconnect the injector line at the flow divider.
v. Disconnect the alternator leads and the cable attachment clamps.
w. Attach a one-half ton (minimum) hoist to the hoisting straps and relieve the tension from the engine
mounts.
NOTE
Place a tail stand under the tail of the airplane before removing the engine.
x. Check the engine for any attachments remaining to obstruct its removal.
y. Drain the engine oil, if desired, and then close drain.
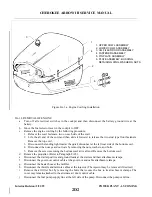
z. Remove the four engine mount assemblies and swing the engine free, being careful not to damage any
attaching parts.
8A-15. INSTALLATION OF ENGINE.
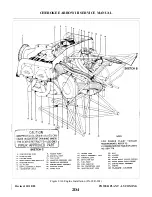
a. Attach a one-half ton (minimum) hoist to the engine hoisting straps and swing the engine into
alignment with its attaching points.
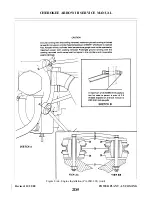
b. Insert an engine mount bolt, with washer against head, in the engine mount and slide half of the mount
c. Position the mounting lugs of the engine so that they align with the engine mount attaching points,
then move the engine rearward onto the mounts.
d. Slide onto each mounting bolt a spacer washer, spacer and the forward half of the mount. Install
washer and nut, and torque the nuts of the bolts to 450 to 500 inch-pounds.
e. Connect the alternator leads and secure cable with clamps.
f. Connect the injector line to the flow divider.
g. Connect the manifold pressure line at the right rear side of the engine.
h. Connect the static and fuel flow line at the right rear engine baffle.
i. Connect the oil pressure line.
j. Install the line fitting in the vacuum pump and install lines.
k. Connect the tachometer drive cable.
1. Connect the oil temperature lead.
m. Connect the engine vent tube.
Revised: 8/31/77
2D3
CHEROKEE ARROW III SERVICE MANUAL
POWER PLANT - LYCOMING
Summary of Contents for ARROW III
Page 4: ...THIS PAGE INTENTIONALLY LEFT BLANK 1A4...
Page 12: ...THIS PAGE INTENTIONALLY LEFT BLANK 1A12...
Page 94: ...Figure 4 2 Wing Installation Revised 2 13 89 1D22 CHEROKEE ARROW III SERVICE MANUAL STRUCTURES...
Page 171: ...lH3 INTENTIONALLY LEFT BLANK...
Page 172: ...lH4 INTENTIONALLY LEFT BLANK...
Page 286: ...THIS PAGE INTENTIONALLY LEFT BLANK Revised 2 13 89 2A8...
Page 528: ...INTENTIONALLY LEFT BLANK 2K10 THRU 2L24 2K10...

