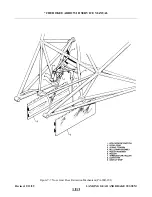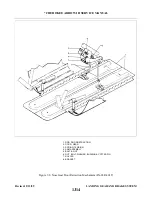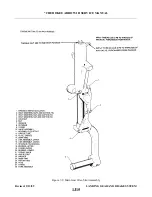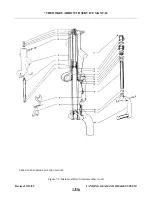
7-27. ALIGNMENT OF MAIN LANDING GEAR
a.
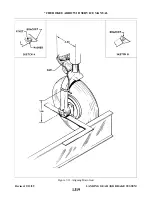
Place a straightedge no less than twelve feet long across the front of both main landing gear wheels.
Butt the straightedge against the tire at the hub level of the landing gear wheels. Jack the airplane up
just high enough to obtain a six and one-half inch dimension between the centerline of the strut piston
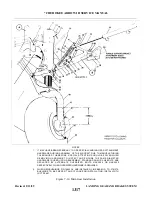
and the centerline of the center pivot bolt of the gear torque links. (Refer to Figure 7-11.) Devise a
support to hold the straightedge in this position.
b. Set a square against the straightedge and check to see if its outstanding leg bears on the front and rear
side of the brake disc. (It may be necessary to remove the brake assembly to have clear access to the
disc.) (Refer to Figure 7-11.) If it touches both forward and rear flange, the landing gear is correctly
aligned. The toein for the main landing gear wheels is 0 +/- 1/2 degrees.
NOTE
A carpenter’s square, because of its especially long legs, is recommended
for checking main landing gear wheel alignment.
c.
If the square contacts the rear side of the disc, leaving a gap between it and the front flange, the wheel
is toed-out. If a gap appears at the rear flange, the wheel is toed-in.
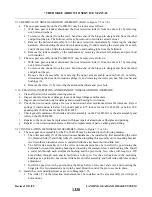
d. To rectify the toe-in or toe-out condition, remove the bolt connecting the upper and lower torque links
and remove or add spacer washers to move the wheel in the desired direction. Refer to the chart on the
following page.
e.
Should a condition exist that all spacer washers have been removed and it is still necessary to move the
wheel further in, then it will be necessary to turn the torque link assembly over. This will put the link
connecting point on the opposite side allowing the use of spacers to go in the same direction.
f.
Recheck wheel alignment. If the alignment is correct, safety the castellated nut with cotter pin.
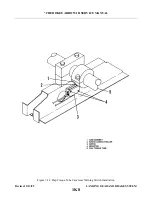
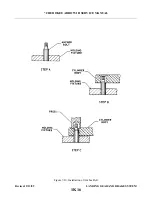
g. If a new link on the top left main gear had to be installed or it had to be reversed during the alignment
check, it will be necessary to check the gear safety switch (squat switch) bracket for engagement and
locking in place. If the large machine surface of the link is inboard, the bracket is mounted with the
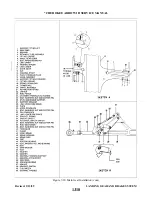
small rivet hole next to link. (Refer to Sketch A, Figure 7-11.) This should be aligned on the centerline
of link and hole drilled to .096 of an inch, .15 of an inch deep. Insert an MS20426AD3-3 rivet in the
hole. This locking rivet is held in place by the flat washer, castellated nut and cotter pin. If link has to
be reversed, then the bracket and bolt are also reversed. (Refer to Sketch B, Figure 7-11.)
h. Check adjustment of landing gear safety switch (squat switch) per Paragraph 7-37.
Revised: 2/13/89
1K3
* CHEROKEE ARROW III SERVICE MANUAL
LANDING GEAR AND BRAKE SYSTEM
Summary of Contents for ARROW III
Page 4: ...THIS PAGE INTENTIONALLY LEFT BLANK 1A4...
Page 12: ...THIS PAGE INTENTIONALLY LEFT BLANK 1A12...
Page 94: ...Figure 4 2 Wing Installation Revised 2 13 89 1D22 CHEROKEE ARROW III SERVICE MANUAL STRUCTURES...
Page 171: ...lH3 INTENTIONALLY LEFT BLANK...
Page 172: ...lH4 INTENTIONALLY LEFT BLANK...
Page 286: ...THIS PAGE INTENTIONALLY LEFT BLANK Revised 2 13 89 2A8...
Page 528: ...INTENTIONALLY LEFT BLANK 2K10 THRU 2L24 2K10...

