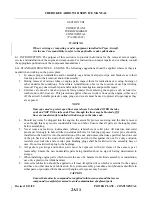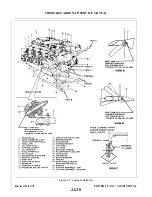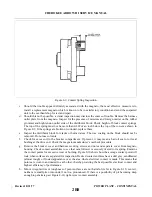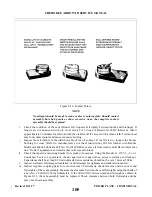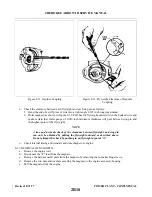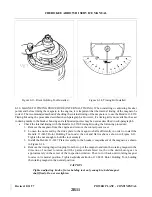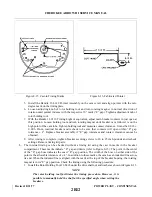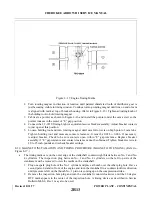
8-19. INSTALLATION OF ENGINE. (Refer to Figure 8-6.) Prior to installing the engine, be sure to install all
items that were removed after the engine was removed from the aircraft
WARNING
Prior to installation of the engine, ensure that Teledyne Continental Service
Bulletin M86-11 is complied with.
NOTE
Removal all protective caps and identification tags as each item is installed.
NOTE
If engine is equipped with a freon compressor, the compressor support
brackets must be properly aligned. Refer to the latest revision of Teledyne
Continental Motors Service Bulletin No. M79-15.
a.
Install the shock mount in the engine mount and hoist the engine into position on the mount.
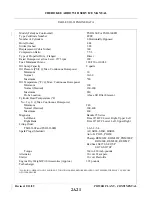
b. Install the lower shock mount assemblies and mounting bolts. Torque the bolts 450 to 500 inch
pounds.
c.
Route and connect the throttle and mixture control cables and adjust.
d. Route and connect the propeller governor control cable and adjust.
e.
Connect the alternate air cable and adjust.
f.
Reconnect all lines and hoses previously disconnected from the engine.
NOTE
Apply Lubon No. 404 to all male fuel system fittings. Do not allow to enter
system.
g. Route and connect the electrical leads to the appropriate connections on the engine.
h. Connect the tachometer drive cable.
i.
Connect exhaust manifold at the turbocharger turbine inlet (“Y” connection) and at each exhaust
manifold slip joint adjacent to No. 1 and 2 cylinders.
NOTE
Secure all cables, hoses and wires with clamps and Ty-strap in the same
location as before removal. Make sure then clamping cables to ensure
wiring clears all metal plates and free from forced chaffing against any
sharp metal edges, see Figure 8-6.
j.
Install the propeller and spinner per paragraph 8-11.
k. Service the engine with the proper grade and quantity of oil; refer to Section II.
l.
Be certain all switches are in the OFF position and connect the battery cables.
m. Install the engine cowling per paragraph 8-7.
n. Make a final check of the security, location and installation of all lines, wires and cables.
o. Perform an operational check of the engine; inspect for leaks and make final adjustments to engine
controls as required.
NOTE
Check exhaust pipe clearance. Minimum clearance to structure opening
should be 0.50 of an inch.
Revised: 2/13/89
2A22
CHEROKEE ARROW III SERVICE MANUAL
POWER PLANT - CONTINENTAL
Summary of Contents for ARROW III
Page 4: ...THIS PAGE INTENTIONALLY LEFT BLANK 1A4...
Page 12: ...THIS PAGE INTENTIONALLY LEFT BLANK 1A12...
Page 94: ...Figure 4 2 Wing Installation Revised 2 13 89 1D22 CHEROKEE ARROW III SERVICE MANUAL STRUCTURES...
Page 171: ...lH3 INTENTIONALLY LEFT BLANK...
Page 172: ...lH4 INTENTIONALLY LEFT BLANK...
Page 286: ...THIS PAGE INTENTIONALLY LEFT BLANK Revised 2 13 89 2A8...
Page 528: ...INTENTIONALLY LEFT BLANK 2K10 THRU 2L24 2K10...

