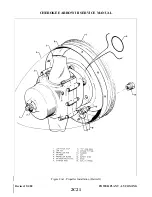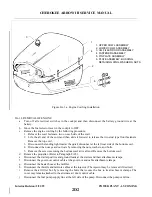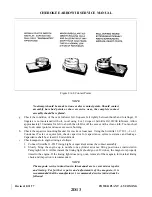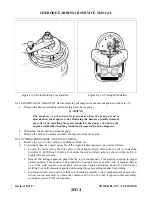
8A-7. INSTALLING PROPELLER.
a.
Assure master switch and magneto switches are in the off position.
b. Make certain the fuel selector is in the off position and the mixture control is in idle cut-off.
c.
Wipe crankshaft and the interior of the propeller hub to assure no foreign matter entered the propeller
mechanism.
d. Check propeller hub for proper seating of “O” ring. Cover “O” ring with a light film of engine oil.
e.
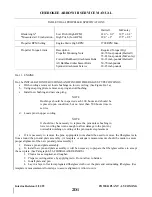
Install rear spinner bulkhead. Refer to Table VIIIA-I for torque specification.
f.
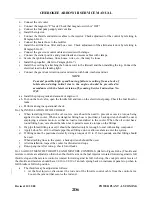
Align propeller mounting studs with proper holes and the extended bushing in the engine crankshaft
flange, and slide propeller carefully over crankshaft pilot until studs can be started in crankshaft flange
bushing.
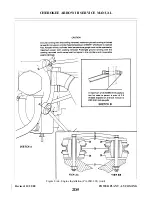
g. Secure propeller assembly by tightening the mounting studs in a sequence not to allow the propeller
hub to cock on the engine crankshaft.
h. Torque propeller mounting studs and safety. Refer to Table VIIIA-I for torque specification.
i.
Attach forward spinner bulkhead to propeller. Refer to Table VIIIA-I for torque specifications on
Hartzell propellers.
j.
Attach the propeller spinner by aligning the reference mark on the spinner with the mark on the rear
spinner bulkhead. Secure with attaching screws to specification. Refer to Table VIIIA-I.
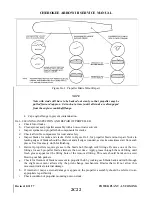
8A-8. BLADE TRACK. Blade track is the ability of one blade tip to follow the other, while rotating, in almost
the same plane. Excessive difference in blade track-more than .0625 inch-may be an indication of bent blades
or improper propeller installation. Check blade track as follows:
a.
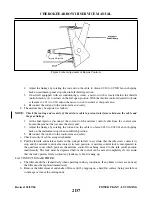
With the engine shutdown and blades vertical, secure to the aircraft a smooth board just under the tip
of the lower blade. Move the tip fore and aft through its full “blade-shake” travel, making small marks
with a pencil at each position. Then center the tip between these marks and scribe a line on the board
for the full width of the tip.
b. Carefully rotate propeller by hand to bring the opposite blade down. Center the tip and scribe a pencil
line as before and check that lines are not separated more than .0625 inch.
c.
Propellers having excess blade track should be removed and inspected for bent blades, or for parts of
sheared “O” ring, or foreign particles, which have lodged between hub and crankshaft mounting faces.
Bent blades will require repair and overhaul of assembly.
8A-9. PROPELLER GOVERNOR.
8A-10. REMOVAL OF PROPELLER GOVERNOR.
a.
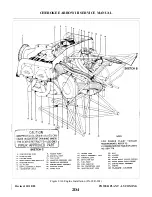
Remove the upper engine cowl.
b. Disconnect the control cable end from the governor control arm.
c.
Remove the governor mounting stud nuts. It will be necessary to raise the governor as the nuts are
being removed before the nuts can be completely removed.
d. Remove the mounting gasket. If the governor is to be removed for a considerable length of time and
another unit not substituted, it is advisable to cover the mounting pad to prevent damage caused by
foreign matter.
8A-l l. INSTALLATION OF PROPELLER GOVERNOR.
a.
Clean the mounting pad thoroughly, making very certain that there are no foreign particles in the
recess around the drive shaft.
b. Place the governor mounting gasket in position with the raised portion of the screen facing away from
the engine.
c.
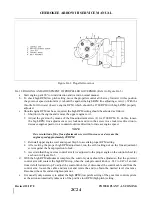
Align the splines on the governor shaft with the engine drive and slide the governor into position.
d. With the governor in position, raise the governor enough to install washers and start mounting nuts.
Torque nuts even.
e.
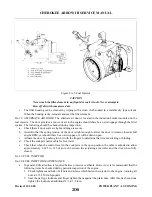
Connect the control cable end to the governor control arm. The ball stud is installed in the innerhole of
the control arm.
f.
Adjust governor control per Paragraph 8A-12.
g. Install engine cowl.
Revised: 8/31/77
2C23
CHEROKEE ARROW III SERVICE MANUAL
POWER PLANT - LYCOMING
Summary of Contents for ARROW III
Page 4: ...THIS PAGE INTENTIONALLY LEFT BLANK 1A4...
Page 12: ...THIS PAGE INTENTIONALLY LEFT BLANK 1A12...
Page 94: ...Figure 4 2 Wing Installation Revised 2 13 89 1D22 CHEROKEE ARROW III SERVICE MANUAL STRUCTURES...
Page 171: ...lH3 INTENTIONALLY LEFT BLANK...
Page 172: ...lH4 INTENTIONALLY LEFT BLANK...
Page 286: ...THIS PAGE INTENTIONALLY LEFT BLANK Revised 2 13 89 2A8...
Page 528: ...INTENTIONALLY LEFT BLANK 2K10 THRU 2L24 2K10...

