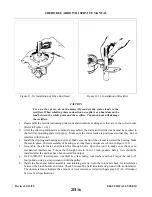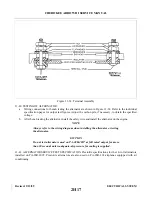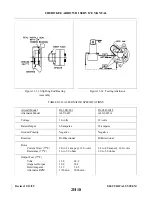
11-79. REMOVAL OF TAIL NAVIGATION LIGHT.
a.
Remove the two screw securing the lens and lens retainer.
b. Remove the bulb.
NOTE
To remove the complete tail light assembly, unsolder the electrical lead from
the base of the light assembly and disconnect the remaining electrical lead
at the connector.
11-80. INSTALLATION OF TAIL NAVIGATION LIGHT.
a.
Install bulb and lens in light assembly.
b. Place light assembly in position on tail and secure with screws previously removed.
11-81. ANTI-COLLISION (STROBE)
11-82. DESCRIPTION. The lights are located on each wing tip in the same assembly with navigation lights on
the fin tip. They are rated to flash at approximately 50 times a minute.
11-83. REMOVAL OF WING TIP STROBE LIGHT.
a.
Remove the screw securing the navigation light cover and remove cover.
b. Remove the three screws securing navigation light bracket assembly and pull out.
c.
Remove the strobe lamp by cutting the wires on the lamp beneath the mounting bracket.
d. Remove the defective lamp.
e.
Remove and discard the plug with the cut wires from its electrical socket.
11-84. INSTALLATION OF WING TIP STROBE LIGHT.
a.
Route the wires from the new lamp down through the hole in the navigation light bracket.
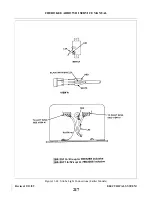
b. Insert the wire terminals in the plastic plug supplied with the new lamp. Wire according to the
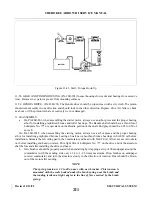
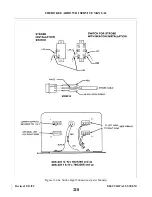
schematic diagram located in the back of this section and also see Figure 11-44.
c.
Position strobe lamp on navigation light bracket.
d. Secure navigation light assembly and bracket with appropriate screws.
e.
Install navigation light cover and secure with appropriate screw.
11-85. REMOVAL OF STROBE POWER SUPPLY. The strobe power supply is in the aft section of the
fuselage.
a.
Remove access panel to the aft section of the fuselage in the rear baggage compartment to gain access
to power supply.
b. To remove power supply, disconnect the two electrical plugs.
c.
Disconnect the two other electrical leads.
d. Remove the four screws securing power supply to the fuselage. Power supply can now be removed.
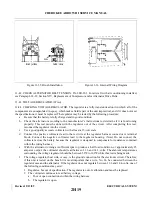
11-86. INSTALLATION OF STROBE POWER SUPPLY. (Refer to Figure 11-44.)
a.
Position the power supply in place and secure with the four screws previously removed.
b. Reconnect the electrical leads in their proper place.
c.
Reconnect the electrical plugs previously removed in their proper place.
d. Replace access panel in rear baggage compartment.
Revised: 2/13/89
2I6
CHEROKEE ARROW III SERVICE MANUAL
ELECTRICAL SYSTEM
Summary of Contents for ARROW III
Page 4: ...THIS PAGE INTENTIONALLY LEFT BLANK 1A4...
Page 12: ...THIS PAGE INTENTIONALLY LEFT BLANK 1A12...
Page 94: ...Figure 4 2 Wing Installation Revised 2 13 89 1D22 CHEROKEE ARROW III SERVICE MANUAL STRUCTURES...
Page 171: ...lH3 INTENTIONALLY LEFT BLANK...
Page 172: ...lH4 INTENTIONALLY LEFT BLANK...
Page 286: ...THIS PAGE INTENTIONALLY LEFT BLANK Revised 2 13 89 2A8...
Page 528: ...INTENTIONALLY LEFT BLANK 2K10 THRU 2L24 2K10...

