14-69. INSTALLATION OF OUTLETS.
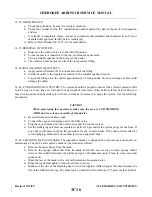
1. Apply Teflon tape to male threads of the affected fitting. Refer to Section 14-60 instructions.
2. Connect outlet to low pressure line.
3. Position trim panel and secure with screws.
4. Position and secure outer half of outlet with a suitable spanner wrench.
5. Tighten fittings onto the outlets to a torque of approximately 30 in.-lb. Do not overtorque.
14-70. REMOVAL AND INSTALLATION OF OXYGEN ON/OFF CONTROL.
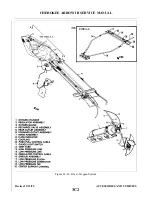
1. As shown in Figure 14-16, the on/off control is mounted in the overhead vent panel. To remove the
control, drop the overhead panel and ducting and remove retaining nut from rear of control cable
fitting.
2. Make access to the bottle, if necessary, and disconnect cable from regulator-control mechanism.
3. Cut tie wraps securing cable and pull cable from aircraft.
4. When installing a new cable, make sure new cable shield is cut to 84.0 inches long and that the core
has sufficient material to make a twin loop two inches from end of shield. Install as follows:
a.
Route cable through hole in overhead duct as shown in Figure 35-1. The wrap the cable as before.
b. Make sure cable properly reaches valve and install vent and panels. Connect cable to control
mechanism.
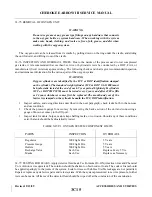
14-71. REFILLING OXYGEN SYSTEM.
CAUTION
Refilling of the oxygen system should be done by qualified personnel.
Before servicing the oxygen system, ensure that the aircraft is electrically
grounded. Do not attempt to tighten any connections while the system is
charged. Electrical equipment must not be operated while servicing the
oxygen system.
parameters to be followed for filling.
1. Only aviators breathing oxygen (MIL-0-27210) and appropriate filling equipment should be used to
service the system.
2. If a cylinder has less than 5 psi pressure or has insufficient pressure to produce an audible hissing
sound when the valve is cracked, it should be removed and/or purged. If the condition has existed for a
significant length of time, the bottle must be hydrostatically tested.
CAUTION
Be cautious that there is no oil on the fittings or near the immediate vicinity.
Revised: 2/13/89
3C12
CHEROKEE ARROW III SERVICE MANUAL
ACCESSORIES AND UTILITIES
Summary of Contents for ARROW III
Page 4: ...THIS PAGE INTENTIONALLY LEFT BLANK 1A4...
Page 12: ...THIS PAGE INTENTIONALLY LEFT BLANK 1A12...
Page 94: ...Figure 4 2 Wing Installation Revised 2 13 89 1D22 CHEROKEE ARROW III SERVICE MANUAL STRUCTURES...
Page 171: ...lH3 INTENTIONALLY LEFT BLANK...
Page 172: ...lH4 INTENTIONALLY LEFT BLANK...
Page 286: ...THIS PAGE INTENTIONALLY LEFT BLANK Revised 2 13 89 2A8...
Page 528: ...INTENTIONALLY LEFT BLANK 2K10 THRU 2L24 2K10...

