D.C. GENERATION (cont.)
(4) Checking Alternator System (cont.)
Using the example that the airplane’s maximum continuous load with all equipment on is approxi-
mately 48 amperes for the 60 ampere alternator. This approximate 48 ampere value, plus approxi-
mately two amperes for a fully charged battery, will appear continuously under these flight condi-
tions. If the ammeter reading were to go much below this value, under the aforementioned condi-
tions, trouble with the alternator system would be indicated and corrective action should be taken
by switching off the least essential equipment.
The following test procedure could be helpful in locating faulty components:
(a) Ensure that the airplane is positioned so that the prop blast will not interfere with other operations
going on near by. Start engine and set throttle for 1000 to 1200 rpm.
(b) Switch on the following loads and observe the ammeter output increase as indicated.
1 Rotating beacon - 3 to 6 amps.
2 Navigation and instrument lights (bright position) - 4 to 6 amps.
3 Landing light - 7 to 9 amps.
If alternator does not meet above indications, refer to troubleshooting Chart 1. Follow trou-
bleshooting procedure outlined on the chart in a step by step fashion checking each cause and iso-
lation procedure under a given trouble before proceeding to the next step.
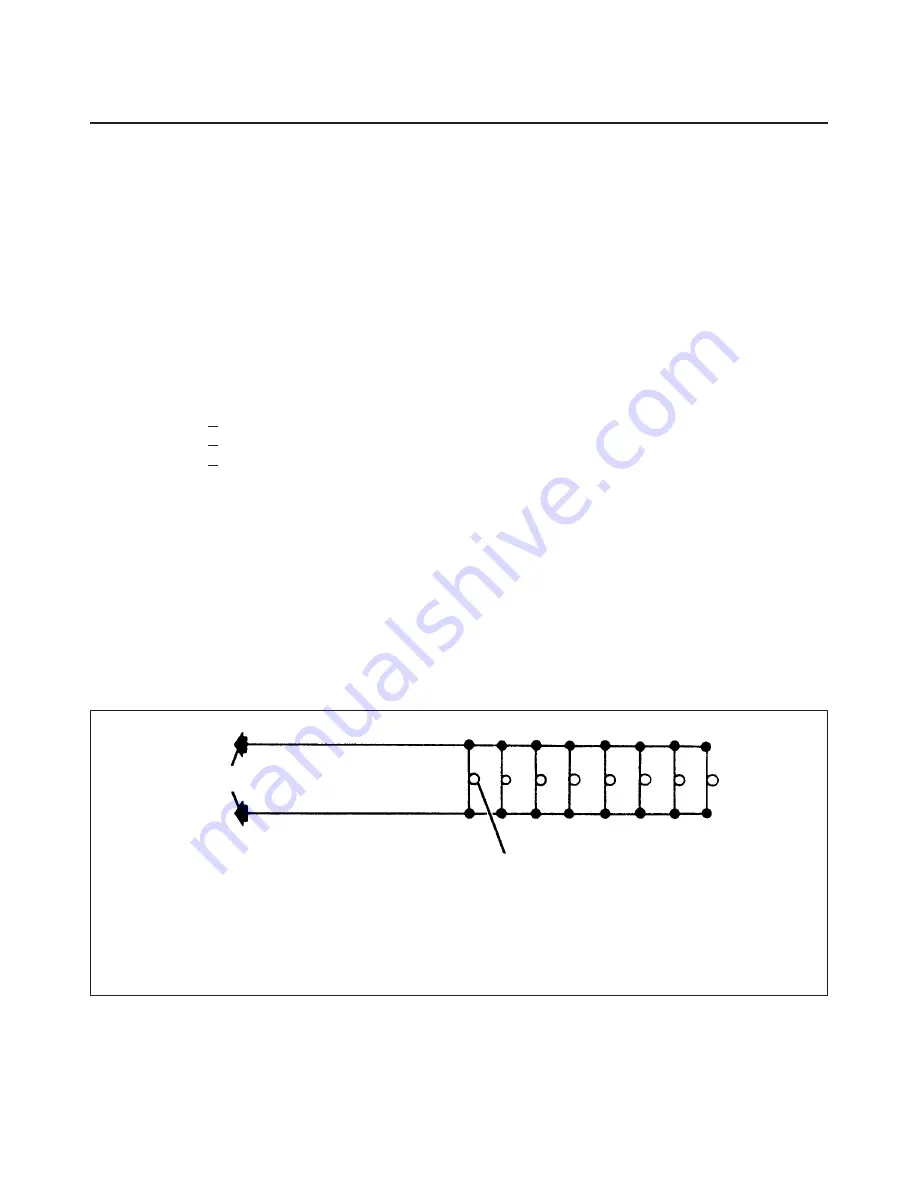
On airplanes without night-flying equipment, load required by test can be simulated by connect-
ing a lamp-bank load consisting of 8 landing lights wired in parallel from main bus (+) to airframe
ground (-). (Refer to Figure 4) or 8, 3-ohm, 100-watt resistors.
— NOTE —
On air-conditioned aircraft, full alternator output on ground
must be limited to not more than 10 minutes. Refer to Pilot’s
Operating Handbook.
Lamp-Bank Load
Figure 4
PIPER AIRCRAFT
PA-32R-301/301T
MAINTENANCE MANUAL
24-30-00
Page 24-11
Reissued: July 1, 1993
1K11
Alligat or clips
(8) 8 Amp Landing Light s
60 Ampere Alt ernat or
Summary of Contents for PA-32R-301T SARATOGA S
Page 26: ...CHAPTER 4 AIRWORTHINESS LIMITATIONS 1C1 ...
Page 29: ...CHAPTER 5 TIME LIMITS MAINTENANCE CHECKS 1C4 ...
Page 53: ...CHAPTER 6 DIMENSIONS AND AREAS 1D6 ...
Page 64: ...CHAPTER 7 LIFTING AND SHORING 1D21 ...
Page 68: ...CHAPTER 8 LEVELING AND WEIGHING 1E1 ...
Page 72: ...CHAPTER 9 TOWING AND TAXIING 1E5 ...
Page 76: ...CHAPTER 10 PARKING AND MOORING 1E9 ...
Page 80: ...CHAPTER 11 REQUIRED PLACARDS 1E13 ...
Page 92: ...CHAPTER 12 SERVICING 1F1 ...
Page 126: ...CHAPTER 20 STANDARD PRACTICES AIRFRAME 1G17 ...
Page 127: ...THIS PAGE INTENTIONALLY LEFT BLANK ...
Page 139: ...CHAPTER 21 ENVIRONMENTAL SYSTEMS 1H5 ...
Page 188: ...CHAPTER 22 AUTOFLIGHT 1J7 ...
Page 193: ...CHAPTER 23 COMMUNICATIONS 1J12 ...
Page 203: ...CHAPTER 24 ELECTRICAL POWER 1J22 ...
Page 263: ...CHAPTER 25 EQUIPMENT FURNISHINGS 2A13 ...
Page 269: ...CHAPTER 27 FLIGHT CONTROLS 2A20 ...
Page 332: ...CHAPTER 28 FUEL 2D11 ...
Page 363: ...CHAPTER 29 HYDRAULIC POWER 2E18 ...
Page 404: ...CHAPTER 30 ICE AND RAIN PROTECTION 2G16 ...
Page 470: ...CHAPTER 32 LANDING GEAR 3A13 ...
Page 550: ...CHAPTER 33 LIGHTS 3D24 ...
Page 562: ...CHAPTER 34 NAVIGATION AND PITOT STATIC 3E12 ...
Page 582: ...CHAPTER 35 OXYGEN 3F8 ...
Page 604: ...CHAPTER 37 VACUUM 3G6 ...
Page 616: ...CHAPTER 39 3G18 ELECTRIC ELECTRONIC PANELS MULTIPURPOSE PARTS ...
Page 620: ...CHAPTER 51 STRUCTURES 3G22 ...
Page 636: ...CHAPTER 52 DOORS 3H14 ...
Page 650: ...CHAPTER 55 STABILIZERS 3I4 ...
Page 662: ...CHAPTER 56 WINDOWS 3I16 ...
Page 670: ...CHAPTER 57 WINGS 3I24 ...
Page 688: ...CHAPTER 61 PROPELLER 3J18 ...
Page 704: ...CHAPTER 70 STANDARD PRACTICES ENGINES 3K10 ...
Page 708: ...CHAPTER 71 POWER PLANT 3K14 ...
Page 737: ...CHAPTER 73 ENGINE FUEL SYSTEM 4A13 ...
Page 749: ...CHAPTER 74 IGNITION 4B1 ...
Page 783: ...CHAPTER 77 ENGINE INDICATING 4C11 ...
Page 793: ...CHAPTER 78 EXHAUST 4C21 ...
Page 801: ...CHAPTER 79 OIL 4D5 ...
Page 805: ...CHAPTER 80 STARTING 4D9 ...
Page 819: ...CHAPTER 81 TURBINES 4D23 ...
Page 833: ...CHAPTER 91 CHARTS WIRING DIAGRAMS 4E13 ...


