background image


                                                                             User Manual 

Page 29 

ID station User Manual 


Appendix C.   

How to : Camfi  

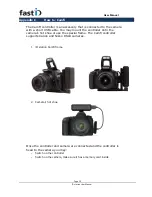
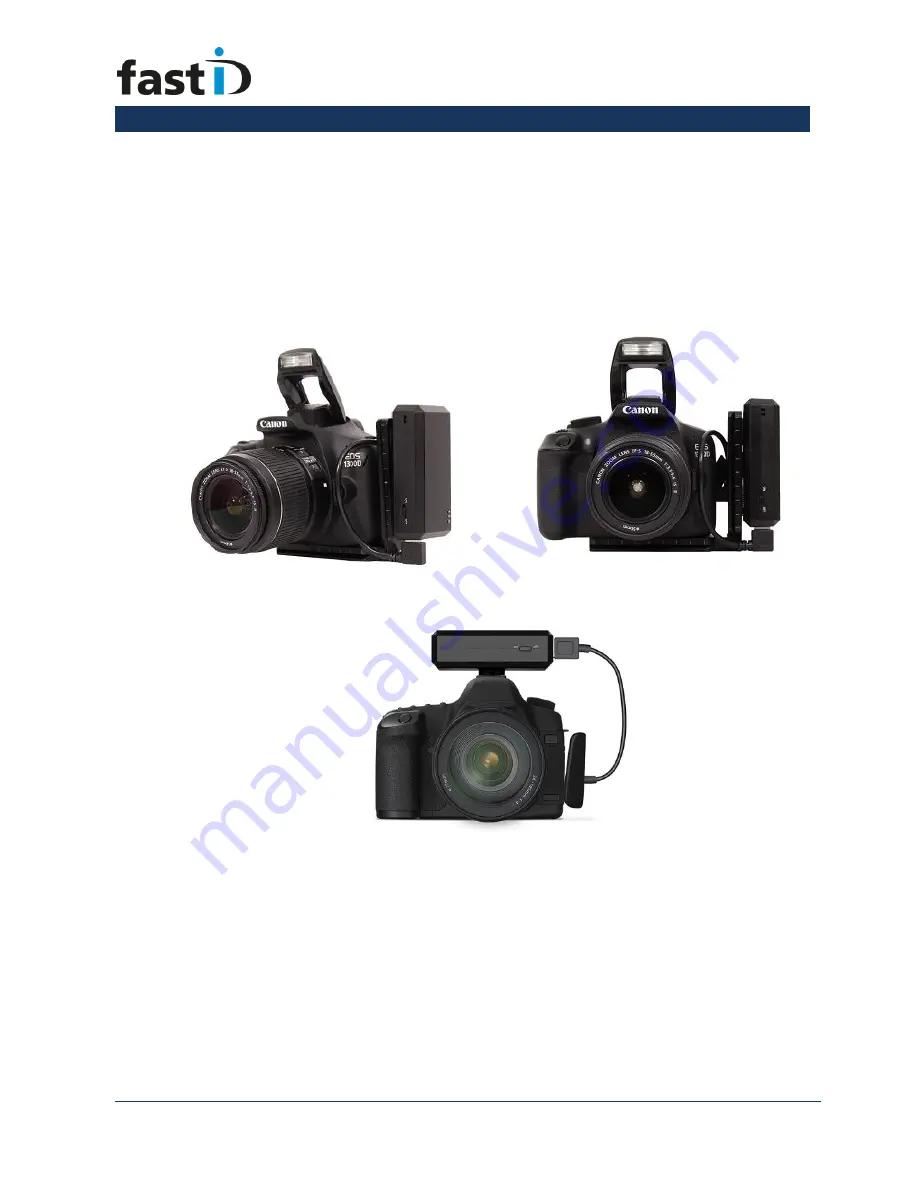
The CamFi controller is an accessory that is connected to the camera 

with a short USB cable. You may mount the controller onto the 

camera’s h

ot shoe or use the special frame. The Camfi controller 

supports Canon and Nikon DSLR cameras. 


1.


ID station Camfi frame 


2.


C

amera’s hot shoe 


Once the controller and camera are connected and the controller is 
fixed to the camera you may: 

-


Switch on the controller 

-


Switch on the camera, make sure it has a memory card inside 


Summary of Contents for fastID

Page 1: ...User Manual Page 1 ID station User Manual Version 7 4 3 Last change March 2017 User Manual ...

Page 2: ...latest release information videos and FAQ Please send your questions and comments to support idstation eu Contents 1 Setting up your system 2 Getting started 3 Take a picture 4 The software will process the picture 5 Quality Check 6 Print 7 Save 8 Email 9 Taking passport of VISA photos for another country 10 Editing the background Appendix A load paper and ribbon Appendix B How to Read Card mode A...

Page 3: ...fastID system is quite easy Unpack everything from the carton box and follow these simple steps Now switch on the ID console If the software reports Printer not on line and shows a red exclamation mark on the Print button you may have forgotten one of the above steps or you may have made not loaded the paper and ribbon properly Step 1 Take the printer connect it to a power outlet and switch it ON ...

Page 4: ...p window Network status button Click this button to see the status of connections internet and connection to Camfi of your fastID If you re not connected to internet you will get a red exclamation mark Home button Click this button to clear the screen and clear the session Use this button to prevent the customer s photo to remain on screen while the system is idle Exit button Click this button to ...

Page 5: ...insert the SD card into the reader then click The software will scan the card and show you the last pictures first These are explained in chapter 9 of this manual Wireless mode button If you click this button the software will try to connect to a Camfi controller The red exclamation mark appears if you re not connected to a Camfi controller The Camfi controller has its own user manual The Open Fil...

Page 6: ...the passport photo complies to the requirements for a USA passport photo The results are shown as green or red boxes Now click on the Print button The 78 behind the Print indicates the remaining number of prints Probably you will 300 as you ve just loaded a new ribbon and roll of paper into the printer Now after you ve clicked on the Print button the passport photos aren t printed immediately You ...

Page 7: ...utton it also contains information about the printer and the options you can select or deselect You may also select another Print template For now just click Print and the passport photos will be ready in about 10 seconds You have setup your new fastID and printed your first set of passport photos with it Now it s time to start taking pictures ...

Page 8: ...card reader The card reader is a simple USB card reader If it get damaged somehow it s easy and cheap to replace Now click on the Read Card button The software will scan the card and will show the last two pictures you ve just taken To see more browse forward and backwards Click on a preview to select it for processing There are a few things to consider Image rotation some take pictures in landsca...

Page 9: ... manual or read Appendix C Make sure your camera has a memory card inside otherwise it won t work Now take a couple of pictures and you will see them appear on the fastID console Click on one of them to start processing it There are a few things to consider when using the Camfi controller The fastID console must have a WiFi connection to the Camfi controller Otherwise the images will not transmit ...

Page 10: ...o The result is shown with an Overlay on top of it that will help you to check the face size and position Now the software will run a full quality test It will check if the automatically generated passport photo meets the official requirements for Image quality Face size and position and background color and uniformity All these requirements are described by the ICAO sometimes with extra local req...

Page 11: ...hat the size and position of the face in the passport photo is OK You should verify this using the overlay that is drawn over the photo Usually the face size is from chin to crown and the overlay will help you to make sure that is correct You can manually improve this using the up down left right and and buttons around the preview If you click on this button you will see a few more buttons for rot...

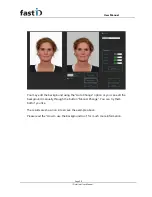
Page 12: ...r example the preferred background color for Canadian passport photos is white The preferred background color for passport photos for the UK is light gray If you capture an image using white background and you select UK as country you will get a background error You may use the background tool to change the background color Click on the button to start this sophisticated tool Please read the How T...

Page 13: ... of printing the default one click on Previous or Next To print the preview just click on the Print button You can also print the ICAO test report of this passport photo There are a few options such as oversized print the passport photos a little larger or with cutmarks The DUO is an option to print two sets of ID photos on one sheet of paper This option is typically used to print ID photos of som...

Page 14: ...a JPEG file The can change the file name destination folder such as USB stick or memory card file size The country template displayed in red will contain information about the preferred file size so if you change it you should be sure that the new file size meets the requirements When starting the Save tool the Photomatic software will check if the destination folder exists If not you will be show...

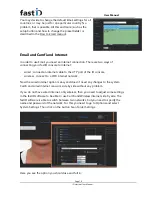
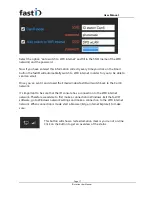
Page 15: ...0x70 If you need to Email an ID photo for another application such as a greencard for the US first change the country selection to USA greencard Most fields in the Email tool are preset with default values The selected country is shown in red to emphasize that it is processed and checked for this application only Just enter the Email address You may enter this using the keyboard or select one of t...

Page 16: ...cable to the UTP port of the ID console wireless connect to a WiFi internet network Now the wired internet option is easy and doesn t need any changes to the system Camfi and wired internet can work side by side without any problem If you do not have wired internet only wireless then you need to adjust some settings in the fastID software to be able to use Camfi and Wireless Internet side by side ...

Page 17: ...Once you ve sent it and closed the Email window fastID will switch back to the Camfi network It s important to be sure that the ID console has a connection to the WiFi internet network Therefore we advise to first make a connection in Windows Exit the fastID software go to Windows network settings and make a connection to the WiFi internet network When connection is made start a browser Edge Inter...

Page 18: ...ntry first select that template Click on the country button A new window will open showing a list of all available country templates In fact this window can be viewed in two modes with flags or in lists example below The checkbox upper left New Layout will switch between the two modes Click on the template you need and click on the Select button For example if you to take a passport photo for a Ge...

Page 19: ...ting another country template If the background color is rejected because it s white and the country template specifies it should be gray you will see a red box Click on it and you will start the Background tool Chapter 9 The Background tool The Background tool is designed to check and improve the background color of the passport photo This may be necessary when taking passport photos for other co...

Page 20: ...ound using the Auto Change option or you can edit the background manually through the button Manual Change You can try them both if you like The results are shown on screen see the example above Please read the How to use the Background tool for much more information ...

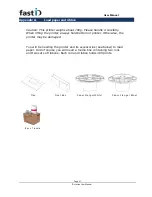
Page 21: ...lifting the printer always hold bottom of printer Otherwise the printer may be damaged You will be needing the printer and its accessories see below to load paper And of course you will need a media box containing two rolls and two sets of ribbons Each roll and ribbon holds 300 prints Tray Box of media Dust Box Paper Flange White Paper Flange Blue ...

Page 22: ...nit Attention Do not open the drawer unit quickly or with unnecessary force Do not press the drawer unit or place a heavy object other than paper after opening the drawer unit Insert the ribbon as shown Note that the PINK bar is placed in the lowest holder pink on the left side and the GREEN bar is placed in the highest holder green part right ...

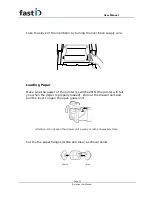
Page 23: ...aper Make sure the power of the printer is switched ON the printer will tell you when the paper is properly loaded Pull out the drawer unit and pull the lever to open the open guide unit Attention Do not open the drawer unit quickly or with unnecessary force Put the the paper flanges white and blue as shown below Blue White ...

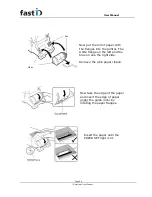
Page 24: ...s into the printer The white flange on the left and the blue on one the right side Remove the pink paper ribbon Now take the edge of the paper and insert the edge of paper under the guide roller by rotating the paper flanges Insert the paper until the PAPER SET light is lit Blue White ...

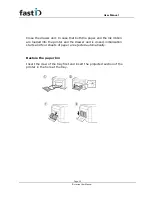
Page 25: ...he paper and the ink ribbon are loaded into the printer and the drawer unit is closed initialization starts and four sheets of paper are ejected automatically Restore the paper bin Insert the claw of the tray first and insert the projected section of the printer in the hole at the tray ...

Page 26: ...d it will scan the card looking for the a folder called DCIM This is the default folder all cameras use to save images If the DCIM folder is found the software will subsequently scan all folders inside the DCIM folder The software will select the most recent folder Then the images inside that folder will be shown as previews on screen the last one taken will be shown first The software shows just ...

Page 27: ...card is not in the reader or not properly inserted it will not be detected and hence not shown in this Dialog box Otherwise select the card and the folder you want to scan and clik OK The software will continue scanning the selected folder You may preset the rotation of imported images using the System Settings in the Options menu ...

Page 28: ...ge 28 ID station User Manual Here you can preset the rotation as well as the default folder that the software will search for at first when reading the card Remember to clean up the memory card every once and a while ...

Page 29: ...ou may mount the controller onto the camera s hot shoe or use the special frame The Camfi controller supports Canon and Nikon DSLR cameras 1 ID station Camfi frame 2 Camera s hot shoe Once the controller and camera are connected and the controller is fixed to the camera you may Switch on the controller Switch on the camera make sure it has a memory card inside ...
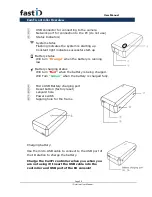
Page 30: ...nge when the battery is running low Battery charging status Will turn Red when the battery is being charged Will Turn Green when the battery is charged fully Micro USB Battery charging port Reset button factory reset Lanyard hole Power switch tapping hole for the frame Charging battery Use the micro USB cable to connect to the USB port of the ID station to charge the battery Charge the CamFi contr...

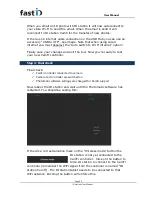
Page 31: ...settings Internet When using the CamFi controller your ID station will be connected to the CamFi controller So your ID station is not connected to WiFi Internet How to use internet then Options 1 Preferred Connection Connect your ID station to a wired internet connection cable LAN We have or can provide a USB to UTP connector for this 2 Let ID station switch automatically to a Wi Fi internet when ...

Page 32: ...you re ready to test your new CamFi controller Step 4 Final check Final check CamFi controller connected to camera Camera and controller are switched on Photomatic software settings are changed for CamFi support Now reboot the ID station and wait until the Photomatic software has restarted You should be seeing this If there s a red exclamation mark on the Wireless mode button the ID station is not...

Page 33: ...that needs to be charged every day The CamFi kit contains a USB cable for charging the battery inside the controller The battery doesn t need to be removed from the controller Just insert the USB cable into the controller and on the other end insert the USB cable into a USB port of the ID station or a AC adapter for 5V USB devices Supported cameras Canon 1Dx 5D II 5D III 5Ds 5Dsr 6D 7D 7D II 50D 6...

Reviews: