User Manual
Page 3
ID station User Manual
1. Set up your system
fastID comes in one box, containing:
1.
fastID printer
2.
brown carton box containing the ID console, cables and accessories
3.
Camfi controller [only if ordered]
The Camfi controller is an optional accessory. So you need to order it separately
along with the new fastID passport photo system. A Camfi controller is a WiFi
device that you connect to your camera. It will transfer any image you take
automatically to the fastID.
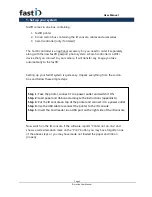
Setting up your fastID system is quite easy. Unpack everything from the carton
box and follow these simple steps:
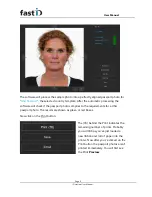
Now switch on
the ID console. If the software reports “Printer not on
-
line” and
shows a red exclamation mark on the “Print” button you may have forgotten one
of the above steps or you may have made not loaded the paper and ribbon
properly.
Step 1
: Take the printer, connect it to a power outlet and switch it ON
Step 2
: Load paper and ribbon according to the instructions (appendix A)
Step 3
: Put the ID console on top of the printer and connect it to a power outlet
Step 4
: Use the USB cable to connect the printer to the ID console
Step 5
: Insert the Card reader in an USB port on the right side of the ID console

