


3-17
SV61027 Rev. D
DA700/DA750 Features and Adjustments • 3
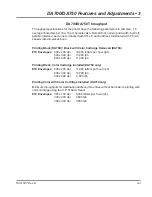
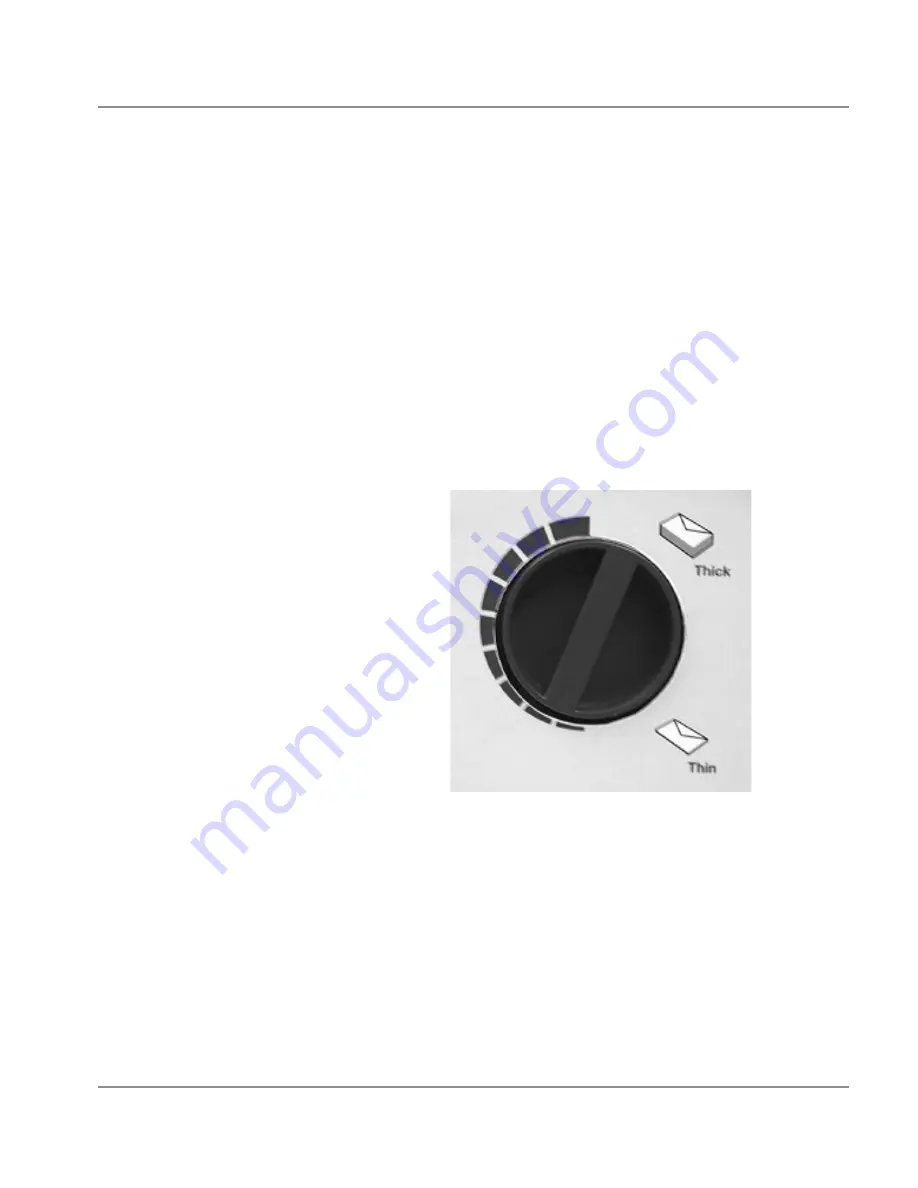
2. While running test samples, turn the knob
counter-clockwise to close the gap until the desired
quality of printing is obtained.
NOTE:
Adjusting the media thickness knob too far
counter clockwise may cause smearing or jamming.
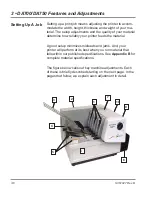
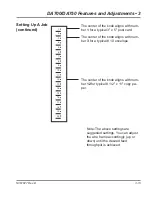
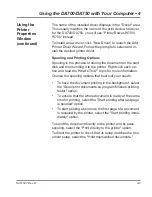
7. Adjust the Media Thickness Knob
The media thickness knob sets the distance between the
printhead and the material. Use it to compensate for differ-
ent material thicknesses and to increase clarity of the print-
ing.
1. Estimate the thickness of the material to be run
NOTE: All material in a run must be the same thickness.
For envelopes with 0 - 2 inserts, start with the media thick-
ness knob set as shown below. For 1/4" thick material,
start with setting all the way at the Thick side. For 1/8",
start 1/2 way.
Setting Up A Job
(continued)
Summary of Contents for ADDRESSRIGHT DA700
Page 1: ...AddressRight Printer DA700 DA750 Operator Guide US English Version ...
Page 6: ...iv SV61027 Rev D Table of Contents This page is intentionally blank ...
Page 14: ...1 8 SV61027 Rev D 1 DA700 DA750 Printer Overview This page is intentionally blank ...
Page 50: ...3 22 SV61027 Rev D 3 DA700 DA750 Features and Adjustments This page is intentionally blank ...
Page 120: ...A 36 SV61027 Rev D Appendix A Control Panel Menus This page is intentionally blank ...
Page 132: ...B 12 SV61027 Rev D Appendix B DA700 DA750 Specifications This page is intentionally blank ...
Page 133: ...Index ...
Page 139: ......