2
Solar Designer User Guide 28961 V0513
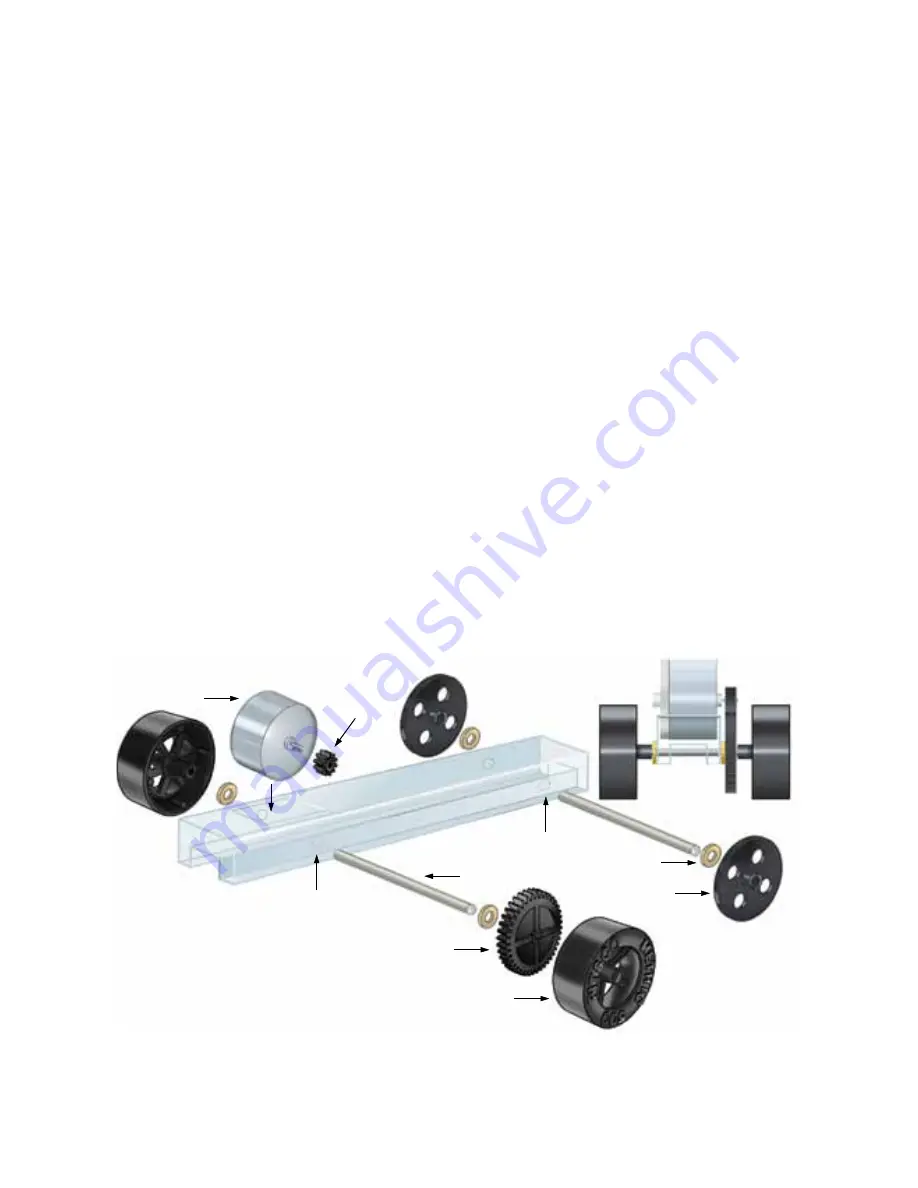
Materials Included
• Solar panel
• 2 axles
• Body tube (3/4" x 1" x 9")
• 4 washers
• 2 front (narrow) wheels
• DC motor
• 2 rear (wide) wheels
• Gear font
• Adhesive tab
Items Required (not included)
• 9/64" drill bit
• Ruler
• Drill or drill press
• Sandpaper
• Utility or hobby knife (optional)
• Cool-melt glue gun (optional)
Building Your Solar Car
1. Deburr the axles by brushing the ends against sandpaper. This will
make it easier to push the axles into the wheels.
2. Using a drill or drill press with a 9/64" bit, drill two holes in the plastic
body as shown in Figure 1. Hole A should be drilled 1-3/4" from the
back of the body (under the motor slot) and 1/2" from the top of
the body (opposite of the grooved side). Drill through all four plastic
surfaces, keeping the drill bit parallel to the top and perpendicular to
the side.
3. Hole B should be drilled the same way, with the center of the hole
1-3/4" from the front of the body and 1/2" from the top of the body
(Figure 1).
End View
Rear Wheel
Front Wheel
Axle
Hole A
Hole B
Gear O
Motor
Gear I
Washer
Figure 1


