background image

12

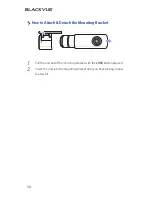
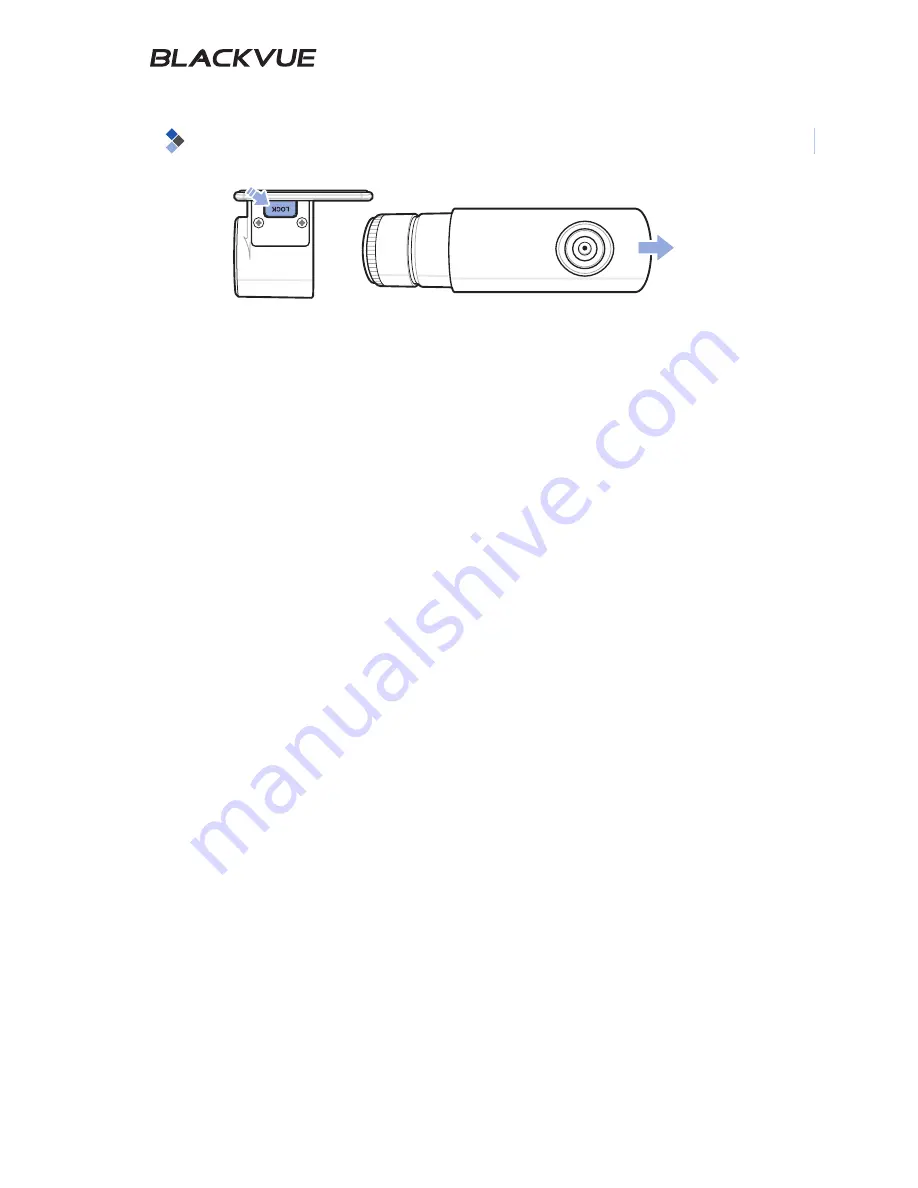
How to Attach & Detach the Mounting Bracket

1


Pull the unit out of the mounting bracket with the 

LOCK

 button pressed.

2


Insert the unit into the mounting bracket until you hear clicking sound, 
to attach it.

Summary of Contents for BlackVue DR3500-FHD

Page 1: ......

Page 2: ......

Page 3: ...he BlackVue 13 Checking Installation Position 13 How to Insert Remove the microSD Card 14 Installation Video Recording 16 Normal Recording 16 Parking Mode Recording 17 Event Recording Simple Video Pla...

Page 4: ...ed by this product constitutes the secondary data that may help to determine the circumstances of an accident Pittasoft Co Ltd will not be held responsible for any loss or damage caused by any acciden...

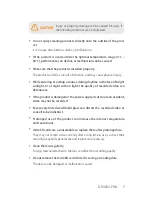
Page 5: ...ater y y If any foreign matter gets inside the product detach the power cord straightaway Call the sales headquater for repair y y Do not operate the product while driving It can cause an accident Sto...

Page 6: ...ectric shock or malfunction y y If smoke or an unsual smell is emitted from the power cord detach it immediately Call the sales headquater or the dealer y y Keep the terminal of the power cord clean A...

Page 7: ...r at night with no light the quality of recorded video can deteriorate y y If the product is damaged or the power supply is cut due to an accident video may not be recorded y y Excessively tinted wind...

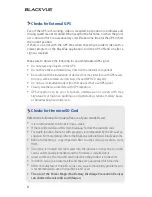
Page 8: ...in tunnels underpasses or streets with may Skyscrapers or high rise buildings and generating stations military bases or broadcasting transmitters etc Checks for the microSD Card Refer to the following...

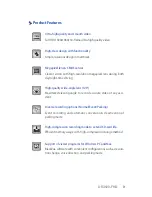
Page 9: ...riving High quality wide angle lens 120 Maximized viewing angle to record accurate video of any acci dent ulw Diverse recording options Normal Event Parking Event recording and automatic conversion de...

Page 10: ...ncluding BlackVue Software microSD Card Reader Note y y Pictures of the components may differ from the actual ones y y To enhance the performance of the product components may be changed without prior...

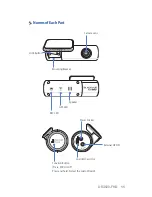
Page 11: ...HD 11 Names of Each Part Camera Lens Mounting Bracket LOCK Button microSD Card Slot Function Button Press MIC On Off Press and hold Format the microSD card Power Socket External GPS IN Speaker GPS LED...

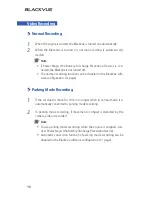
Page 12: ...How to Attach Detach the Mounting Bracket 1 Pull the unit out of the mounting bracket with the LOCK button pressed 2 Insert the unit into the mounting bracket until you hear clicking sound to attach...

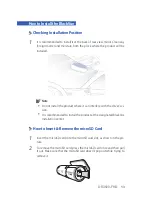
Page 13: ...Do not install the product where it can interfere with the driver s vi sion y y It is recommended to install the product at the designated BlackVue installation center How to Insert Remove the microS...

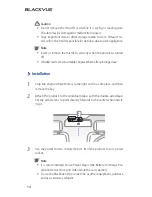
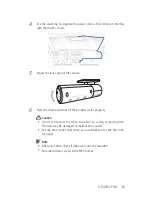
Page 14: ...ace them after prolonged use Installation 1 Stop the engine where there is some light and in a safe place and then remove the key 2 Attach the product to the windshield glass with the double sided tap...

Page 15: ...the engine and check if the product works properly Caution y y Do not remove the microSD card while it is saving or reading data The data may be damaged or malfunction caused y y Set the time time zon...

Page 16: ...in the BlackVue soft ware configuration 31 page Parking Mode Recording 1 If the car doesn t move for 10 min or longer when in normal mode it is automatically converted to parking mode recording 2 In p...

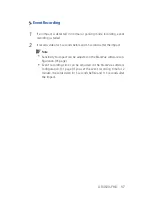
Page 17: ...conds before and 55 seconds after the impact Note y y Sensitivity to impact can be adjusted in the BlackVue software con figuration 33 page y y Event recording time can be adjusted in the BlackVue sof...

Page 18: ...e 2 Insert the microSD card into the smartphone 3 Open an application to play back recorded videos and select the movie you want to play back Note y y How to play back recorded videos may differ betwe...

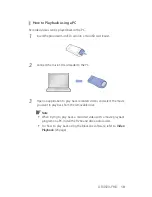
Page 19: ...microSD card reader to the PC 3 Open an application to play back recorded videos and select the movie you want to play back from the removable drive Note y y When trying to play back a recorded video...

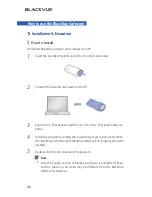
Page 20: ...3 Execute the BlackVueSetup HD exe file in the BlackVue Software folder 4 Install the program according the installation program instruction When the installation is finished the BlackVue software ico...

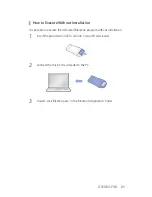
Page 21: ...n It is possible to execute the dedicated BlackVue program without installation 1 Insert the provided microSD card into a microSD card reader 2 Connect the microSD card reader to the PC 3 Double click...

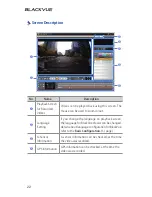
Page 22: ...anguage Setting If you change the language on playback screen the language for BlackVue Viewer can be changed details about language configuration for BlackVue refer to the Basic Configuration 31 page...

Page 23: ...ne This is a parking mode recording file and marked with blue in the timeline 6 Timeline Video can be explored with the date hr min and sec of when a video was recorded 7 Playback Option Button The pl...

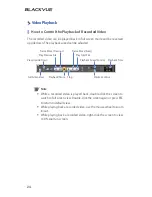
Page 24: ...ntrol Playback Time Play Previous File Play Next File Playback Speed Control Frame Move Previous Frame Move Next Note y y While a recorded video is played back double click the screen to switch to ful...

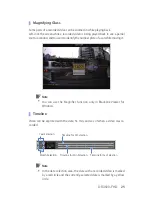
Page 25: ...hile moving it Note y y You can use the Magnifier function only in BlackVue Viewer for Windows Timeline Video can be explored with the date hr min and sec of when a video was re corded Year Selection...

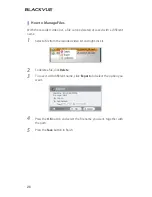
Page 26: ...rent name 1 Select a file from the recorded video list and right click it 2 To delete a file click Delete 3 To save it with different name click Export and select the option you want 4 Press the OK bu...

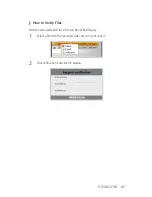
Page 27: ...DR3500 FHD 27 How to Verify Files With the recorded video list a file can be verified forgery 1 Select a file from the recorded video list and right click it 2 Click Verification and click OK button...

Page 28: ...eo list and play it back 2 Press the Map tab 3 With the button or mouse wheel the map can be zoomed in out Speed Unit Change Map Type Selection Car Location Map Zoom In Out Note y y To use the map ser...

Page 29: ...ayed on the map 3 Double click the map to play back the recorded video of the nearest driving route from the clicked point Speed Unit Change Car Location Record Starting Point Driving Route Currently...

Page 30: ...utton 4 Select the file name you want together with the path and click the Save button Note y y JPG and BMP formats are supported for image files How to Print Out an Image While playing back a recorde...

Page 31: ...corded video For the details refer to the How to Configure theTime 32 page 2 Image Setting Resolution quality and the brightness of the re corded video can be configured According to the resolution re...

Page 32: ...laying a recorded video please set Quality to Normal low end compatible How to Configure Time If the model is not equipped with GPS set the time manually for use If you do not set the time the time of...

Page 33: ...ivity tab 2 After changing the configuration click Save Close Note y y For details about advanced sensitivity configuration refer to Ad vanced Sensitivity Configuration 34 page 1 2 No Function Descrip...

Page 34: ...at the bottom of the recorded video which is played back 4 Move the control bar up down to adjust the sensitivity range If the range is wide it is less sensitive and if the range is narrow it is more...

Page 35: ...urned on off Voice direction item or the volume can be changed How to Apply Configuration The user s configuration can be applied to the product 1 Insert the microSD card into the product For details...

Page 36: ...p file 3 Unzip the file and copy the BlackVue folder to the microSD card 4 Insert the microSD card in BlackVue and turn on the power Then up grade will automatically occur Note y y After firmware upgr...

Page 37: ...Vertical 55 Resolution Frame Full HD 1920x1080 30fps Full HD 1920x1080 15fps HD 1280x720 30fps HD 1280x720 15fps D1 720x480 30fps Resolution frame can be changed Video Compression Mode MP4 GPS Externa...

Page 38: ...rs LED State Recording REC GPS Security Boot up Red Light Green Light Blue Light Recording Normal Red Blinking Blue Blinking Event Red Blinking Blue Blinking Parking Red Blinking Blue Blinking GPS ON...

Page 39: ...20MIN 4HR10MIN 4HR10MIN 5HR40MIN 8HR30MIN High 4HR30MIN 5HR40MIN 5HR40MIN 8HR30MIN 11HR20MIN Normal 6HR50MIN 8HR30MIN 8HR40MIN 11HR20MIN 17HR10MIN Normal low end compatible 4HR30MIN 6HR50MIN 6HR50MIN...

Page 40: ...ge device component It might be necessary to delete all the data from the product for A S Service So it is required for us ers to back up important data by themselves before requesting A S Service For...

Page 41: ...ates uses and can radiate radio frequency energy and if not installed and used in accordance with the instructions may cause harmful interference to radio communi cations However there is no guarantee...

Page 42: ...turer Pittasoft Co Ltd Korea Address Gasan dong BYC HIGHCITY A 7th floor 131 Gasan digital 1 ro Geumcheon gu Seoul 153 718 Republic of Korea Sales Headquater Tel 82 2 6947 4670 3 Fax 82 2 6947 4699 e...

Reviews: