background image

Page 4

For technical questions, please call 1-888-866-5797.

Item 64982

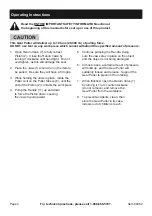
Operating Instructions

  Read the ENTIRE IMPORTANT SAFETY INFORMATION section at 

the beginning of this manual before set up or use of this product.


This Gear Puller will deliver up to 10 tons (20,000 lb.) of pulling force.   
DO NOT use tool on any work piece which cannot withstand the specified amount of pressure.

1.  Open Return Valve (7) to fully retract 

Piston (2).  Close the Return Valve by 
turning it clockwise until hand tight.  Do not 
overtighten, as this will damage the seal.

2.  Place the Jaws (1) around (or in) the item to 

be pulled.  Be sure they will have a firm grip.

3.  While holding the Jaws in place, rotate the 

Puller Unit on the Puller Sleeve (6), until the 
end of the Piston (2) contacts the work piece. 

4.  Pump the Handle (11) up and down 

to force the Piston down, causing 
the Jaws to pull upward. 

5.  Continue pumping the Handle, being 

sure the Jaws stay in place on the object 
and the object is not being damaged.

6.  In most cases, a certain amount of pressure 

will build up, and the Gear Puller will 
suddenly loosen and release.  Support the 
Gear Puller to prevent it from falling.

7.  When finished, open the Return Valve (7) 

by turning it 1 turn counterclockwise 
(do not remove), and remove the 
Gear Puller from the workpiece.

8.  To prevent accidents, clean, then 

store the Gear Puller in its case, 
indoors out of children’s reach.

Summary of Contents for 64982

Page 1: ...ference 18k When unpacking make sure that the product is intact and undamaged If any parts are missing or broken please call 1 888 866 5797 as soon as possible Copyright 2018 by Harbor Freight Tools A...

Page 2: ...ed could result in minor or moderate injury Addresses practices not related to personal injury Important Safety Information WARNING Read all safety warnings and instructions Failure to follow the warn...

Page 3: ...o holes and then flip over the Jaws for the other two settings Each can be for both inside and outside pulling Determine whether to use the upper or lower holes in the Jaws and which way the Jaws shou...

Page 4: ...pulled Be sure they will have a firm grip 3 While holding the Jaws in place rotate the Puller Unit on the Puller Sleeve 6 until the end of the Piston 2 contacts the work piece 4 Pump the Handle 11 up...

Page 5: ...any other condition which may affect its safe operation 2 AFTER USE clean external surfaces with clean cloth 3 Lightly oil the threads and pivoting joints periodically to keep them operating smoothly...

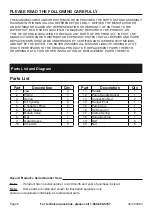
Page 6: ...g 1 19 Bolt 6 20 Nut 6 PLEASE READ THE FOLLOWING CAREFULLY THE MANUFACTURER AND OR DISTRIBUTOR HAS PROVIDED THE PARTS LIST AND ASSEMBLY DIAGRAM IN THIS MANUAL AS A REFERENCE TOOL ONLY NEITHER THE MANU...

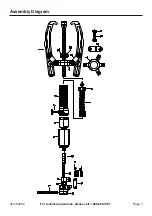
Page 7: ...Page 7 For technical questions please call 1 888 866 5797 Item 64982 Assembly Diagram...

Page 8: ...o the above limitation of exclusion may not apply to you THIS WARRANTY IS EXPRESSLY IN LIEU OF ALL OTHER WARRANTIES EXPRESS OR IMPLIED INCLUDING THE WARRANTIES OF MERCHANTABILITY AND FITNESS To take a...

Reviews: