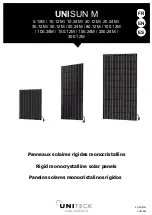
3.6 Attach the Touch Panel main body onto the mounting
bracket, use the hook on the mounting bracket to fix it securely
in place.
3.8 The installation is completed. Please follow the on-screen step-by-step guide to complete the setup once powered. The
Touch Panel may take up to 60 seconds to be ready for configuration after being powered.
* If the connection of a LAN cable is not feasible for the installation environment, the PIXIE Ambience Touch Panel supports 2.4GHz Wi-Fi
for wireless network connection. In this scenario, please ensure the Wi-Fi signal coverage, and set up the network connection for the
touch panel on the screen interface after installation.
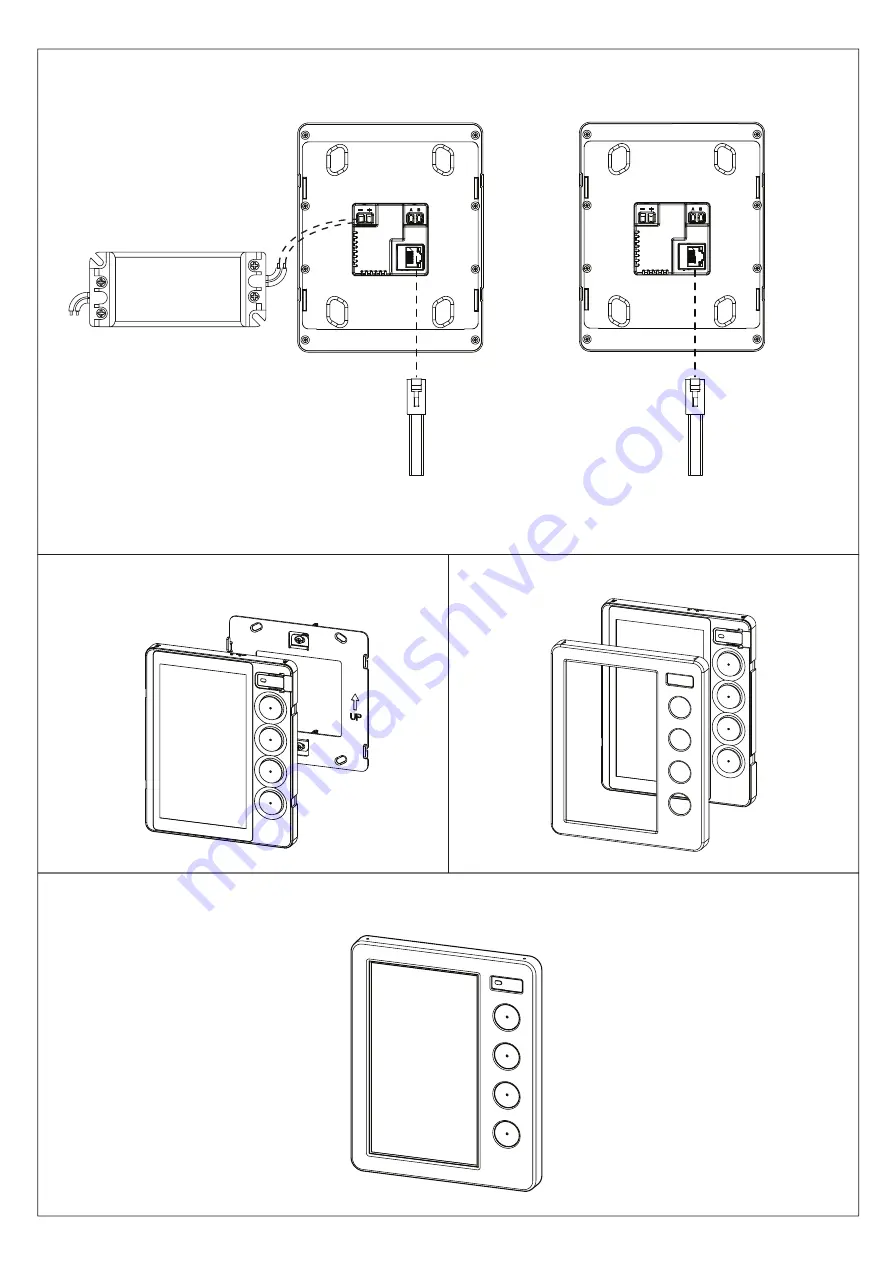
3.5 Connect power and network (LAN cable* recommended) to the touch panel main body.
Option 2 - PoE
Option 1 - DC 12V power supply (min. 15W)
LAN Cable
Constant Voltage
Power Supply
Output: 12V DC
Power rating: 15W or above
Power Supply
LAN Cable
3.7 Mount the faceplate onto the touch panel main body.


