13
Setting up
USB storage
device
Connecting with your devices (continued)
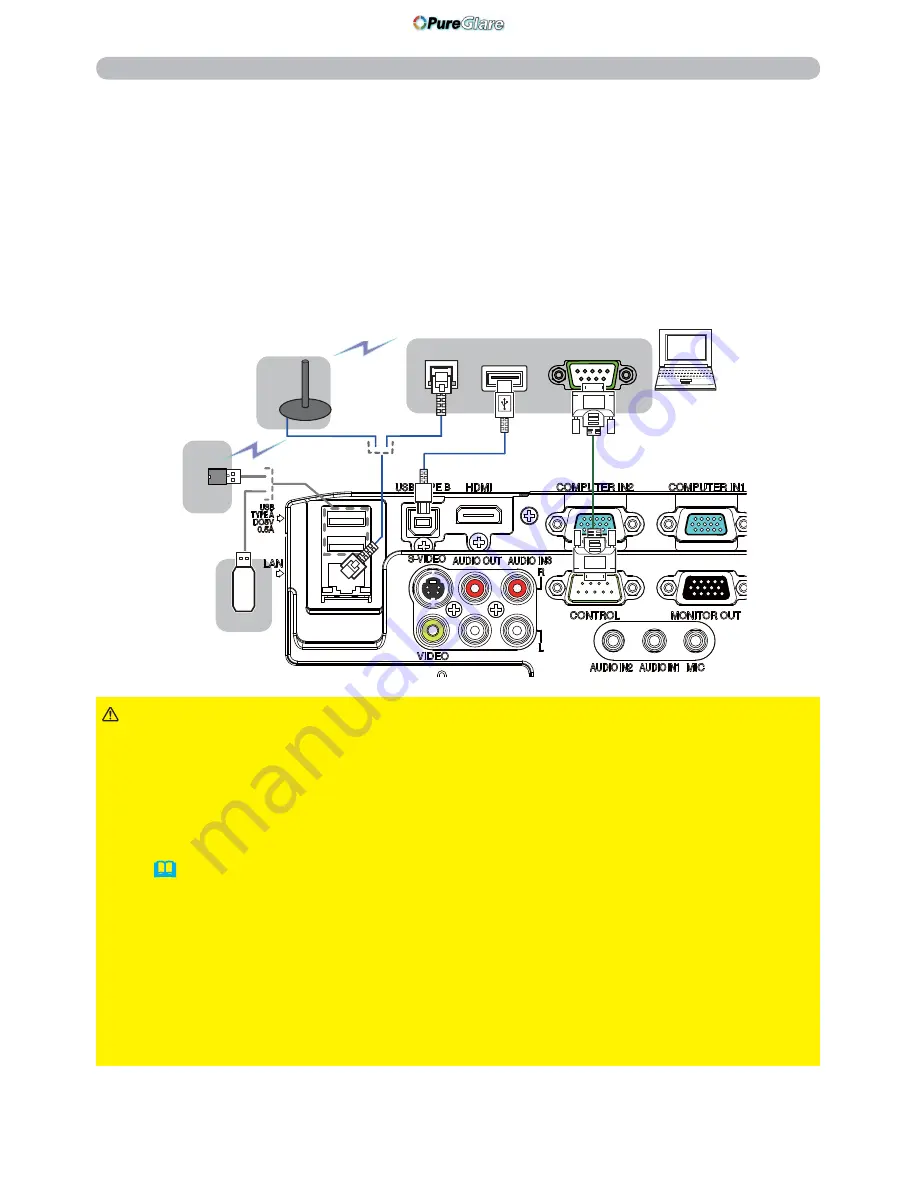
To use network functions of the projector, connect the
LAN
port with the
computer's LAN port, or with an access point that is connected to the computer
with wireless LAN, using a LAN cable. To use NETWORK BRIDGE function,
also connect the
CONTROL
port and an RS-232C port of the external device to
communicate as a network terminal. See the
User's Manual - Network Guide
for
details of the network functions.
►Before connecting the projector to a network system be sure
to obtain the consent of the administrator of the network.
►Do not connect the
LAN
port to any network that might have the excessive voltage.
►The designated USB wireless adapter that is sold as an option is required to
use the wireless network function of this projector.
►Before removing the USB storage device from the port of the projector, be
sure to use the REMOVE USB function on the thumbnail screen to secure your
data (
90
)
.
►Do not use any extension cable or device when connecting the adapter to
the projector. Before you insert or pull out the USB wireless adapter from the
projector, turn off the power of the projector and pull out the power cord’s plug
from the outlet. Do not touch the USB wireless adapter while the projector is
receiving AC power.
►To connect both the LAN cable and USB device to the projector, use a LAN
cable that is fl at on the side where the plug’s wire is visible. Otherwise, both of
them cannot be connected correctly, or the wire may break (malfunction).
CAUTION
RS-232C
LAN
USB TYPE A
Access point
Computer
(continued on next page)
http://www.pureglare.com.au


