~
63
~
3.
Check that the appliance and the power cord are not visible damaged.
4.
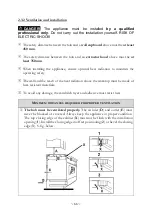
Install the appliance in a dry and well-ventilated place.
5.
Do not install the appliance in a place where it may come in contact with water
or rain; otherwise, the insulation of the electrical system will be damaged.
6.
Install the appliance on a
level, dry and solid floor
. Check the correct installation
with a bubble level.
7.
Remove the complete packaging material (inside and outside the appliance)
before initial operation.
8.
Connect the appliance to the mains properly.
9.
Manufacturing residues or oil having remained in the appliance or on the heating
element may cause some odours and smoke emission. These are normal
operational parameters, which will disappear after several uses. Open the room
door or a window to ensure proper ventilation.
10.
The nameplate is situated inside the appliance or at the back.
2.2 Pre-installation requirements
➢
The worktop must be made of heat-resisting material. Structural elements should
not interfere with the installation area.
➢
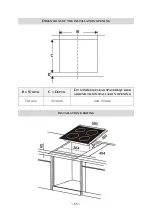
The thickness of the worktop for the installation of the hob must be
at least 30
mm
.
➢
The wall sat the hob should be covered with heat-resistant material, e.g., ceramic
tiles.
➢
During operation of the appliance (hob and / or oven), adjacent furniture or
housing and all materials used for installation must be able to resist a temperature
of min. 85 °C above the ambient temperature of the room the appliance is
installed in.
➢
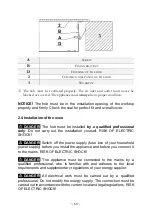
If you are not sure whether the adjacent cabinets or the back wall are heat-
resistant, you should provide a clearance of approx. 20 mm around the oven.
The installation of the appliance (hob and oven) must meet the safety
requirements as well as the legal rules and regulations.


