54
2.
Slightly tilt the appliance back and secure it in this position. Do not tilt the
appliance more than 45
0
!
3.
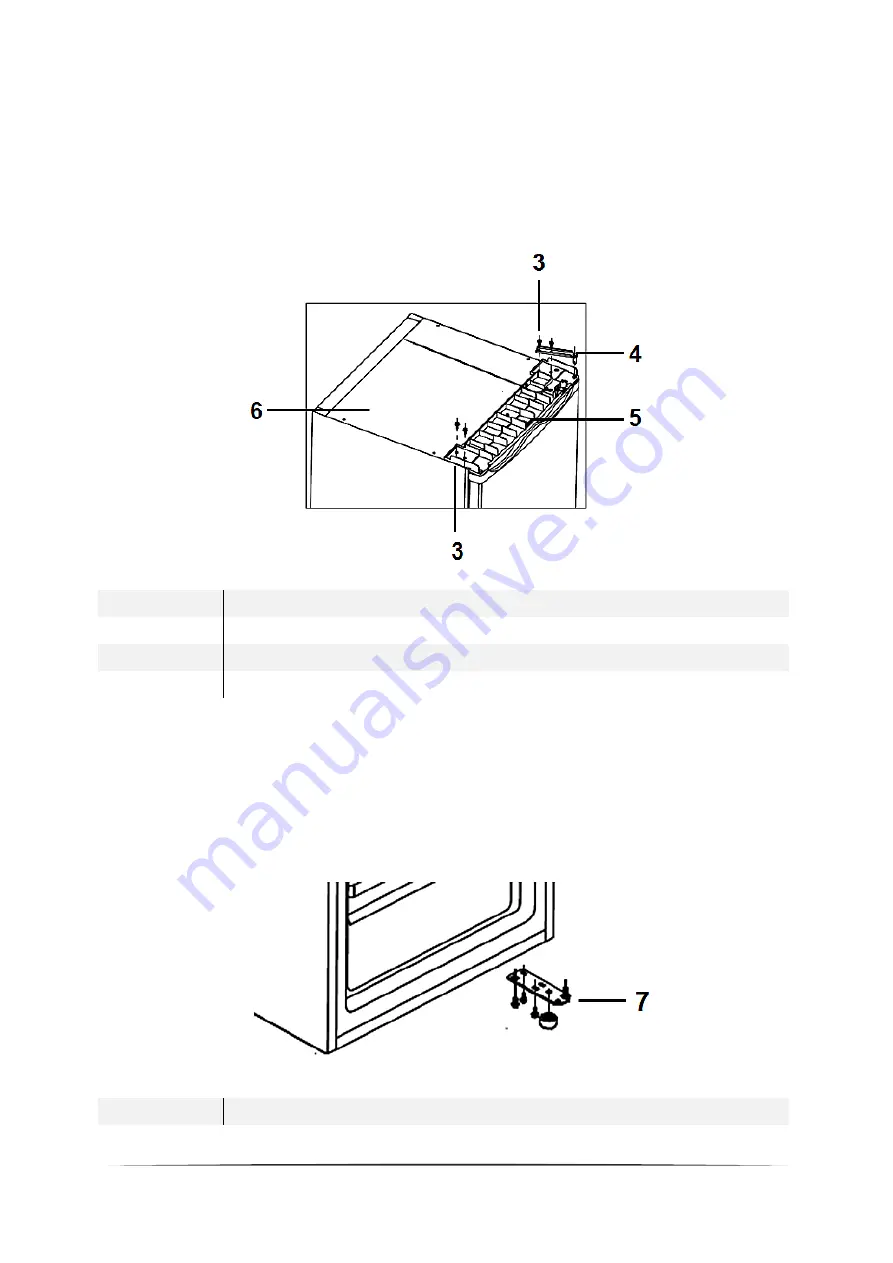
Unscrew the four screws (3) on the top of the appliance (6) and remove the
right upper hinge (4) and the bracket of the hinge axis (5) (s. fig. below).
3
S
CREWS
4
U
PPER HINGE
5
B
RACKET OF THE HINGE AXIS
6
T
OP OF THE APPLIANCE
4.
Open the door slightly. Lift the door and remove it carefully.
5.
Unscrew the adjustable feet on both sides of the appliance.
6.
Unscrew the right bottom hinge bracket (7) and remove it (s. fig. below).
7
B
OTTOM HINGE BRACKET


