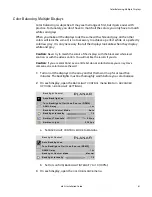
Auto Setup Options
m52L Installation Guide
67
Auto Setup Options
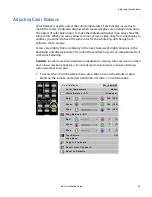
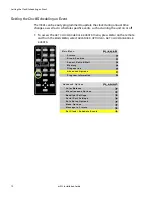
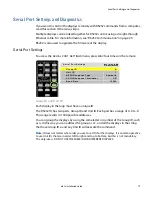
Auto Setup Options determine what will happen automatically and what will not. To
access the
AUTO
SETUP
OPTIONS
menu, press
MISC
five times on the remote.
Note:
Auto Setup Options rely on the content displayed on the screen. You will get best
results with something that has a lot of changes, such as a checkerboard pattern.
Each checkbox in the
AUTO
SETUP
OPTIONS
menu can be turned on or off by
selecting it (using the up/down arrows) and pressing
ENTER
.
Retry on Lost Signal
Occurs only when the present signal (picture) disappears or changes in some way. If
this item is not checked, the display will not try to sync to a new signal. Keep this
menu item checked.
Note:
Searching will
not
occur because the picture goes black. Black, from video or from a
computer, is a valid picture. The signal itself (the sync pulses) must be lost to trigger a search.
“Do” Checkboxes
Each
DO
that is checked
will adjust the display, one process at a time, until all the
processes are completed.
In the following situations, each of the checked
DO
boxes will be completed in the
order shown in the menu:
• If a new signal is acquired, either through selecting a different connector or
because the source picture has changed modes, such as from WXGA to UXGA.
• When you press the
SETUP
button on the remote.
Do Frequency and Do Phase
These work separately to find the frequency and phase of the computer picture and
adjust to them. These work best on a picture that has a lot of sharp changes in
brightness, such as text (adjacent white and black pixels).
A u t o S e t u p O p t i o n s
R e t r y o n L o s t S i g n a l
D o F r e q u e n c y
D o P h a s e
D o P o s i t i o n
Summary of Contents for m52L
Page 1: ...m52L Installation Guide ...
Page 2: ......
Page 4: ...iv m52L Installation Guide ...
Page 10: ...Table of Contents vi m52L Installation Guide ...
Page 20: ...Tools and Other Things You May Need 10 m52L Installation Guide ...
Page 28: ...Lining Up Screen Brackets 18 m52L Installation Guide ...
Page 32: ...About UPS Supplies 22 m52L Installation Guide ...
Page 58: ...Sharpness Settings 48 m52L Installation Guide ...
Page 60: ...Picture Position 50 m52L Installation Guide ...
Page 64: ...Using Planar s Big PictureTM 54 m52L Installation Guide ...
Page 68: ...Viewport Adjustment 58 m52L Installation Guide ...
Page 74: ...Tips for Color Balancing 64 m52L Installation Guide ...
Page 88: ...Turn Backlight Off With No Source and DPMS Delay 78 m52L Installation Guide ...
Page 92: ...Controlling With RS232 Commands 82 m52L Installation Guide ...
Page 102: ...Deleting a Configuration 92 m52L Installation Guide ...
Page 106: ...Where to Go From Here 96 m52L Installation Guide ...
Page 116: ...106 m52L Installation Guide ...
Page 118: ...Rear View 108 m52L Installation Guide Rear View 0 3 0 7 5 7 2 7 21 0 00 3 ...
Page 120: ...110 m52L Installation Guide ...


