High Temperature Warning
m52L Installation Guide
77
High Temperature Warning
The m52L has a feature that allows the display to recognize when it is too hot and to
automatically reduce the backlight intensity in an effort to cool itself down.
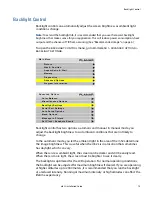
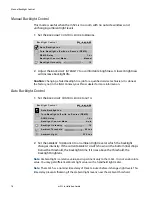
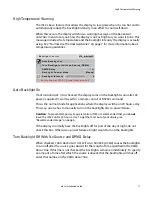
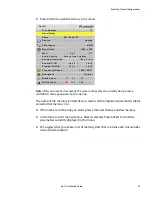
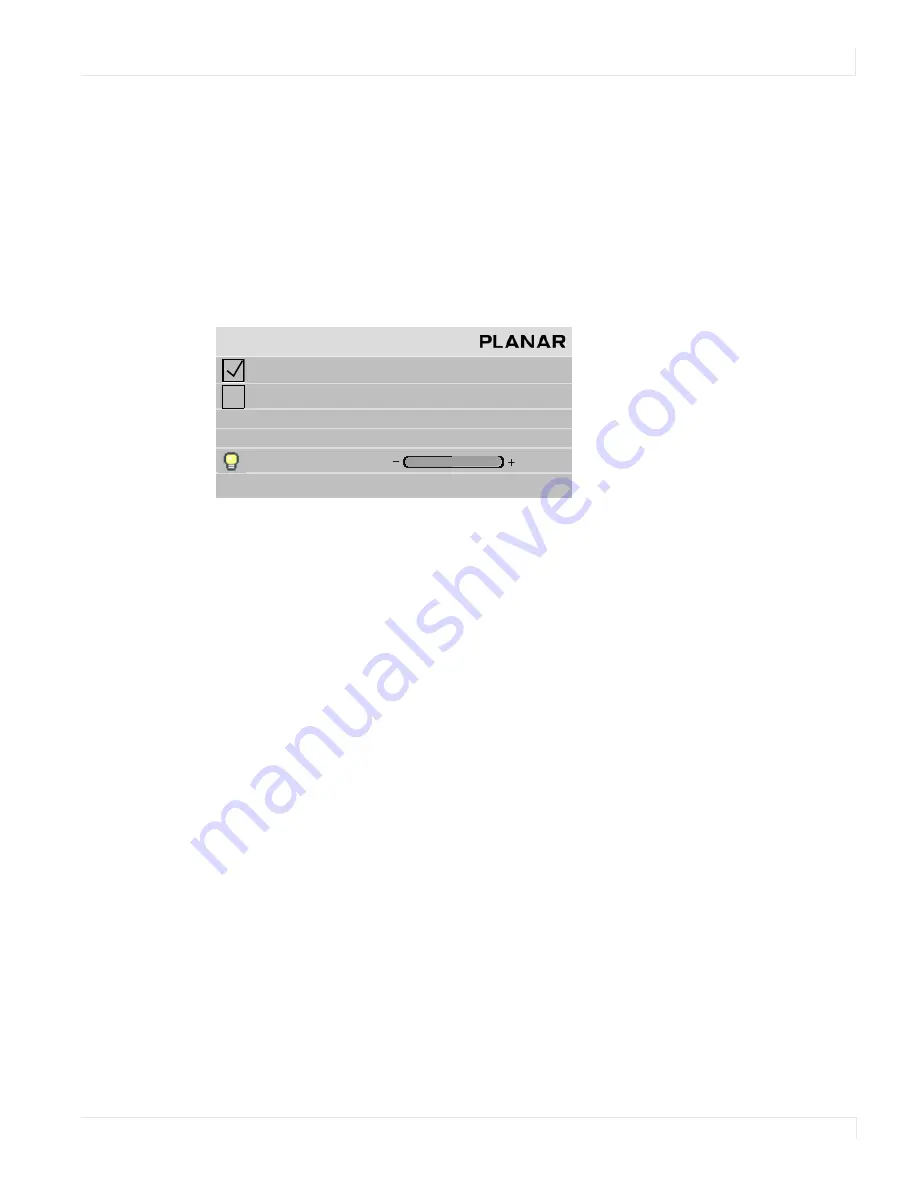
When this occurs, the display will show a warning message on the
BACKLIGHT
CONTROL
menu to let you know the display is not as bright as you want it to be. This
message includes the temperature and the backlight intensity the display is actually
using. See "Normal Use Thermal Guidelines" on page 7 for more information about
temperature guidelines.
Auto Backlight On
If
AUTO
BACKLIGHT
ON
is checked, the display turns on the backlights soon after AC
power is applied. It won’t wait for a remote control or RS232 command.
This is the normal mode for applications where the displays will be on 24 hours a day.
This way, no one has to manually turn on the backlights after a power failure.
Caution:
To prevent temporary image retention (TIR), is recommended that you do
not
leave the m52L on for 24 hours a day. To get the most out of your display, see
"Recommended Usage" on page 6.
If the displays normally have the backlights off for part of the day or night, do not
check this box. Otherwise a power failure at night would turn on the backlights.
Turn Backlight Off With No Source and DPMS Delay
When checked,
TURN
BACKLIGHT
OFF
WITH
NO
SOURCE
(
DPMS
)
causes the backlights
to turn off after the source goes absent for the length of time specified in the
DPMS
DELAY
line. If this line is not checked, the backlights remain on indefinitely. To specify
an amount of time after which the source is absent that the backlights will shut off,
enter that number in the
DPMS
DELAY
line.
B a c k l i g h t C o n t r o l
A u t o B a c k l i g h t o n
Tu r n B a c k l i g h t o f f w i t h n o S o u r c e ( D P M S )
D P M S D e l a y
1 h r
B a c k l i g h t C o n t r o l M o d e
M a n u a l
B a c k l i g h t I n t e n s i t y
6
U n i t i s t o o h o t ( 5 1
º
C ) . A c t u a l I n t e n s i t y i s 5 .
Summary of Contents for m52L
Page 1: ...m52L Installation Guide ...
Page 2: ......
Page 4: ...iv m52L Installation Guide ...
Page 10: ...Table of Contents vi m52L Installation Guide ...
Page 20: ...Tools and Other Things You May Need 10 m52L Installation Guide ...
Page 28: ...Lining Up Screen Brackets 18 m52L Installation Guide ...
Page 32: ...About UPS Supplies 22 m52L Installation Guide ...
Page 58: ...Sharpness Settings 48 m52L Installation Guide ...
Page 60: ...Picture Position 50 m52L Installation Guide ...
Page 64: ...Using Planar s Big PictureTM 54 m52L Installation Guide ...
Page 68: ...Viewport Adjustment 58 m52L Installation Guide ...
Page 74: ...Tips for Color Balancing 64 m52L Installation Guide ...
Page 88: ...Turn Backlight Off With No Source and DPMS Delay 78 m52L Installation Guide ...
Page 92: ...Controlling With RS232 Commands 82 m52L Installation Guide ...
Page 102: ...Deleting a Configuration 92 m52L Installation Guide ...
Page 106: ...Where to Go From Here 96 m52L Installation Guide ...
Page 116: ...106 m52L Installation Guide ...
Page 118: ...Rear View 108 m52L Installation Guide Rear View 0 3 0 7 5 7 2 7 21 0 00 3 ...
Page 120: ...110 m52L Installation Guide ...

