background image


Function Description 

Icon 

Function 

Function Description 


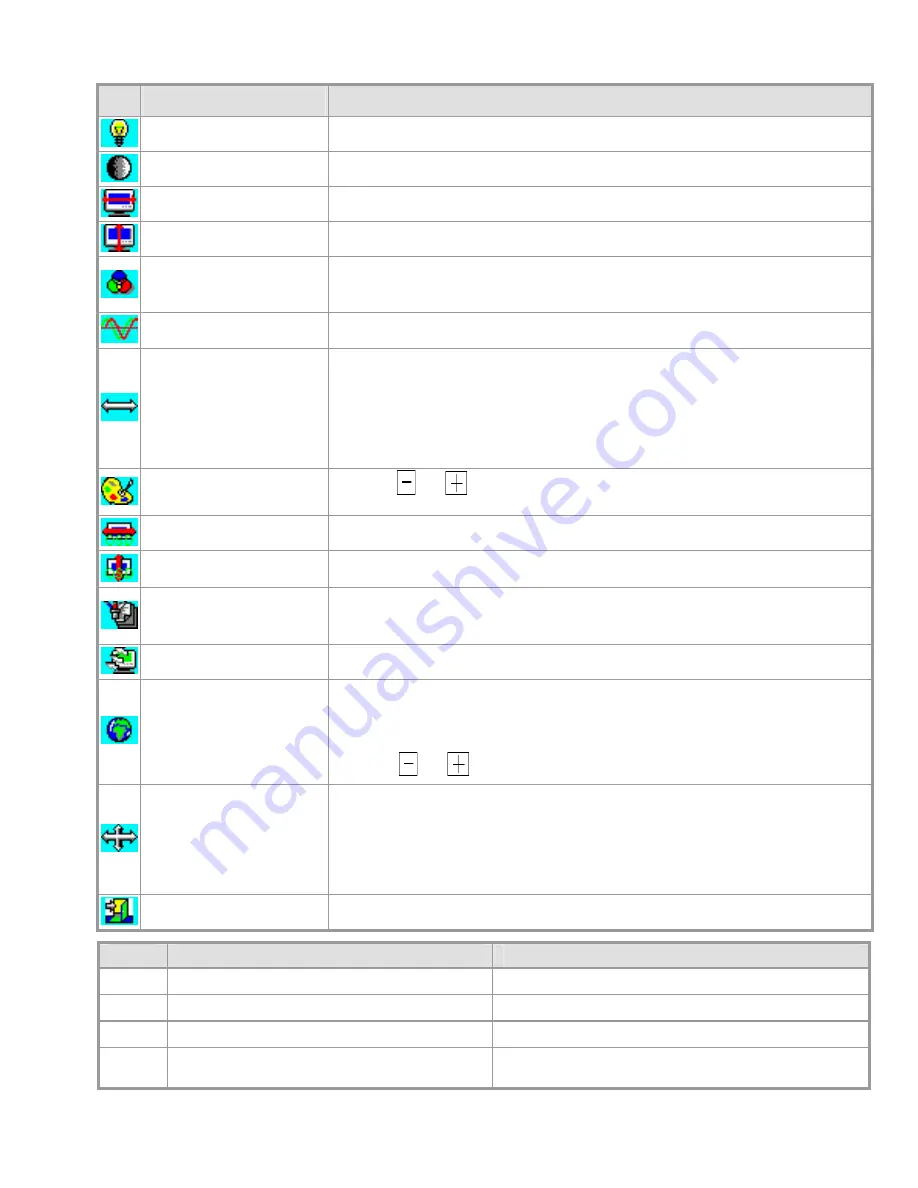
Brightness 

101 scales of brightness are available to choose from (0 to 100). 


Contrast 

101 scales of contrast are available to choose from (0 to 100).   


H. Position 

This function let's you adjust the display's horizontal position. 


V. Position 

This function let's you adjust the display's vertical position. 


OSD Transparency 

This function let's you set the transparency of the OSD menu. The transparency is 
adjustable from 0 to 10. 11 scales are available. 


Phase 

A total of 101 scales (0 to 100) are available to adjust the focus and clarity of the display. 


Clock 

This function carries a frequency-tracking feature that offers users better stability 
and clarity. 101 scales (from -50 to +50) are available on the mode that is 
currently running. The adjustable range can be variable in different modes. This 
function records the deviated number of clock period between input timing and 
supported timing. The clock value may not be ”0” after Auto Adjustment when 
the input timing is different from supported timing. 


Color Temperature 

Push the 

 or 


button to select a different color temperature. Please see 

the diagram below for function and description. 


OSD H. Position 

This function moves the OSD menu window horizontally. 


OSD V. Position 

This function moves the OSD menu window vertically. 


Graph / Text 

Because the H and V-Frequencies of both 640 x 400 70Hz, and 720 x 400 70Hz, are 
the same, this function let's you manually select either 640 x 400 (graphics 
mode), or 720 x 400 (text mode).


Recall 

The recall function will return all adjusted parameters to factory preset values. 


Language 

Nine OSD language options are available:   

English, German, French, Spanish, Italian, Japan, Russian, Simplified Chinese and 
Traditional Chinese. 

Press the 

 or 


adjustment control button to select other language. 


Auto Adjustment 

The Auto Adjustment function let you adjust the display size, clock and phase to 
obtain the best viewing settings. This process will take 3 ~ 5 seconds to 
complete. Attention: After Auto Adjustment, the display might display wrong 
position or size, if it has received a pattern which has no screen border.   


Exit 

Saves the values of this setting and exits the OSD menu function. 


Icon 

Function 

Description 

9300 

CIE coordinated Color Temperature of 9300°K 

Sets the CIE coordinate color temperature to 9300°K 

7500 

CIE coordinated Color Temperature of 7500°K


Sets the CIE coordinate color temperature to 7500°K


6500 

CIE coordinated Color Temperature of 6500°K 

Sets the CIE coordinate color temperature to 6500°K 

User 

Three colors (Red, Green, Blue) can be 
adjusted from the OSD menu 

Sets the settings to a user defined CIE Temperature. 

Summary of Contents for PL1702

Page 1: ...PL1702...

Page 2: ...Connecting the Display 5 Connecting the AC Power 6 Connecting the Audio Cable 6 Setting Up the LCD Monitor 6 Power Management System 6 Display Controls 7 User Controls 7 Adjusting the Monitor s Displ...

Page 3: ...encetoradioortelevisionreception whichcanbe determinedbyturningtheequipmentoffandon theuserisencouragedtotrytocorrecttheinterferencebyoneormoreofthe followingmeasures Reposition or relocate the receiv...

Page 4: ...or 4 140 F Storing the LCD Monitor outside this range could result in permanent damage 6 If any of the following occurs immediately unplug your monitor and call an authorized technician Monitor to PC...

Page 5: ...sure that the LCD Monitor has enough space around it for sufficient airflow Though the LCD Monitor uses very little power some ventilation is needed to ensure that the Monitor does not become too hot...

Page 6: ...and pull downo the hinge to release Interface for Arm Applications Before installing to mounting device please refer to Fig 1 3 The rear of this LCD display has four integrated 4 mm 0 7 pitches thread...

Page 7: ...ord is connected to the LCD Monitor 2 Turn on the LCD Monitor s power switch located on the bezel of the monitor Power Management System This LCD Monitor complies with the VESA DPM Power Management gu...

Page 8: ...udio Volume decrease For PL1700M only Adjust decrease Adjusting the Monitor s Display The monitor has four function control buttons to select among functions shown on OSD menu designed for easy user v...

Page 9: ...u window horizontally OSD V Position This function moves the OSD menu window vertically Graph Text Because the H and V Frequencies of both 640 x 400 70Hz and 720 x 400 70Hz are the same this function...

Page 10: ...buttons The monitor will show an OSD Lock Out message for 5 10 seconds and the message will disappear automatically Repeat this step to unlock Option 2 OSD Power button lock all 5 buttons including th...

Page 11: ...cal 7 5 mA rms Video Input Signal Input Impedance Polarity Amplitude Multi mode Supported Analogue RGB 0 7Vp p 75 Ohm 2 Positive Negative 0 0 7 0 05 Vp Horizontal Frequency 30 80 kHz Vertical Frequenc...

Page 12: ...zation Polarity Positive and negative Plug Play Supports VESA DDC2B functions External Connection Power Input AC input AC socket Video Cable 15 pin D sub connector Audio Cable Stereo Jack Environment...

Page 13: ...40 640 64 16 120 31 5 VESA 480 75Hz 75 500 480 3 1 16 720x400 31 469 900 720 108 18 54 28 322 VGA 400 TEXT 70 087 449 400 2 12 35 832x624 APPLE 49 725 1152 832 64 32 224 57 2832 MAC 800 74 55 667 624...

Page 14: ...1 36 1280x960 75 00 1800 1280 112 96 312 135 00 75Hz 75 00 1000 960 3 1 36 64 1688 1280 112 48 248 108 1280x1024VESA 1 024 60Hz 60 1066 1024 3 1 38 80 1688 1280 144 16 248 135 1280x1024VESA 1 024 75Hz...

Page 15: ...rmal PC operating environment PROBLEM There is no picture on LCD Monitor If there s no picture on the LCD Monitor please perform the following steps 1 Make sure the power indicator on the LCD Monitor...

Page 16: ...nitor touch screen or other Planar products visit our online store at www PlanarOnline com or find other stores who carry Planar products at http www planar com howtobuy Technical Support Visit Planar...

Page 17: ...HDPNRD3700I...

Reviews: