background image


3

Important Safety Instructions 
 

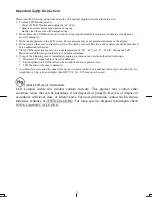
Please read the following instructions carefully. This manual should be retained for future use.   
1.


To clean LCD Monitor screen: 
-- Power off LCD Monitor and unplug the AC Cord.   

  -- Spray a non-solvent cleaning solution onto a rag.   

-- Gently clean the screen with dampened rag.   

2.


Do not place the LCD Monitor near a window. Exposing the monitor to rain water, moisture or sunlight can 
severely damage it.   

3.


Do not apply pressure to the LCD screen. Excess pressure may cause permanent damage to the display.   

4.


Do not remove the cover or attempt to service this unit by yourself. Servicing of any nature should be performed 
by an authorized technician.   

5.


Store LCD Monitor in a room with a room temperature of -20° ~ 60°C (or -4° ~ 140°F). Storing the LCD 
Monitor outside this range could result in permanent damage.   

6.


If any of the following occurs, immediately unplug your monitor and call an authorized technician.   
*    Monitor to PC signal cable is frayed or damaged.   
*    Liquid spilled into LCD Monitor or the monitor has been exposed to rain.   
*    LCD Monitor or the case is damaged.   

7.


A certified line is required to connect this device to a power outlet. For a nominal current up to 6A and a device 
weight above 3 kg, a line not lighter than H05VV-F, 3G, 0.75 mm

2

 must be used. 


Important Recycle Instruction: 

LCD Lamp(s) inside this product contain mercury. This product may contain other 
electronic waste that can be hazardous if not disposed of properly. Recycle or dispose in 
accordance with local, state, or federal Laws. For more information, contact the Electronic 
Industries Alliance at WWW.EIAE.ORG. For lamp specific disposal information check 
WWW.LAMPRECYCLE.ORG

Summary of Contents for PL2010M

Page 1: ...PL2010M...

Page 2: ...download documentation view answers to frequently asked questions FAQs and get troubleshooting advice or email Planar your support question Talk to a Customer Service Representative To contact Planar...

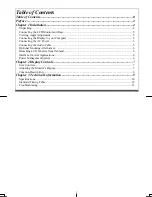
Page 3: ...er 5 Connecting the AC Power 5 Connecting the Audio Cable 5 Optional Mounting Alternatives 6 Detaching LCD Monitor from Its Stand 6 Interface for Arm Applications 6 Power Management System 6 Chapter 2...

Page 4: ...no guarantee that interference will not occur in a particular installation If this equipment does cause harmful interference to radio or television reception which can be determined by turning the equ...

Page 5: ...C or 4 140 F Storing the LCD Monitor outside this range could result in permanent damage 6 If any of the following occurs immediately unplug your monitor and call an authorized technician Monitor to...

Page 6: ...x LCD Monitor User s Manual Monitor to PC VGA Cable Power Cord Monitor to PC DVI D Cable Stereo Jack Audio Cable Register Your Planar Products Today Thank you for choosing Planar To assure you receive...

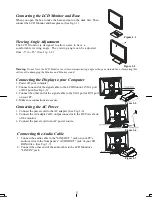
Page 7: ...ur Computer 1 Power off your computer 2 Connect one end of the signal cable to the LCD Monitor s VGA port or DVI port See Fig 1 5 3 Connect the other end of the signal cable to the VGA port or DVI por...

Page 8: ...g as illustrated in Figure 1 4 These specifications meet the VESA Flat Panel Monitor Physical Mounting Interface Standard paragraphs 2 1 and 2 1 3 version 1 dated 13 November 1997 Note Please using 4m...

Page 9: ...d press the right button to increase the OSD setting 7 External Headphone Jack The monitor speakers will be disabled when using an external headphone or external speakers 8 Input Select Press this but...

Page 10: ...vertically Graph Text Because the H and V Frequencies of both 640 x 400 70Hz and 720 x 400 70Hz are the same this function let s you manually select either 640 x 400 graphics mode or 720 x 400 text mo...

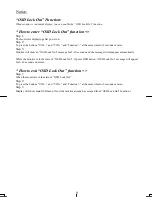
Page 11: ...ow an OSD Lock Out message for 5 10 seconds and the message will disappear automatically While the monitor is in the state of OSD Lock Out if press OSD button OSD Lock Out message will appear for 5 10...

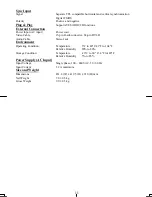
Page 12: ...75 Hz Audio Input 500mVrms Output 2W 2W Control Power switch hard and soft types On Off switch with LED indicator OSD Brightness Contrast Horizontal Position Vertical Position Phase Clock Display Mode...

Page 13: ...pin D sub connector 24 pin DVI D Audio Cable Stereo Jack Environment Operating Condition Temperature 5 C to 40 C 41 F to 104 F Relative Humidity 20 to 80 Storage Condition Temperature 20 C to 60 C 4...

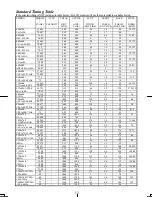
Page 14: ...35 156 1024 800 72 24 128 36 SVGA 56 25 625 600 2 1 22 800x600 37 879 1056 800 128 40 88 40 VESA 600 60Hz 60 317 628 600 4 1 23 800x600 48 077 1040 800 120 56 64 50 VESA 600 72Hz 72 188 666 600 6 37...

Page 15: ...ndows and back to the normal PC operating environment PROBLEM There is no picture on LCD Monitor If there s no picture on the LCD Monitor please perform the following steps 1 Make sure the power indic...

Page 16: ...006 1992 www planar com 2006 Planar Systems Inc Planar is a registered trademark of Planar Systems Inc Other brands and names are the property of their respective owners Technical information in this...

Reviews: