background image


7

Chapter 2 Display Controls 


User Controls 

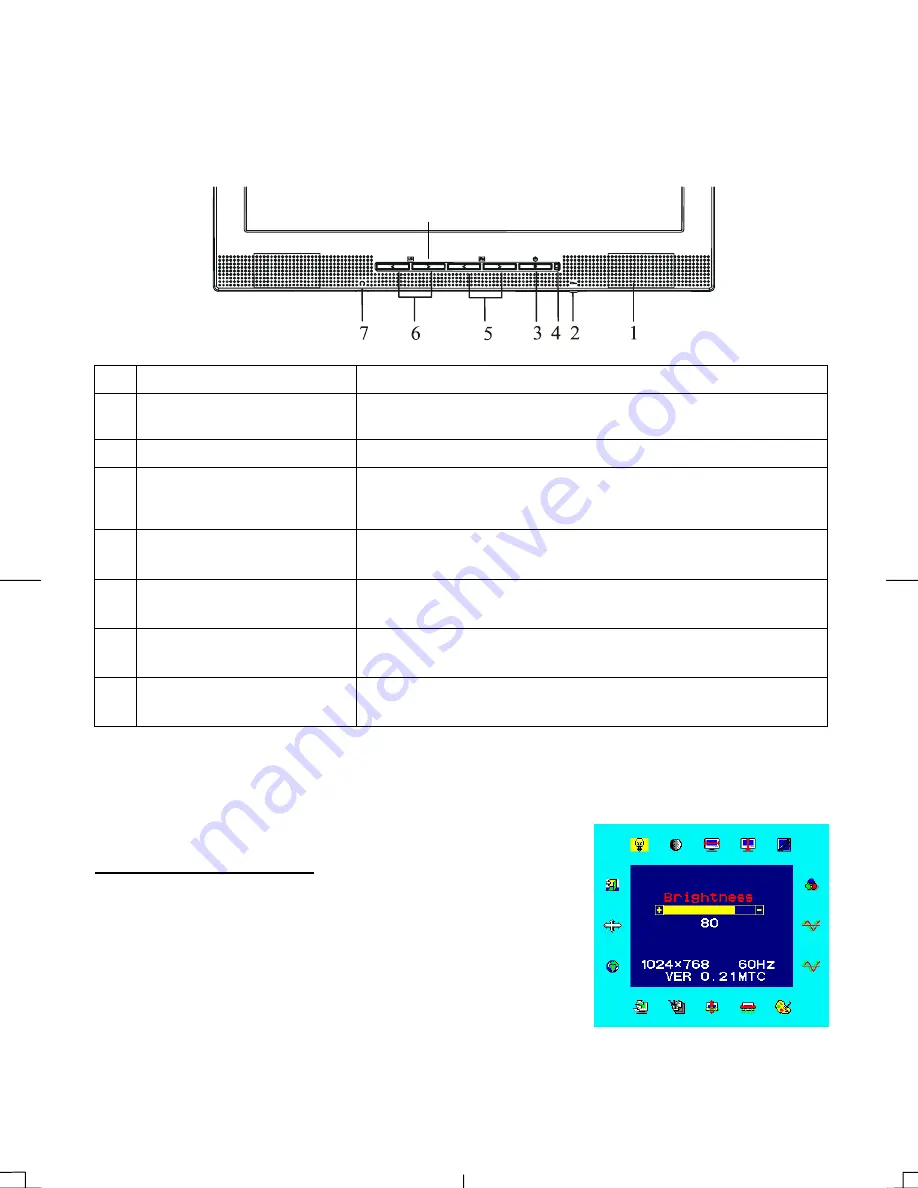
A brief description and the location of all LCD Monitor functions control and indicator: 


Figure 2-1 

Stereo Speakers 

PC Audio Stereo output. 

Speaker Volume Control


Increase Volume - Turn the knob clock wise. 

Decrease Volume - Turn the knob counter clock wise. 

Soft Power Switch


Press the soft power switch to switch the monitor ON/OFF. 

Power-On Indicator


LED lights Green color --- Power is ON.   

LED lights Yellow --- Monitor is in "Power Saving Mode". 

LED is off --- Power is OFF. 

Function Select Buttons


Press either left or right control button for OSD (On Screen 

Display) menu selection. 

Adjustment Control 

Buttons


Press the left button to decrease the OSD setting and press the 

right button to increase the OSD setting. 

External Headphone Jack


The monitor speakers will be disabled when using an external 

headphone or external speakers. 

Input Select 

Press this button to switch between Analog or Digital input. 

 
Adjusting the Monitor's Display 

The monitor has four function control buttons to select among functions shown on OSD menu, 

designed for easy user-viewing environments. 

 
OSD Function Menu


To access OSD Main menu, simply press one of the Function Select 
control buttons, and the menu diagram will pop up on the screen as 
shown on Fig. 2-2: 
Continue pressing the Function Select buttons to scroll through the 
entire menu items, then press Adjustment Control buttons to adjust 
content of selected item.


Figure 2-2


Attention: 

Firmware revision may have been updated in your monitor. However, the version number shown 

on all OSD menus in this manual are listed Ver. 1.00. 


Summary of Contents for PL2010M

Page 1: ...PL2010M...

Page 2: ...download documentation view answers to frequently asked questions FAQs and get troubleshooting advice or email Planar your support question Talk to a Customer Service Representative To contact Planar...

Page 3: ...er 5 Connecting the AC Power 5 Connecting the Audio Cable 5 Optional Mounting Alternatives 6 Detaching LCD Monitor from Its Stand 6 Interface for Arm Applications 6 Power Management System 6 Chapter 2...

Page 4: ...no guarantee that interference will not occur in a particular installation If this equipment does cause harmful interference to radio or television reception which can be determined by turning the equ...

Page 5: ...C or 4 140 F Storing the LCD Monitor outside this range could result in permanent damage 6 If any of the following occurs immediately unplug your monitor and call an authorized technician Monitor to...

Page 6: ...x LCD Monitor User s Manual Monitor to PC VGA Cable Power Cord Monitor to PC DVI D Cable Stereo Jack Audio Cable Register Your Planar Products Today Thank you for choosing Planar To assure you receive...

Page 7: ...ur Computer 1 Power off your computer 2 Connect one end of the signal cable to the LCD Monitor s VGA port or DVI port See Fig 1 5 3 Connect the other end of the signal cable to the VGA port or DVI por...

Page 8: ...g as illustrated in Figure 1 4 These specifications meet the VESA Flat Panel Monitor Physical Mounting Interface Standard paragraphs 2 1 and 2 1 3 version 1 dated 13 November 1997 Note Please using 4m...

Page 9: ...d press the right button to increase the OSD setting 7 External Headphone Jack The monitor speakers will be disabled when using an external headphone or external speakers 8 Input Select Press this but...

Page 10: ...vertically Graph Text Because the H and V Frequencies of both 640 x 400 70Hz and 720 x 400 70Hz are the same this function let s you manually select either 640 x 400 graphics mode or 720 x 400 text mo...

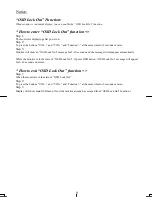
Page 11: ...ow an OSD Lock Out message for 5 10 seconds and the message will disappear automatically While the monitor is in the state of OSD Lock Out if press OSD button OSD Lock Out message will appear for 5 10...

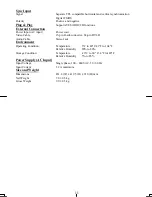
Page 12: ...75 Hz Audio Input 500mVrms Output 2W 2W Control Power switch hard and soft types On Off switch with LED indicator OSD Brightness Contrast Horizontal Position Vertical Position Phase Clock Display Mode...

Page 13: ...pin D sub connector 24 pin DVI D Audio Cable Stereo Jack Environment Operating Condition Temperature 5 C to 40 C 41 F to 104 F Relative Humidity 20 to 80 Storage Condition Temperature 20 C to 60 C 4...

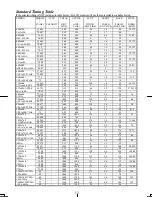
Page 14: ...35 156 1024 800 72 24 128 36 SVGA 56 25 625 600 2 1 22 800x600 37 879 1056 800 128 40 88 40 VESA 600 60Hz 60 317 628 600 4 1 23 800x600 48 077 1040 800 120 56 64 50 VESA 600 72Hz 72 188 666 600 6 37...

Page 15: ...ndows and back to the normal PC operating environment PROBLEM There is no picture on LCD Monitor If there s no picture on the LCD Monitor please perform the following steps 1 Make sure the power indic...

Page 16: ...006 1992 www planar com 2006 Planar Systems Inc Planar is a registered trademark of Planar Systems Inc Other brands and names are the property of their respective owners Technical information in this...

Reviews: