background image

18


PT1700M(U) and PT1701M(U) User’s Guide (

020-0410-00 A)

On-Screen Display Menus

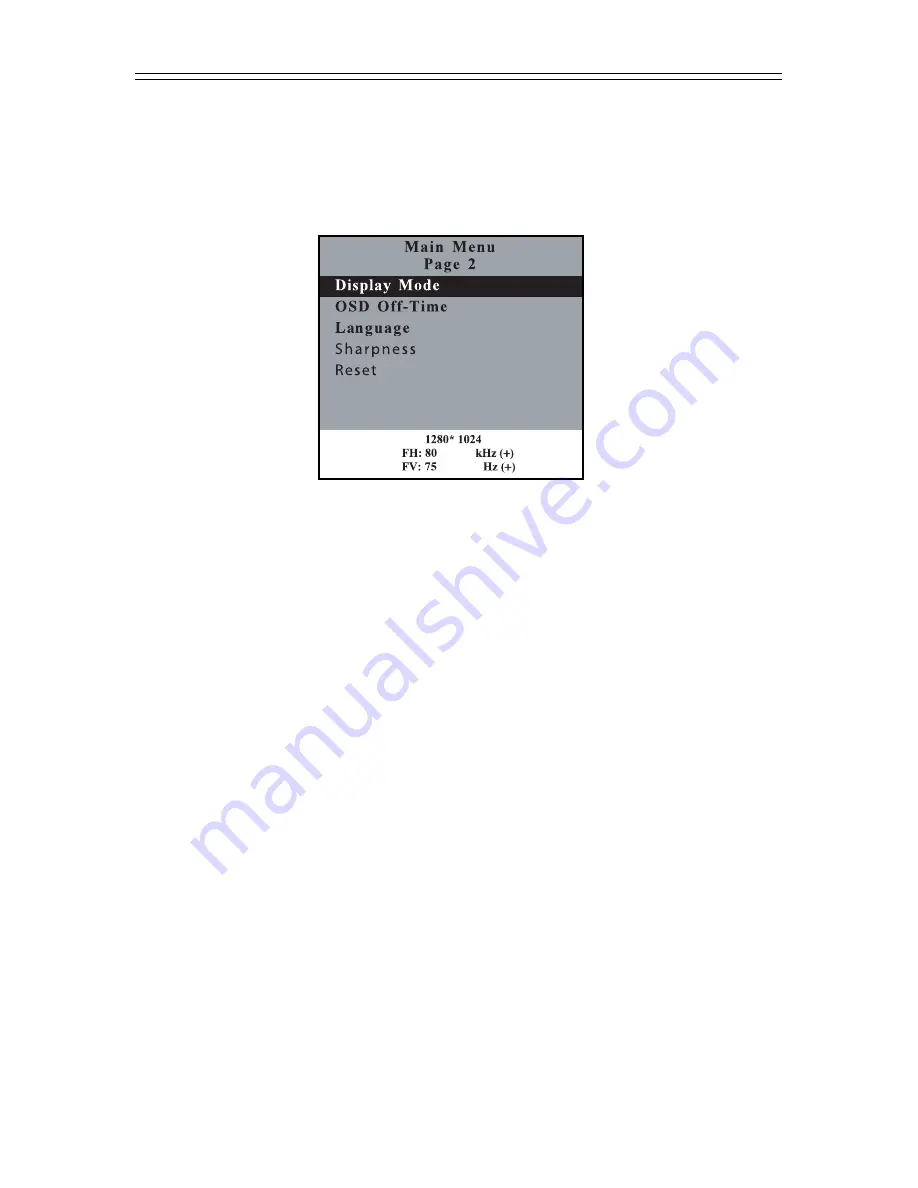
Second OSD Menu:

`

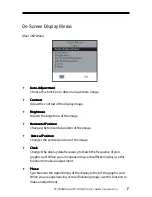
Display Mode

Display Mode

Display Mode

Display Mode

Display Mode
Select this function to view the display resolution, vertical refresh, and
horizontal scan of the current mode.

`

OSD O

OSD O

OSD O

OSD O

OSD Off-

ff-

ff-

ff-

ff-T

T

T

T

Time

ime

ime

ime

ime

Adjusts the time period for OSD menu to disappear.

`

Language

Language

Language

Language

Language
Choose the language you need.

`

Shar

Shar

Shar

Shar

Sharpness

pness

pness

pness

pness

Adjust the sharpness of the image.

`

Reset

Reset

Reset

Reset

Reset
Returns the display parameters of the current mode to its factory default
settings.

Summary of Contents for PT1700M

Page 1: ...PT1700M U PT1701M U USER S GUIDE www planar com...

Page 2: ...kage Overview 6 I I I I Installa nstalla nstalla nstalla nstallation tion tion tion tion ProductOverview 7 StartYourInstallation 11 ConnectingtheDisplay 12 User Controls User Controls User Controls Us...

Page 3: ...AC outlet if the product is not used for a long period of time D D D D Don on on on on t t t t t Do not touch the LCD panel surface with sharp or hard objects Do not use abrasive cleaners waxes or sol...

Page 4: ...nput Active matrix TFT LCD technology 1280 x 1024 SXGA resolution 17 viewable display area 31 5 80 kHz horizontal scan 56 75 Hz refresh rate 0 264mm x 0 264mm pixel pitch 300 cd m2 typ brightness 4 CC...

Page 5: ...ions Hardness of surface Resistive 4H per ASTM D3363 92 Capacitive 6 5 Mohs Operating force for resistiveTouchscreen Stylus 25g average Finger 50g average R R R R Resistiv esistiv esistiv esistiv esis...

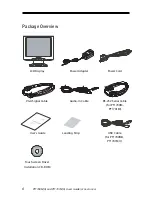
Page 6: ...020 0410 00 A Package Overview LCD Display VGA Signal Cable User s Guide Power Adapter Audio In Cable Power Cord RS 232 Serial Cable for PT1700M PT1701M Landing Strip USB Cable for PT1700MU PT1701MU...

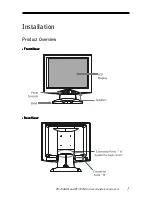
Page 7: ...M U and PT1701M U User s Guide 020 0410 00 A 7 Installation Product Overview F F F F Fr r r r ron on on on ont t t t t V V V V View iew iew iew iew R R R R Rear ear ear ear ear V V V V View iew iew ie...

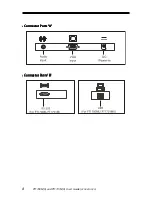
Page 8: ...de 020 0410 00 A C C C C Connec onnec onnec onnec onnect t t t tor P or P or P or P or Por or or or orts ts ts ts ts A A A A A C C C C Connec onnec onnec onnec onnect t t t tor P or P or P or P or Por...

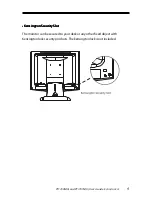
Page 9: ...nsington Security Slot Kensington Security Slot Kensington Security Slot Kensington Security Slot Kensington Security Slot The monitor can be secured to your desk or any other fixed object with Kensin...

Page 10: ...mountinginterfaceforflatpanel monitors andcorrespondingstandardsforflatpanelmonitormountingdevices such as wall and table arms The VESA mounting interface is located on the back ofyourmonitor Tomountt...

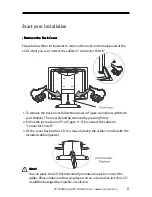
Page 11: ...remove the back cover follow the arrows in Figure A and press with both your thumbs The cover should be removed by pressing firmly 2 Follow the instruction on P 12 Figure 11 1 to connect the cables in...

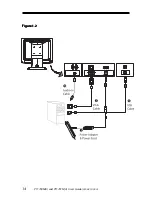
Page 12: ...o the 15 pin connector of your host computer and tighten the screws 2 4 WARNING For PT1700 1 MU Monitor Do not connect the USB cable from USB port of your display to the USB port of your computer unti...

Page 13: ...PT1700M U and PT1701M U User s Guide 020 0410 00 A 13 F F F F Figur igur igur igur igure 1 1 e 1 1 e 1 1 e 1 1 e 1 1...

Page 14: ...14 PT1700M U and PT1701M U User s Guide 020 0410 00 A Figure 1 2 Figure 1 2 Figure 1 2 Figure 1 2 Figure 1 2...

Page 15: ...PT1700M U and PT1701M U User s Guide 020 0410 00 A 15 User Controls Front Panel Controls...

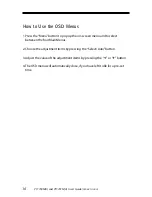
Page 16: ...utton to pop up the on screen menu and to select between the four Main Menus 2 Choose the adjustment items by pressing the Select Auto button 3 Adjust the value of the adjustment items by pressing the...

Page 17: ...zontal Position Horizontal Position Horizontal Position Horizontal Position Changesthehorizontalpositionoftheimage Vertical Position Vertical Position Vertical Position Vertical Position Vertical Posi...

Page 18: ...and horizontal scan of the current mode OSD O OSD O OSD O OSD O OSD Off ff ff ff ff T T T T Time ime ime ime ime Adjusts the time period for OSD menu to disappear Language Language Language Language...

Page 19: ...and PT1701M U User s Guide 020 0410 00 A 19 On Screen Display Menus Third OSD Menu V V V V Volume olume olume olume olume Controls the sound volume Mut Mut Mut Mut Mute e e e e Disables the sound imm...

Page 20: ...justment Red Color Adjustment Red Color Adjustment Red It allows you to adjust the red color of the display Color Adjustment Green Color Adjustment Green Color Adjustment Green Color Adjustment Green...

Page 21: ...P P P Pr r r r roblem I oblem I oblem I oblem I oblem Image has flicker mage has flicker mage has flicker mage has flicker mage has flickering v ing v ing v ing v ing ver er er er ertical line bars ti...

Page 22: ...l The LCD has been powered on but it isn t receiving a signal from the computer graphic card Check all the power switches power cables and VGA signal cable G G G G Going t oing t oing t oing t oing to...

Page 23: ...PT1700M U and PT1701M U User s Guide 020 0410 00 A 23 Product Dimensions...

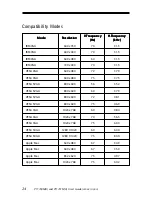
Page 24: ...00 800 x 600 1024 x 768 1024 x 768 1024 x 768 1280 X 1024 1280 X 1024 640 x 480 640 x 480 832 x 624 1024 x 768 70 70 60 70 72 75 56 60 72 75 60 70 75 60 75 67 67 75 75 31 5 31 5 31 5 31 5 37 9 37 5 35...

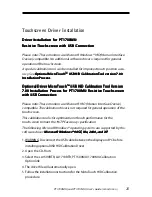
Page 25: ...ch ouch ouch ouchTM TM TM TM TM USB HID C USB HID C USB HID C USB HID C USB HID Calibr alibr alibr alibr alibra a a a ation tion tion tion tion T T T T Tool ool ool ool ool V V V V Version ersion ersi...

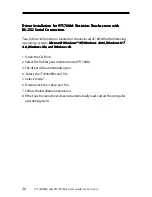
Page 26: ...efollowing operating systems M M M M Micr icr icr icr icrosof osof osof osof osoft t t t t W W W W Windo indo indo indo indow w w w ws XP s XP s XP s XP s XP W W W W Windo indo indo indo indow w w w w...

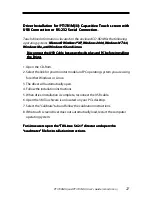
Page 27: ...isplay and PC before installing Disconnect the USB Cable between the display and PC before installing Disconnect the USB Cable between the display and PC before installing Disconnect the USB Cable bet...

Page 28: ...il Email Email PlanarSupport planar com Hours Hours Hours Hours Hours M F 5am 5pm Pacific Time 2005 Planar Systems Inc 04 05 Planar Systems Inc 04 05 Planar Systems Inc 04 05 Planar Systems Inc 04 05...

Reviews: