background image

 9

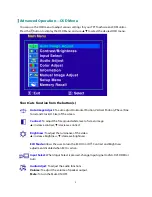
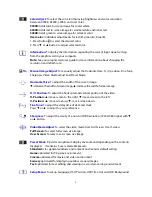
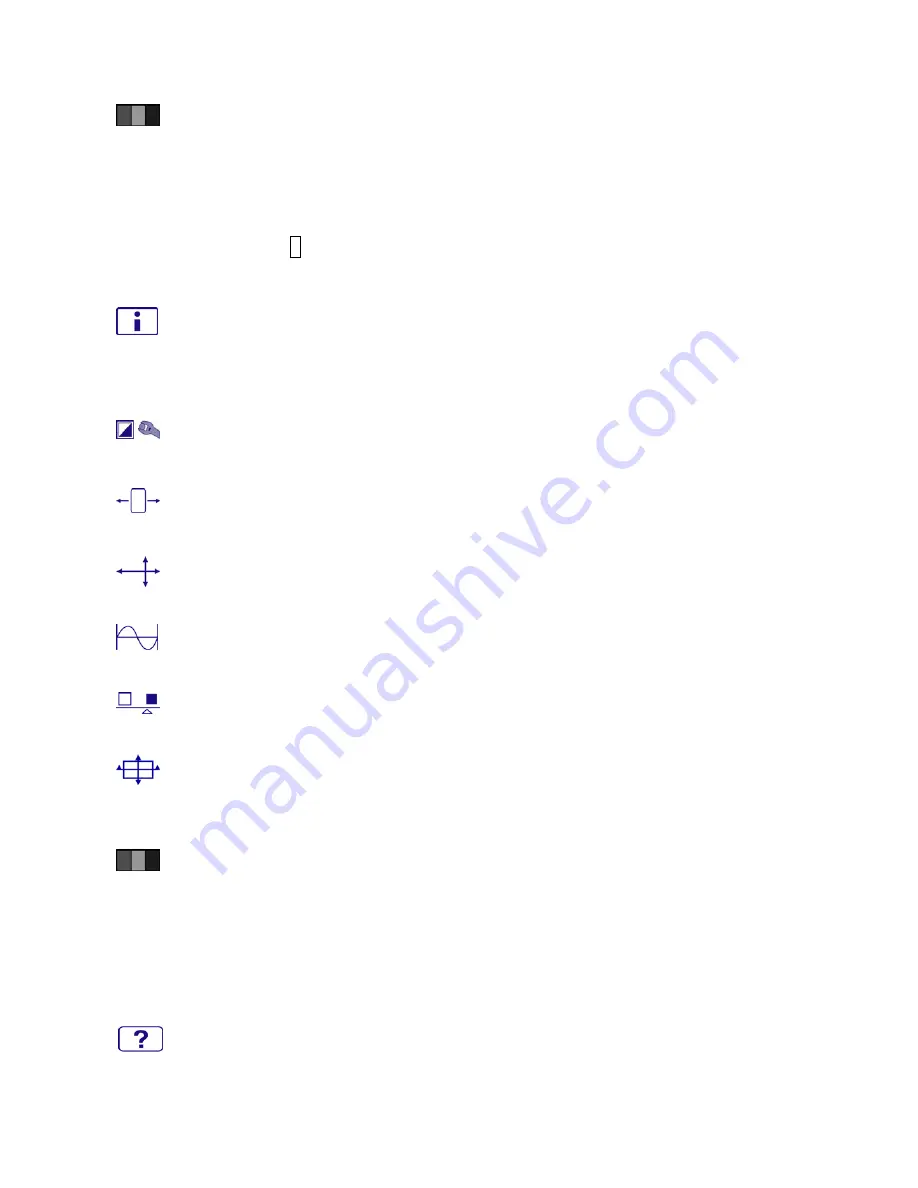
Color Adjust:

 To select the color for improving brightness and color saturation 

between 9300K, 6500K, 5400K, and User Color. 
9300K: Adds blue to screen image for cooler white. 
6500K:
 Adds red to screen image for warmer white and richer red. 
5400K: Adds green to screen image for a darker color. 
User Color:


Individual adjustments for red (R), green (G), blue (B). 

1. Press button 2 to select the desired color. 
2. Press 

 or 

 button to adjust selected color. 


Information:

 To display the information, regarding the current input signal coming 

from the graphic card in your computer. 
Note: See your graphic card user guide for more information about changing the 
resolution and refresh rate. 


Manual Image Adjust: 

To manually adjust the Horizontal Size, H. /V. position, Fine Tune, 

Sharpness, Video Mode adjust and Preset Mode. 
 

Horizontal Size: 

To adjust the width of the screen image. 

: decrease the width of screen image, 

: increase the width of screen image. 


H./V. Position: 

To adjust the horizontal and vertical position of the video. 

H. Position: 

: move screen to the right, 

: move screen to the left. 

V. Position: 

move screen up, 

: move screen down. 

Fine Tune:

 To adjust the delay time of data and clock. 

Press 

 or 

 to adjust to your preference. 


Sharpness:

 To adjust the clarity of a non-Full HD Resolution (1920x1080) signal with 


or 

 button. 


Video Mode Adjust:

 To select the video mode from Full Screen, Over Screen. 

Full Screen: To select full-screen size image. 
Over Screen: To select over-screen size image. 
 

Preset Mode: 

Provides an optimum display environment depending on the contents 

displayed.    It contains 5 user-selectable presets. 
Standard is for general windows environment and monitor default setting. 
Game optimized for PC game environment. 
Cinema optimized for movie and video environment. 
Scenery optimized for displaying outdoor scenery images. 
Text optimized for text editing and viewing in a word processing environment. 


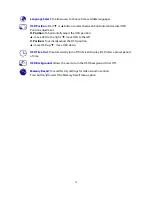
Setup Menu:

 To set up Language, OSD Position, OSD Time Out and OSD Background. 


Summary of Contents for PX2230MW

Page 1: ...www planar com USER S GUIDE LCD Touch Monitor PX2230MW...

Page 2: ...Product 3 Rear View of the Product 4 Quick Installation 5 Basic Operation and Calibration Reset Instructions 6 Advanced Operation OSD Menu 8 Supporting Timing Modes 11 Technical Information 12 Wall M...

Page 3: ...na Move the TFT Touchscreen LCD Monitor and the receiver further away from each other Connect the TFT Touchscreen LCD Monitor into an outlet on a circuit erent from that to which the receiver is conne...

Page 4: ...use abrasive cleaners waxes or solvents for your cleaning Do not operate the product under the following conditions o Extremely hot cold or humid environment o Areas susceptible to excessive dust and...

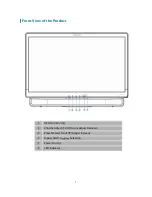
Page 5: ...3 Front View of the Product OSD Turn On O Volume Adjust Scroll Down Adjust Decrease Preset Mode Scroll UP Adjust Increase Input select C Selection Power On O LED Indicator...

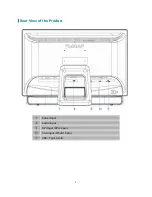
Page 6: ...4 Rear View of the Product Power Input Audio Input DVI Input DVI 24 pin VGA Input D Sub 15 pin USB Type A to B...

Page 7: ...and computer are powered OFF 2 3 Power ON computer and then POWER ON the monitor 4 Set the timing mode on your computer Recommended resolution and refresh rate is 1920 x 1080 60Hz Figure 1 DVI cable...

Page 8: ...rom OSD menu 2 Selects between VGA DVI or Auto mode Select the desired item when in OSD menu When not in OSD menu directly enters Volume adjust Select the desired item when in OSD menu When not in OSD...

Page 9: ...ibration Reset Instructions The PX2230MW is available with USB connection It is Microsoft Windows 7 HID Human Interface Device compatible if you use the USB touch screen interface No additional softwa...

Page 10: ...Clock H Size of the screen Contrast To adjust the foreground white level of screen image increase contrast decrease contrast Brightness To adjust the luminance of the video increase brightness decrea...

Page 11: ...fscreenimage increasethewidthofscreenimage H V Position To adjust the horizontal and vertical position of the video H Position move screen to the right move screen to the left V Position move screen u...

Page 12: ...position move OSD to the right move OSD to the left V Position To vertically adjust the OSD position move OSD up move OSD down OSD Time Out To automatically turn off On Screen Display OSD after a pres...

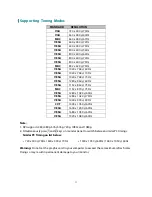
Page 13: ...x 870 75Hz VESA 1280 x 1024 60Hz VESA 1280 x 1024 75Hz VESA 1440 x 900 60Hz CVT 1400 x 1050 60Hz VESA 1600 x 1200 60Hz VESA 1680 x 1050 60Hz VESA 1920 x 1080 60Hz Note 1 DVI supports 480i 480p 576i 57...

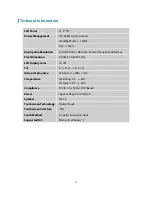
Page 14: ...xel Dimension 0 24825 x 0 24825 mm LCD Display Color 16 7M Tilt 5 0 2 36 2 Active Display Area 476 64 mm x 268 11 mm Temperature Operating 0 C 40 C Storage 20 C 60 C Compliance FCC B CE cTUVus T V Bau...

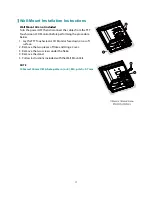
Page 15: ...CD Monitor before performing the procedure below 1 Lay the TFT Touchscreen LCD Monitor face down on a soft surface NOTE 100mmx100mm VESA hole pattern n 4 M4 pitch 0 7 mm 2 Remove the two pieces of fla...

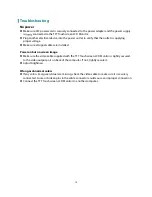
Page 16: ...bles are installed Power on but no screen image Make sure the video cable supplied with the TFT Touchscreen LCD Monitor is tightly secured to the video output port on back of the computer If not tight...

Page 17: ...or touch screen or other Planar products visit our online store at www PlanarOnline com or other stores who carry Planar products at http www planar com howtobuy Technical Support Visit Planar at http...

Page 18: ...2001170840P 020 1024 00A...

Reviews: