2
3
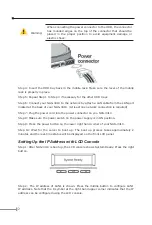
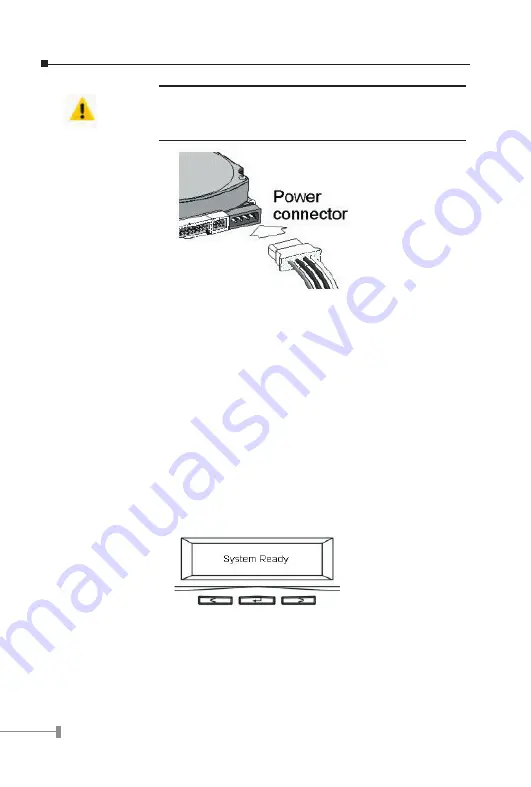
Warning
:
When connecting the power connector to the HDD, the connector
has rounded edges on the top of the connector that should be
placed in the proper position to avoid equipment damage or
electric shock.
Step 4: Insert the HDD tray back in the mobile rack. Make sure the lever of the mobile
rack is properly in place.
Step 5: Repeat Step 1 to Step 3 if necessary for the other HDD trays.
Step 6: Connect your NAS-3410 to the network by attach a LAN cable from the LAN port
located at the back of your NAS-3410. (At least one network connection is required)
Step 7: Plug the power cord into the power connector on you NAS-3410.
Step 8: Make sure the power switch on the power supply is in ON position.
Step 9: Press the power button on the lower right hand corner of your NAS-3410.
Step 10: Wait for the server to boot up. The boot up process takes approximately 2
minutes and the real-time status will be displayed on the front LCD panel.
Setting Up the IP Address with LCD Concole
Step 1: After NAS-3410 is boot up, the LCD console shows System Ready. Press the right
button.
Step 2: The IP address of LAN1 is shown. Press the middle button to configure LAN1
IP address. Note that the 8 symbol at the right hand upper corner indicates that the IP
address can be configured using the LCD console.

