PC Configuration
17
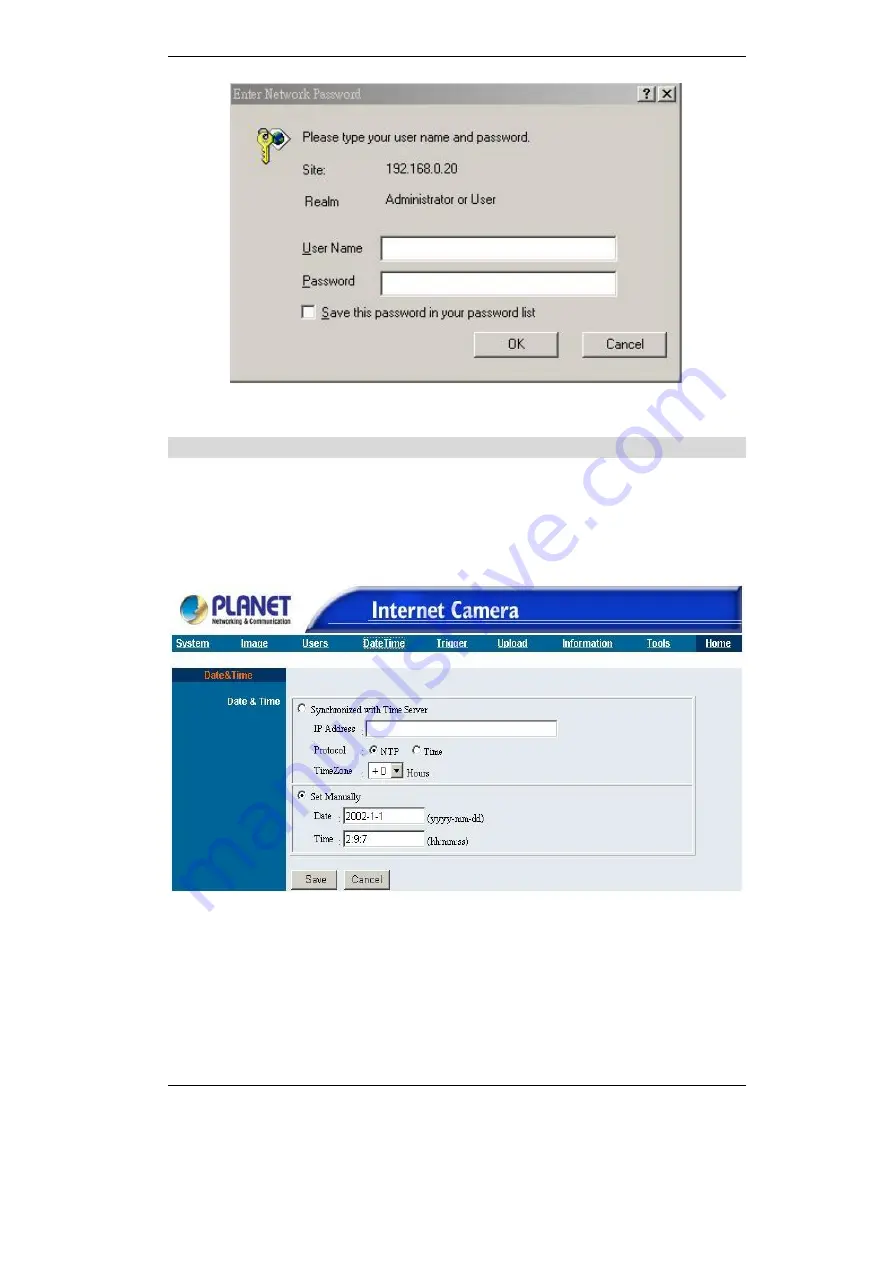
Figure 3-5: User Login Screen
DateTime
The DateTime menu contains commands for setting ICA-100 series' time and date
requirements to provide correct information to users who might be thousands of miles
away in the remote site. There are two options to select from the DateTime menu bar
either Synchronized with Time Server or Set Manually. Click on
“
DateTime
”
in the
system administration menu bar and the DateTime screen will appear as illustrated
below:
Figure 3-6: DateTime Screen
DateTime:
Select
“
Synchronized with Time Server
”
and the time will be based on GMT setting.
The time will be synchronized every 10 minutes. This is also the default setting for ICA-
100 series.
IP Address:
Enter the IP Address of the Time Server in this field.
Summary of Contents for ICA-100
Page 1: ...Internet Camera ICA 100 ICA 100W User s Manual ...
Page 13: ...Broadband Router User Guide 10 ...
Page 55: ...Broadband Router User Guide 52 Figure 5 26 Tools Screen ...
Page 58: ...Advanced Configuration 55 Figure 5 29 Motion Setting Screen ...
Page 61: ...Broadband Router User Guide 58 Figure 5 31 Case Sensitive Menu in Camera View Format ...


