background image

Chapter 3 Setup Wizard 

The Setup Wizard guides you to finish the initial installation of NAS-1101, and the basic configurations for 

Network. Please follow the steps as below.   

Note:

 If you have run the Setup Wizard before and for some reason you need to run the Wizard again, 

please delete the previously created shortcuts first. 

1.  Insert the CD-ROM into the CD-ROM drive to initiate the autorun program. Once completed a menu 

screen will appear. 

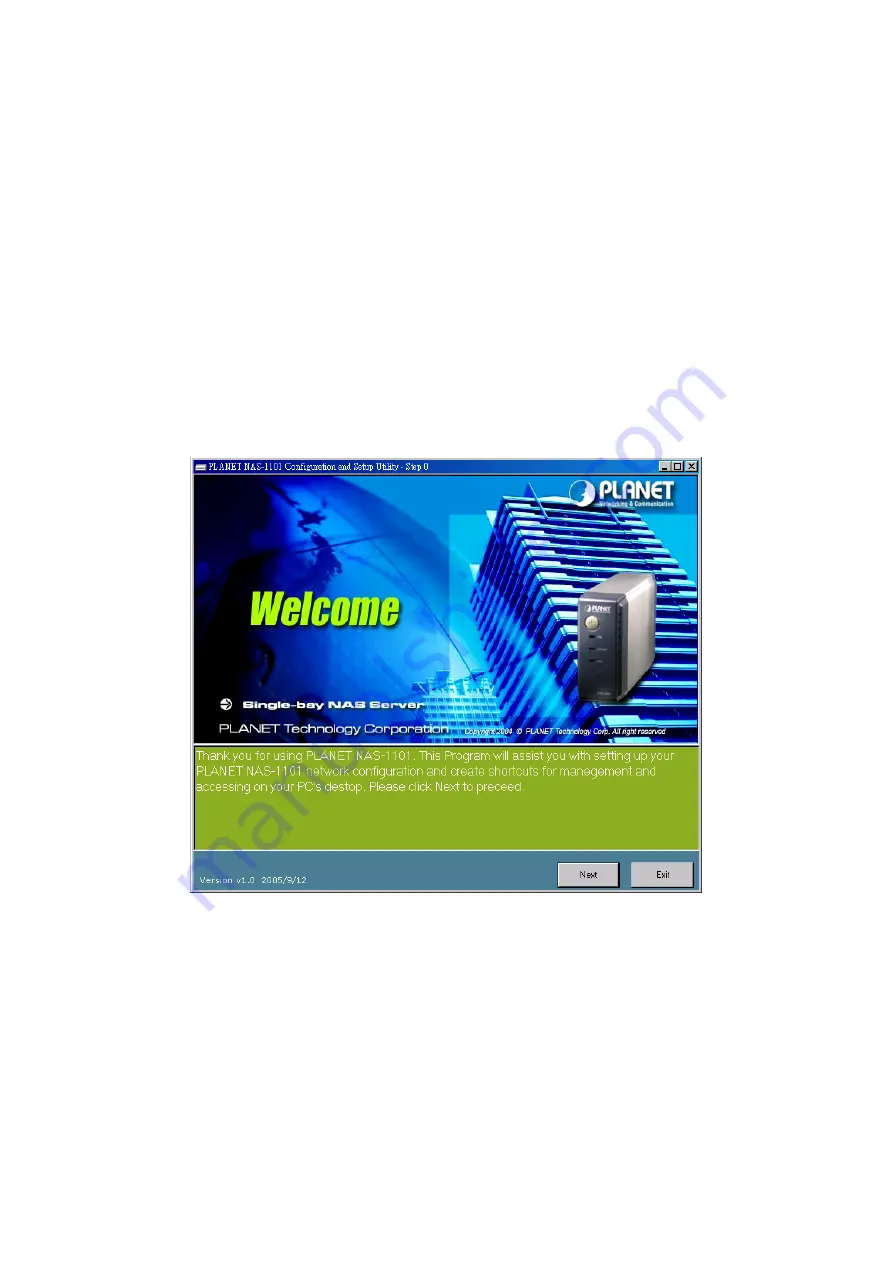
2.  Click on “Setup Wizard” hyper link to initiate the program. If the menu screen is not shown, you can 

click the “Start” button and choose “Run”. When the box appears, enter “E:\Utility\setup.exe” 

(Suppose “E” is your CD-ROM drive). You will see the Welcome screen as below. Please click 

“Next” to continue.   


3.  Plug the circle end of power adapter firmly into the rear panel of NAS-1101, and the other end into a 

power outlet. Press the Power button on NAS-1101 and make sure Power LED is light on.   


5

Summary of Contents for NAS-1101

Page 1: ...Single Bay NAS Server NAS 1101 User s Manual ...

Page 2: ...d Information in this User s Manual is subject to change without notice and does not represent a commitment on the part of PLANET PLANET assumes no responsibility for any inaccuracies that may be contained in this User s Manual PLANET makes no commitment to update or keep current the information in this User s Manual and reserves the right to make improvements to this User s Manual and or to the p...

Page 3: ...g 14 4 2 3 Superuser Password Setting 14 4 2 4 IP Filter 15 4 2 5 MAC Filter 16 4 3 Administration 17 4 3 1 System Restart 18 4 3 2 HD Format 18 4 3 3 Factory Default Reset 19 4 3 4 Firmware Upgrade 19 4 3 5 System Time 20 4 3 6 Character Set 20 4 4 Share 21 4 4 1 User Configuration 21 4 4 1 1 Modify Users 22 4 4 1 2 Add User 23 4 4 1 3 Delete User 24 4 4 2 Folder Configuration 25 4 4 2 1 Modify F...

Page 4: ...4 5 1 FTP Configuration 29 4 6 P2P 30 4 6 1 BitTorrent Configuration 31 4 6 2 Download Configuration 32 4 6 2 1 Add a Download Task 33 4 7 Web Server 35 Chapter 5 Troubleshooting 38 4 ...

Page 5: ...ort 1 2 Features Provides a 10 100Mbps Ethernet port Auto MDI MDIX for network connection Easy configuration via web interface Supports all standard 3 5 IDE HD up to 250GB with EXT3 file format Auto Networking Configuration Utility for Windows OS Supports CIFS SMB for Microsoft Network users to easily retrieve files by using My Network Places Built in FTP server for user conveniently transfer file...

Page 6: ...r Netscape Dimensions 220 x 60 x 132 mm W x D x H Weight 865g without HDD Supported Hard Disk Removable 3 5 External HD ATA Operating Temperature 0 40 C Humidity 10 95 non condensing Storage Temperature 10 70 C Humidity 10 95 non condensing Power Adapter 12V DC 3A Regulatory FCC Class B CE 2 ...

Page 7: ...ur HD jumper should be set to Master Different Hard Disk has different jumper settings please refer to your Hard Disk manual for correct setting 4 Insert the IDE connector into the IDE socket of the Hard Disk Make sure the pin 1 on the cable is connected to pin 1 on the HD socket Pin 1 is the red or pink strip on the edge of an IDE cable The IDE cables are designed so that it will only go in one w...

Page 8: ... socket of HD as shown The power cable is designed to go in one way so you shouldn t have any problems 6 Secure the Hard Disk with the screws we provided 7 Push the Hard disk and HD holder back into the box and secure it with the two screws 4 ...

Page 9: ...ROM drive to initiate the autorun program Once completed a menu screen will appear 2 Click on Setup Wizard hyper link to initiate the program If the menu screen is not shown you can click the Start button and choose Run When the box appears enter E Utility setup exe Suppose E is your CD ROM drive You will see the Welcome screen as below Please click Next to continue 3 Plug the circle end of power ...

Page 10: ...ONLY use the power adapter supplied with the NAS 1101 Otherwise the product may be damaged 4 Connect NAS 1101 to your switch or hub and make sure the LNK ACT LED is light on 5 Press Next to start the scan 6 ...

Page 11: ...6 The Setup Wizard will scan available NAS 1101 in your network 7 The screen will show you the available NAS 1101 Please select the device you want to setup and click Next to continue 7 ...

Page 12: ...ress to NAS 1101 and creating two shortcuts to access and setup the NAS 1101 8 If the Reachable option is No you will see this screen Please enter the NAS 1101 administrator user name and password and click Next The default username and password are both admin 9 The NAS 1101 installation is completed This dialog box prompts you that setup wizard will add two shortcuts on you desktop you can config...

Page 13: ...Wizard will detect your HD content but only for the first partition It is recommended that do not partition the HD Note 3 if an unformatted hard disk or no hard disk is installed users will not be able to access the storage space with following steps However you can still proceed with the configuration procedures described in Chapter 4 To use the storage space of NAS 1101 you can double click on t...

Page 14: ...the Share folder is created automatically in the NAS 1101 and can be accessed by any user Users that would like to use another set of username password after getting access to any folder must log off your operation system and log on again For Windows 95 98 98SE users you should add a new user with the username of your operation system 10 ...

Page 15: ...he Setup My PLANET NAS 1101 icon on desktop A dialog box will pop up and ask for username password The default user name and password are both admin 4 1 Home On this screen you can see the general information of your NAS 1101 including Host Name IP address and Firmware Version You can also access other configuration screens here 11 ...

Page 16: ...tage of HDD Up time The estimate time of system operating period Version Current firmware version Samba Users The number of users who is accessing the NAS 1101 from My Network Places You can have max five online users to access NAS 1101 at the same time FTP Users The number of users who is connected to NAS 1101 by FTP session You can have max five online users to access NAS 1101 at the same time U...

Page 17: ...me Setting Parameters Description Host Name Identification of NAS 1101 represents on My Network Places Work Group The name of the workgroup which NAS 1101 is located Description Brief description of the NAS 1101 13 ...

Page 18: ...ify a Subnet Mask for your LAN segment The default value is 255 255 255 0 Gateway Specify the gateway IP in your network DNS Server This is the ISP s DNS server IP address that they gave you or you can specify your own preferred DNS server IP address 4 2 3 Superuser Password Setting This page allows you to change the username and password which are used to access the web interface of NAS 1101 Plea...

Page 19: ...w password here again to confirm 4 2 4 IP Filter The IP Filter feature provides access management by IP addresses There are three modes for configuration Disable the IP Filter is disabled and all sessions would be allowed Allowed only the clients with IP addresses configured in the table below can access the NAS 1101 Denied the clients with IP addresses configured in the table below are not allowe...

Page 20: ... modes for configuration Disable the MAC Filter is disabled and all sessions would be allowed Allowed only the clients with MAC addresses configured in the table below can access the NAS 1101 Denied the clients with MAC addresses configured in the table below are not allowed to access the NAS 1101 16 ...

Page 21: ...4 3 Administration In this category you can manage the NAS 1101 with some useful tools 17 ...

Page 22: ...our hard disk is a brand new unformatted one or its format is not EXT3 You have to format this hard disk or replace it with another one with EXT3 format Caution All partitions on your HD will be format and all your DATA will be erased Parameters Description Do you want to format HD If you want to format your HD please press Yes or press No to back to previous page Note Please wait until the format...

Page 23: ...n also press the DEFAULT button on the rear panel of NAS 1101 for 10 second And then wait for a while for NAS 1101 to restart with factory default settings 4 3 4 Firmware Upgrade Parameters Description Firmware upgrade If you have the latest firmware of NAS 1101 you may enter the firmware path into this field or press Browse to find out the firmware location and press Apply to upgrade If the firmw...

Page 24: ...t it check the system time with Internet time server You can change the time server address or keep use the default setting and click Save button to apply 4 3 6 Character Set Unicode is work for being compatible with most fonts around the world thus prevents errors from fonts difference To install Unicode insert the CD ROM we provide click the Browse icon click on your CD ROM drive open the folder...

Page 25: ...ation for user login and access data 4 4 1 User Configuration In this category you can Add Delete Modify the user account Before operate please make sure the installed HD was formatted If the installed HD does not format yet the operation in this page may be wrong 21 ...

Page 26: ... icon in Basic User or Advanced User field Then you will see the screen below Parameters Description User Name For existing user you may click Change Name button to change the user name New Password If you want to set a new password of this user please enter the new password here 22 ...

Page 27: ...s Description User Name Please enter the name for this user New Password Please enter a password of this user Confirm Password Please enter the password here again User Description Please enter a simple description of this user FTP Access Allow this user to access NAS 1101 via FTP protocol or not Apply After finish the user configuration please press this button You will see a screen to prompt you...

Page 28: ...ount please click the check box under the user name in the User Configuration screen you may see the Delete button become available When you press Delete button you may see a dialog box to prompt you the user will be deleted press Yes to delete this user If you want to delete two or more users you can click the check box of those users to delete them at the same time 24 ...

Page 29: ...r Configuration In this category you can Add Delete Modify the shared folder 4 4 2 1 Modify Folder If you want to modify the folder configuration please click the folder icon Then you will see the screen below 25 ...

Page 30: ...s this button After press this button you will see the screen below Please press Apply to save the settings NOTE The default folder Share can t be changed Change Description If you want to change the folder description please press this button Please press Apply to save the settings 26 ...

Page 31: ...lder you may press the Add button in the screen above Then you will see this Add Folder screen Parameters Description Folder Name Please set a name to this share folder The folder name will be shown when the user access NAS 1101 Folder Description Please set a simple description for this folder Apply Please press this button to create this new folder Undo Click to clear the current settings Back P...

Page 32: ...ivilege for each user or set the same setting to all users by selecting upper options Apply Please press this button to create this new folder Back Press to back to pervious page 4 4 2 3 Delete Folder Click the check box in front of the folder name then the Delete button will become available Please click this button to delete the folder you selected You will see a dialog box appear to prompt the ...

Page 33: ...vides a FTP server for remote access from Internet 4 5 1 FTP Configuration To setup this configuration such as user limitation sever port number length for time out and anonymous user restriction click FTP Configuration 29 ...

Page 34: ...edded BitTorrent client for Internet peer to peer downloading To start a download session you must 1 Get a Torrent File The BitTorrent download is triggered by Torrent files formatted as XXX torrent 2 Save those Torrent files in a folder within the NAS 1101 For example create a folder which named P2P in the device Place those Torrent files in the P2P folder 3 Create a folder in the NAS 1101 to pla...

Page 35: ...bject to the restrictions of the copyright laws and should accept all the consequences 4 6 1 BitTorrent Configuration The configuration of BitTorrent can be setup here fill in the settings in each blank then press apply to activate Parameters Description Enable BitTorrent Choose Yes to enable BT download Download Folder Choose the folder that contains the subfolder where you place the Torrent file...

Page 36: ...vated at the same time A number within 10 is allowed Scheduler Click Yes to enable the scheduler The scheduler is provided for users to set up the start end time of BitTorrent functionality Start End Set the time to start and end BitTorrent download upload For example you can configure the scheduler to start by Everyday Hour 23 Minute 0 and end by Everyday Hour 6 Minute 0 to process BitTorrent dow...

Page 37: ... Max Rate Down Up The maximum download upload speed 4 6 2 1 Add a Download Task 1 To add a new download task place Torrent files in the folder you specified as the download folder Click Add to proceed 2 Select the files to download and click Next 3 Specify the folder for placing downloaded data and click Next Please make sure the folder is located in the folder which you stored the Torrent files 3...

Page 38: ...P2P software Time to Leave The allowed time to process a download task The task will be terminated if the time expires Max Peers Count Setup the maximum peers when proceeding upload download Min Peers Count Setup the minimum peers when proceeding upload download Max Download Bandwidth The maximum bandwidth used for download tasks 34 ...

Page 39: ...erlink of the Torrent file name to check the properties of the task If you want to terminate a download task select the task and click the Inactive button The specified process will be removed immediately 4 7 Web Server NAS 1101 provides a simple web server for user to construct a personal website This website accepts HTML files only it does not support ASP or JavaScript 35 ...

Page 40: ...g the personal web site is the IP address of the NAS 1101 with the port number added after by a colon For example use 192 168 1 1 8080 if the IP address of the NAS 1101 is 192 168 1 1 and the port number of the web server is configured as 8080 Note For WAN users to get access to the FTP or WEB server you should link the NAS 1101 to a router with appropriate configuration Please make sure that 1 Th...

Page 41: ...Firewall device to secure your network from being invading 37 ...

Page 42: ...ot in Master mode Your HD jumper should be set to Master Different Hard Disk has different jumper settings please refer to your Hard Disk manual for more information The HD is unformatted Please format it with our HD Format tool in Administration The partition format of HD is not EXT3 Please format it with our Format tool in Administration Q4 I use NAS 1101 as a Web FTP server but the users outsid...

Page 43: ...of your operation system Please get access to the management interface Add a new user which use the username the same with your operation system Get access to the HD and double click a folder Fill in the password to get access to the folder If you have accessed to any folder in the HD and would like to use another set of username password for different privilege please log off your operation syste...

Reviews: