background image

V112712 

10 

Back Focus 

 
The CDK design does not have any moving optical components, so the focal point is 
fixed.  This means that the focal plane of the telescope is a set distance behind the 
backplate of the telescope.  The back focus for the various telescope models in shown in 
Table 1 below.   


Backfocus from 
mounting surface of 
telescope backplate 

Focuser Spacer  
(only on CDK24 
and CDK700) 

Back focus from 
fully racked in 
focuser  

CDK12.5 

10.45” 

n.a. 

7.2” 

CDK17 

8.81” 

n.a. 

5.81” 

CDK20 

8.81” 

n.a. 

5.81” 

CDK24 

13.177” 

4.367”  (#240343) 

5.81” 

CDK700 

*11.16” 

n.a   

7.535” 

Table 1:  Shows the back focus with and without the focuser installed for the various 
PlaneWave telescope models.  *The CDK700 is referenced, not from the backplate of the 
telescope, but from the end of the altitude hub which is the mounting surface for the 
optical train.  Also, the CDK700 is using the Focuser/Rotator 600180, which uses 3.625” 
of backfocus on the CDK700.  
 
The CDK24 has significantly more backfocus than the other telescopes in the PlaneWave 
lineup.  In order to take advantage of the existing line of CCD spacers and accessories, a 
spacer pushes the focuser out so it exactly matches the other telescopes.  If more back 
focus is needed, then a shorter spacer can be purchased.   
 
Another reason to push the focuser out to the same position as is used on the rest of the 
CDK line is that it reduces the torque on the focuser.  If the focuser which can easily hold 
25lbs worth of equipment 5.8” out was then made to hold the same equipment 10” out, 
the torque on the focuser would increase 172%.  In order to keep flexure to minimal 
levels, we do not want to move the focuser closer to the telescope unless it is absolutely 
necessary.   


Summary of Contents for CDK Series

Page 1: ...V112712 1 PlaneWave CDK Telescope Instructions CDK12 5 17 20 and 24 ...

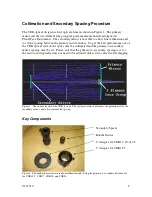
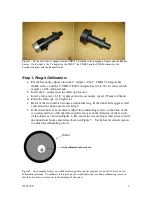
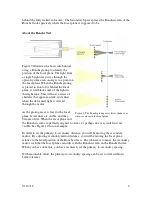
Page 2: ...optics must be collimated and the primary to secondary mirror spacing must be set Please note that the primary to secondary spacing is set at the factory and typically does not need to be adjusted unless it was moved after shipping Figure 1 The optical layout of the CDK system The system contains 4 elements the primary mirror the secondary mirror and a two element lens group Key Components Figure ...

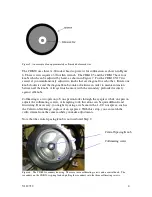
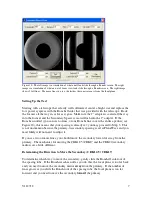
Page 3: ...telescope at a bright star e Defocus the star until it becomes a donut like ring If the donut hole appears well centered in the donut proceed to Step 2 f If the donut hole is not centered adjust the collimating screws on the back of the secondary mirror so that the defocused star moves in the direction of the fat side of the donut as shown in Figure 4 Re center the star and repeat this process unt...

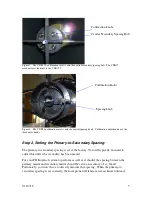
Page 4: ...ith the secondary preloaded securely against all knobs Collimating is a two person job one person looks through the eyepiece while one person adjusts the collimating screws Attempting to do this alone can be quite difficult and frustrating If necessary you might try using a webcam with a 1 1 4 nosepiece such as the Celestron NexImage in place of an eyepiece With this setup you can watch the video ...

Page 5: ...condary spacing is set at the factory You will typically not need to adjust this unless the secondary has been moved For your CDK optical system to perform as well as it should the spacing between the primary mirror and secondary mirror should be set to an accuracy of 1mm Fortunately you won t have to directly measure this spacing When the primary to secondary spacing is set correctly the focal pl...

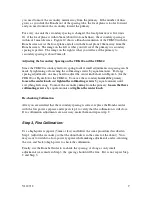
Page 6: ...lar As the grating moves closer to the focal plane fewer lines are visible and they become wider When the focal plane and the Ronchi screen are perfectly aligned no lines or perhaps one very wide line are visible See Figure 10 for an example In order to set the primary to secondary distance you will be moving the secondary mirror By adjusting secondary mirror distance you will be moving the focal ...

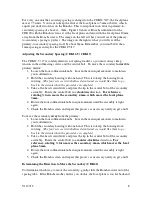
Page 7: ...nes or one Ronchi line covers the entire aperture see Figure 10 this means that your spacing is already set you may proceed to Step 3 This is not uncommon because the primary to secondary spacing is set at PlaneWave and you most likely will not need to adjust it If you see two or more lines you should move the secondary toward or away from the primary The mechanics for moving the CDK12 5 CDK17 and...

Page 8: ...when the procedure is complete 3 Take a flat head screwdriver and place the tip in the central bolt of the secondary assembly Rotate the central bolt in a clockwise direction For reference rotating turn moves the secondary 4mm which moves the focal plane 3mm 4 Rotate the four collimation knobs in equal amounts until the assembly is tight again 5 Check the Ronchi screen and repeat this process as n...

Page 9: ...ounts For large spacing adjustments one may need to adjust the center knob shown in Figure 6 for the CDK20 or Figure 8 for the CDK24 To move the secondary toward the primary loosen the center knob and tighten the collimating screws by equal amounts until everything feels snug To move the secondary away from the primary loosen the three collimating screws by equal amounts and tighten the center kno...

Page 10: ...end of the altitude hub which is the mounting surface for the optical train Also the CDK700 is using the Focuser Rotator 600180 which uses 3 625 of backfocus on the CDK700 The CDK24 has significantly more backfocus than the other telescopes in the PlaneWave lineup In order to take advantage of the existing line of CCD spacers and accessories a spacer pushes the focuser out so it exactly matches th...

Page 11: ...re back focus than the other CDK models so a spacer is used to put the focuser the same distance from the focal plane as the other CDK models This means the same spacers will work with all the different models with exception of the CDK12 5 ...

Reviews: