V112712
7
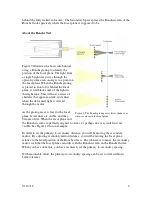
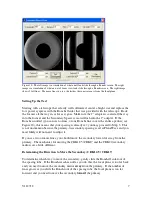
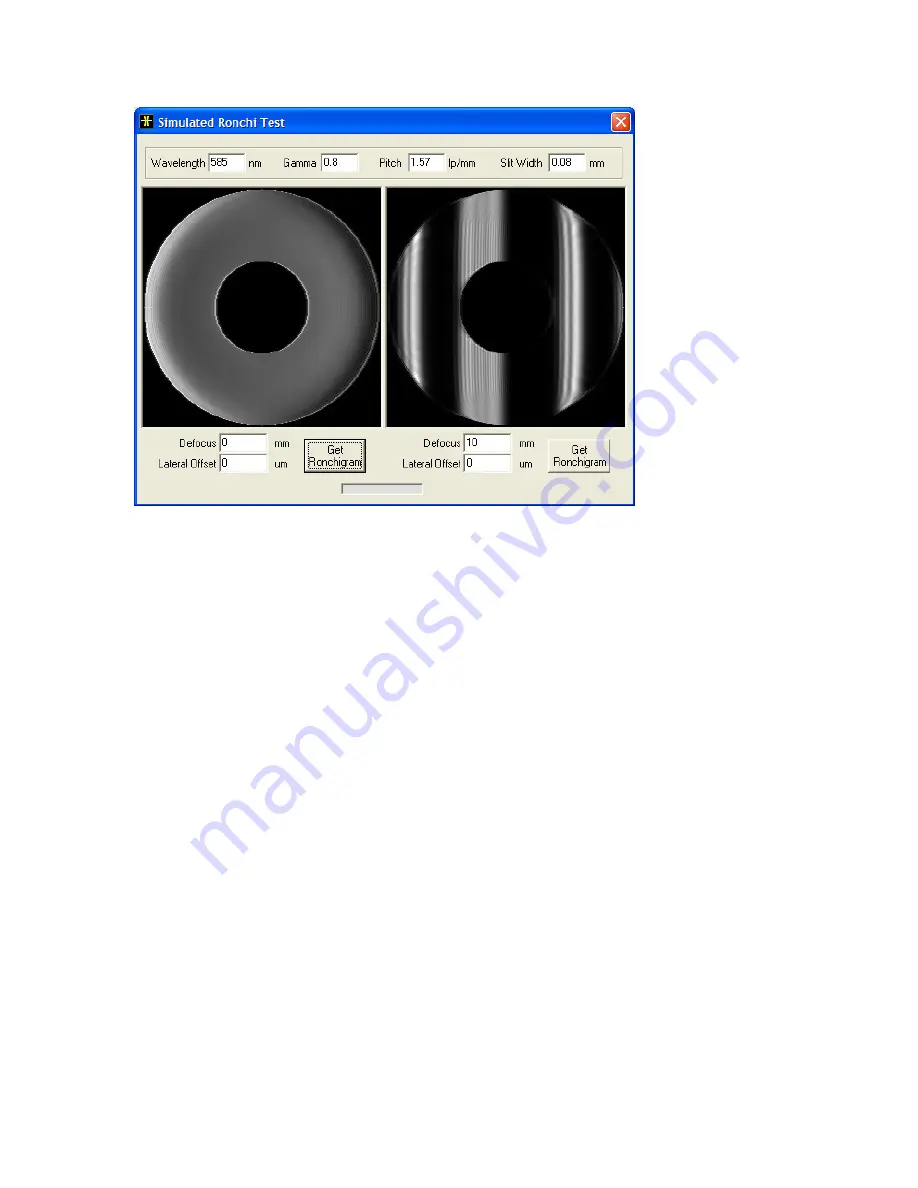
Figure 10: The left image is a simulation of what a null looks like through a Ronchi screen. The right
image is a simulation of what an out of focus view looks like through a Ronchi screen. The right image
shows 2 full lines. The more lines you see, the farther the ronci screen is from the focal plane.
Setting Up the Test
Starting with a telescope that is fairly well collimated, center a bright star and replace the
low power eyepiece with the Ronchi Ocular that was provided with the telescope. Rack
the focuser all the way in, as far as it goes. Make sure the 2” adapter is seated all the way
into the focuser and the Secondary Spacer is seated flush into the 2” adapter. If the
Ronchi is nulled (you can see no lines, or one Ronchi line covers the entire aperture; see
Figure 10), this means that your spacing is already set; you may proceed to Step 3. This
is not uncommon because the primary-to-secondary spacing is set at PlaneWave and you
most likely will not need to adjust it.
If you see two or more lines, you should move the secondary toward or away from the
primary. The mechanics for moving the CDK12.5/CDK17 and the CDK20 secondary
mirrors are a little different.
Determining the Direction to Move the Secondary (CDK12.5 / CDK17)
To determine which way to move the secondary, gently slide the Ronchi Ocular out of
the spacing tube. If the Ronchi reaches null as you do this, the focal plane is too far back
and you need to move the secondary mirror
away
from the primary. If the number of
lines grows as you slide the Ronchi out of the spacing tube, the focal plane is too far
forward and you need to move the secondary
toward
the primary.


