background image

V112907 

4


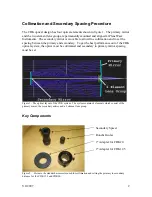
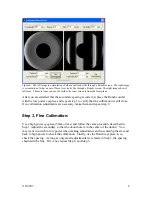
Figure 5: This is an example of an approximately collimated defocused star.   

 
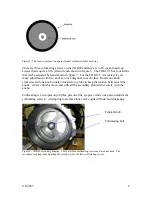
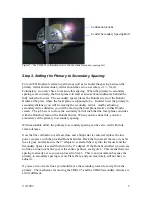
There are three collimating screws on the CDK20 and they are ¼-20 socket head cap 
screws that require a 3/16 Allen wrench shown in figure 6.  The CDK12.5 has four knobs 
that can be adjusted by hand shown in figure 7.  For the CDK12.5 it is easiest if you 
make adjustment with two knobs at once diagonal to each other.  Rotate one knob 
clockwise and one knob counter-clockwise in order to keep the tension between all the 
knobs.  Always finish a move and with all the secondary preloaded securely with the 
knobs.  
    
Collimating is a two-person job (One person at the eyepiece while one person adjusts the 
collimating screws).  Attempting to do this alone can be quite difficult and frustrating. 


Figure 6:  CDK20 secondary housing.  There are three collimating screws and a central knob.  The 
secondary is spring loaded pulling the secondary into the three collimating screws.    

Central Knob 

Collimating bolt 

Summary of Contents for CDK

Page 1: ...V112907 1 PlaneWave CDK Collimation Instructions ...

Page 2: ...d secondary To get the best performance out of the CDK optical system the optics must be collimated and secondary to primary mirror spacing must be set Figure 1 The optical layout of the CDK system The system contains 4 elements which consist of the primary mirror the secondary mirror and a 2 element lens group Key Components Figure 2 Here are the standard accessories used for collimation and sett...

Page 3: ...e telescope at a bright star Defocus the star until it becomes a donut looking ring If the donut hole looks centered in the center of the donut proceed to Step 2 If the donut hole is not centered adjust the collimating screws on the back of the secondary mirror so that the defocused star moves in the direction of the fat side of the donut as shown in figure 4 Re center the star and repeat this pro...

Page 4: ... to each other Rotate one knob clockwise and one knob counter clockwise in order to keep the tension between all the knobs Always finish a move and with all the secondary preloaded securely with the knobs Collimating is a two person job One person at the eyepiece while one person adjusts the collimating screws Attempting to do this alone can be quite difficult and frustrating Figure 6 CDK20 second...

Page 5: ...ides with the Ronchi screen on the Ronchi Ocular When you have done this you have accurately set the primary to secondary spacing With reasonable effort the primary to secondary spacing can be set to well within its 1mm tolerance Now that the collimation is at least close and a bright star is centered replace the low power eyepiece with the provided Ronchi Ocular Rack the focuser all the way in as...

Page 6: ... complete 3 Take a flat head screw driver and place the tip in the central bolt of the secondary assembly Rotate the central bolt in a counter clockwise direction For reference rotating turn moves the secondary 4mm and that moves the focus 3mm 4 Take the four collimation knobs and rotate them in equal amounts until the assembly is tight again 5 Check the Ronchi screen and repeat process as necessa...

Page 7: ...ermine which way to move the secondary gently slide the Ronchi ocular out of the spacing tube If as you do this the Ronchi reaches null the focal plane is too far back and you need to move the secondary mirror away from the primary If as you slide the ronchi out of the spacing tube the number of lines grows the focal plane is too far forward and you need to move the secondary toward the primary Fo...

Page 8: ...peat step 1 to verify that the collimation is still close If re collimation adjustments are necessary make them and repeat step 2 Step 3 Fine Collimation Use a high power eyepiece 5mm or less and follow the same procedure described in Step 1 adjust the secondary so that the donut hole is in the center of the donut You may want to switch to low power when making adjustments and re centering the sta...

Reviews: