10
Sequence of operations to
perform before cutting
IMPORTANT: Before switching on the equipment follow these
instructions carefully:
• Make sure the voltage and frequency of the supply network
correspond to the data on the rating plate.
• Make sure all the torch components are correctly installed.
• Do not point the torch toward yourself or other persons near-
by. If switched on accidentally the pilot arc spark would ignite
and cause dangerous burns.
1) Turn the power switch (Pos. 8, Fig. A) to position
I
.
2) The equipment has just been started. The equipment’s
built-in checking device runs a series of programmed tests
(see the “Switching on the equipment and initial screens”
paragraph) during which the fan motor switches on for a
few seconds.
3) By pushing the cutting mode selection key (Pos. 5, Fig. B),
according to the corresponding lit LED, the operator can
select one of the following operating modes:
• Solid material mode: when the torch button is pushed,
when the operator goes out of the workpiece during cut-
ting, the arc switches off automatically.
• Mesh material mode: when the torch button is pushed,
when the operator goes out of the workpiece during cut-
ting, the pilot arc ignites again automatically, to allow cut-
ting to continue.
• Gouging mode to remove material with the help of a
plasma beam.
4) Press the COMPRESSED AIR TEST Key and check:
• That air comes out of the torch.
• If the air pressure value shown in the display flashes, this
means that it is outside the optimum range for the cut-
ting mode selected. Rotate the filter / regulator knob un-
til the display shows the optimum pressure, as indicated
in the table below. The pressure value is displayed con-
tinuously, without flashing.
Cutting mode
Optimum pressure
Minimum /
Maximum pressure
alarm
5,5 bar
80 psi
4,5÷6,5 bar
65÷94 psi
3,7 bar
54 psi
3,0÷4,5 bar
44÷65 psi
5) Press the DISPLAY SELECTION key until the DISPLAY
shows the current value (CUTTING CURRENT LED
switched on and fixed). The value indicated by the DIS-
PLAY is referred to as the PRESET CUTTING CURRENT.
Adjust the cutting current using the ENCODER KNOB. In-
creasing the current makes faster cutting possible or great-
er thicknesses can be cut at the same speed.
6) Move the torch close to the workpiece (Fig. E) and, keep-
ing the shield supported without exerting pressure, push
the torch button, thereby igniting the pilot arc and the air
supply. Introduce the flame to the workpiece, and begin the
cut. Go with the flame to the piece and start cutting. Do not
keep the pilot arc in the air, to avoid needless consumption
of the electrode and nozzle.
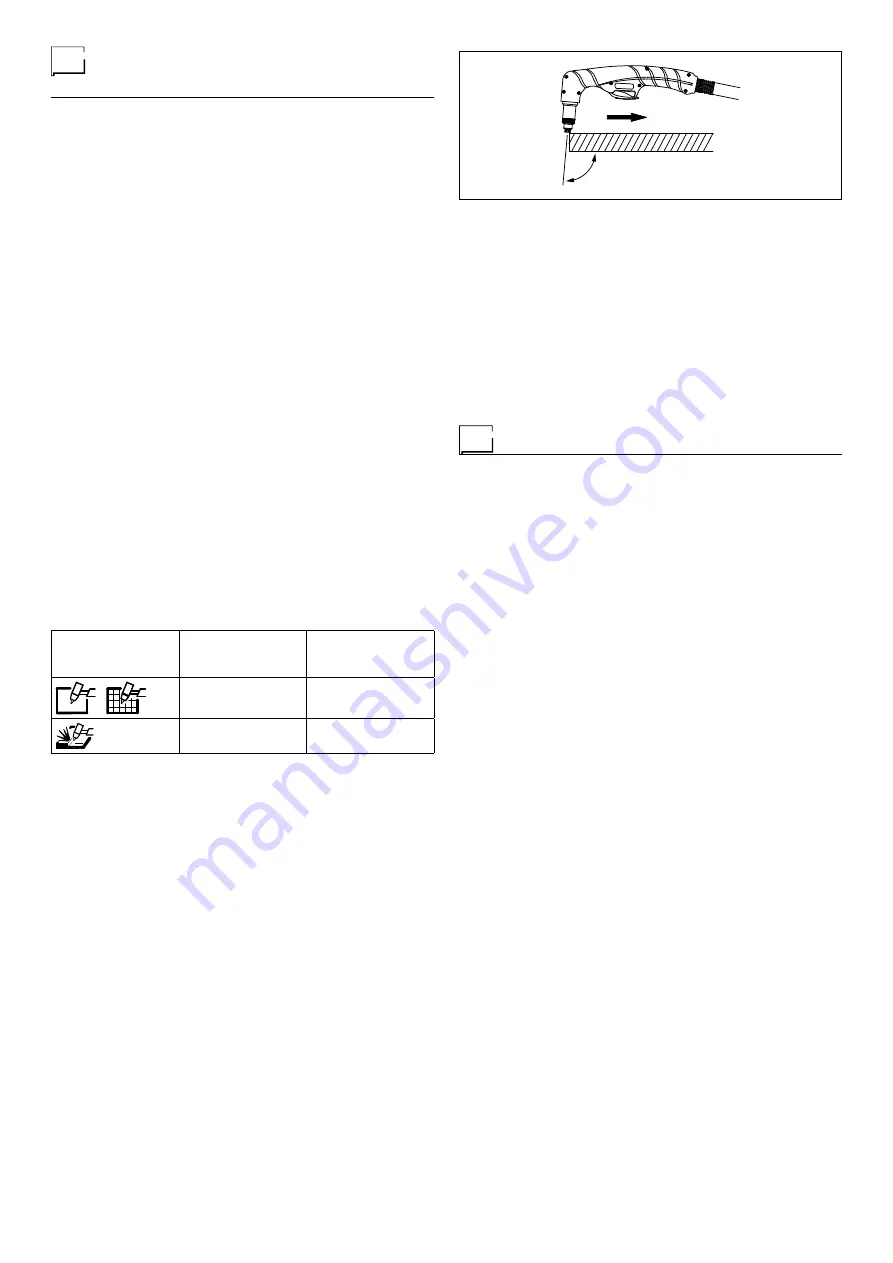
7) In special cases if the arc is switched off when the work-
piece enters, observe the correct angle of inclination be-
tween the torch and the metal (Fig. E). A special control
device prevents arc transfer in case of incorrect inclination
between the torch and the workpiece.
8) Cut taking care that the fused material flows through the
groove and is not projected in the direction of the torch. If
this occurs, reduce cutting speed.
9) Upon completion of the cutting operation, the air will conti-
nue to issue from the torch for about one minute so as to
cool the torch components. Wait for the air to stop flowing
before switching the equipment off. During this time, you
can also start a new cutting operation. If you have to per-
form cir cular cuts, it is advisable to use the special com-
pass sup plied on request.
Energy saving
This function manages correct functioning of the fan motor,
which is switched on for a predefined time and only when strict-
ly necessary, to guarantee lower energy consumption, that is:
• When the equipment is switched on.
• During the cutting phase.
• On completion of the cutting phase.
• When the thermostat intervenes or after it has been reset.
90-95°
FIG. E
Summary of Contents for SHARK 155
Page 47: ......


