16
Sun Lounge Assembly Instructions
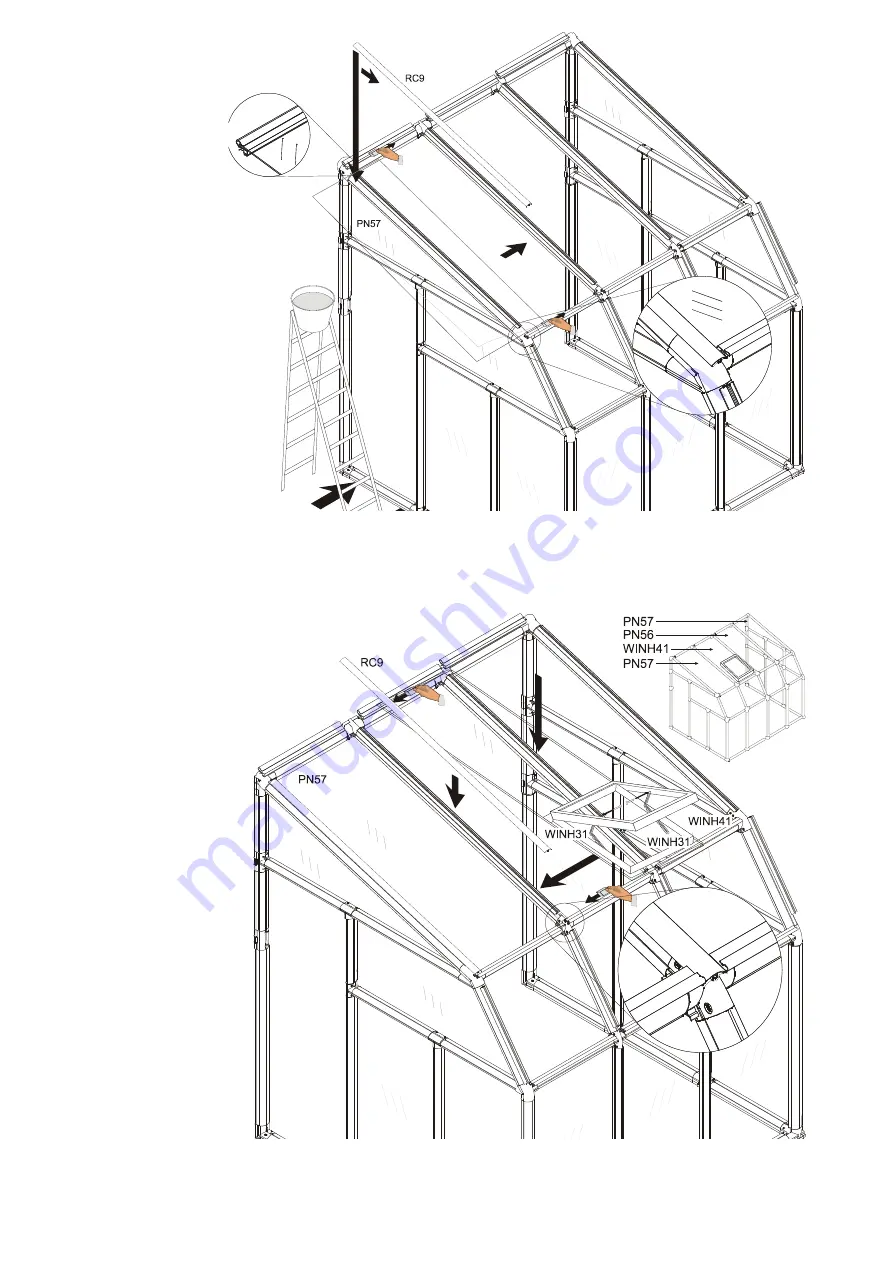
Cover the Roof
Moisten the RD2
elements with soapy
water.
Remove the plastic film
from the PN57 panel
and slide the panel
between the RD
glazing elements.
Note:
If your model
includes polycarbonate
panels with UV
protection, there is a
single plastic film
indicating the outside.
Acrylic panels are
protected by plastic film
on both sides.
Remove
the plastic before
installation.
Important:
In order
to maintain the life of
your greenhouse, it is
essential to insert
glazing elements fully and completely, using soapy water, as explained on page 2.
Lock the left side of the panel into place with an RC9 glazing element. Place one end in the channel and
push it down along the length of the profile. Make sure that the end of the RC glazing element is in line with
the bottom of the RD element.
Moisten the RD2
elements with soapy
water.
Assemble the two
WINH31 handles to
the WINH41 Roof
Vent using the
included pins and
place the window in
central section.
Note:
If you have a
Sun Lounge model with
more than one LTM, you
may install additional
roof vents in the middle
sections.
Lock the right side of
the PN57 panel and
the left side of the
roof vent in place with
an RC9 glazing
element. Place one
end in the channel
and push it down
along the length of the
profile. Make sure that
the end of the RC
glazing element is in line with the bottom of the RD elements.
Summary of Contents for Rion Sun Lounge
Page 27: ...25 Notes...


