For Customer Service Call
800.333.8519 (U.S.A.) or
541.955.9199 (International)
Manufactured by Krauss Craft, Inc.
www.playcraftsystems.com
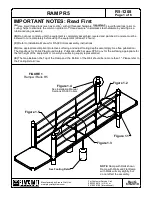
RAMP R5
Rev G
6/5/2010
R5-1208
Page 4 of 6
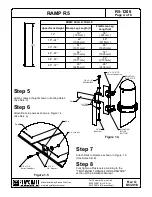
Step 5
Attach collars at height shown in Footing Detail.
(See Note C)
Step 6
Attach Rails to posts as shown in Figure 1.4.
(See Note A)
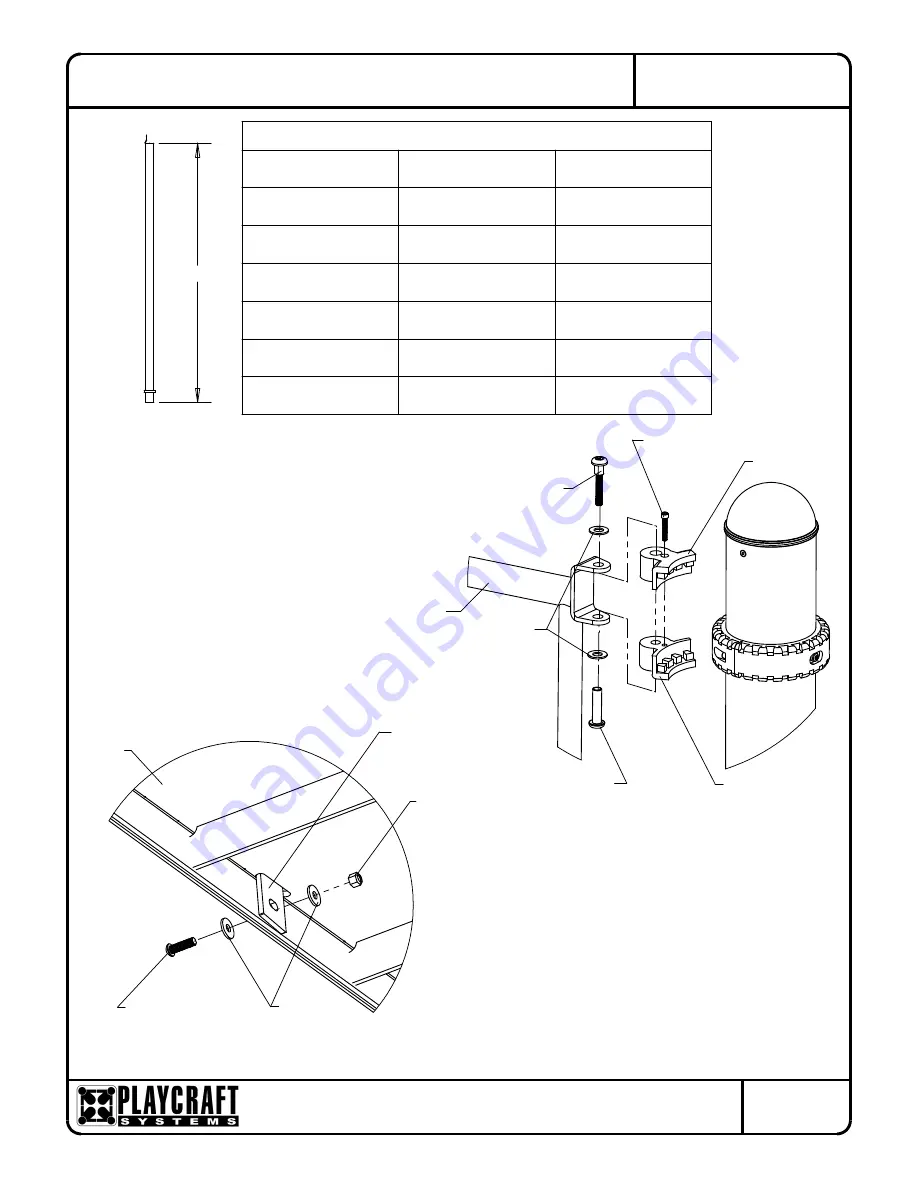
RAMP LEG I.D. TABLE
Upper Deck Height. Ramp Leg Length (X)
Flat Ramp Leg
Length (X)
12"
30"
[ 761mm ]
36"
[ 914mm ]
18" - 24"
42"
[ 1066mm ]
48"
[1218mm ]
30" - 36"
54"
[ 1371mm ]
60"
[ 1520mm ]
42" - 48"
66"
[ 1675mm ]
72"
[ 1828mm ]
54" - 60"
78"
[ 1977mm ]
84"
[ 2133mm]
66" - 72"
90"
[ 2285mm ]
96"
[ 2438mm ]
O.D. Washer
MOUNTING
BLOCK TOP
Fully tighten all fasteners according to the
Step 8
section of the Installation Manual.
"TIGHTENING TORQUE FOR HARDWARE"
(See Notes A & E)
Attach Rails to Ramps as shown in Figure 1.5.
Button Head Bolt
3/8" x 1-1/4"
3/8" Lock Nut
RAIL
RAMP
Shoulder Bolt
RAIL
3/8" x 2-1/2"
Socket Head Screw
1/4" x 1-3/8" TR
Step 7
3/8" x 1"
MOUNTING
BLOCK
BOTTOM
Figure 1.5
Figure 1.4
1/2" SAE
Washer
3/8"X2"
Barrel Nut
(X)


