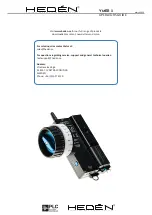
YMER 3
OPERATORS GUIDE
March 2020
www.plcelectronicsolutions.com
D E S I G N E D A N D M A D E I N S W E D E N S I N C E 1 9 6 4
®
D E S I G N E D A N D M A D E I N S W E D E N S I N C E 1 9 6 4
®
6
Installing the Receiver
Mount the Receiver bracket on an appropriate surface using the supplied ¼ inch screw or other preferred method. The
receiver can then be mounted in the bracket by placing it in with the lower edge first and then pressing the receiver in
place while lifting the release tab slightly. The receiver will snap in place when the mounting bracket is set in a centered
position. This is the recommended configuration as the receiver will be more secure, but the receiver can also be mount
-
ed in an off-center position if needed. To release the receiver, press the release tab while pulling the receiver at a slight
forwards angle.
Connect the motor cable(s), Run/Stop cable (if desired), AUX cable (if desired) and power cable. Note the correct connec
-
tor orientation.
WARNING!
Do not connect the power cable to an active power source until all other cables and equipment are installed in
order to protect them from over voltage and ESD.
The chosen power source needs to be able to source 3 Amps or the motor performance will suffer. The receiver can use
a power source anywhere between 10-30 volts (DC) and will accept both standard and reverse polarity power cables,
although we recommend only using original Hedén power cables.
Receiver setup
-Setting Motor Direction
The motor travel direction for all motors can be changed by pressing the DIR buttons on the receiver.
On the receiver, pressing the DIR button controlling the Focus motor will cause the motor, if calibrated to a lens, to shift
on the lens to the corresponding position in the opposite travel direction and then to be moving in the opposite direction
compared to the default setting.
-Resetting the Receiver to Factory Settings
Resetting the receiver will restore all settings to factory defaults.
To perform the reset, turn the system off. Press and hold the AUTO button while powering the system back up and keep
the AUTO button pressed down until the flashing F.r on the display turns solid. Once F.r has turned solid, release the AUTO
button and the receiver will be reset to factory settings.
Pairing
The Hedén Ymer 3 system uses frequency-hopping spread spectrum radio signals and powerful antennas to communicate
at a distance of up to 500 meters (approx. 547 yards) line of sight. Using a radio system with Low Emission significantly
reduces interference by other 2.4Hz radio frequencies and the system will not be affected by WI-Fi devices. This makes the
Hedén Ymer system very reliable and the risk of interference marginal.
In order to pair the Transmitter with the receiver both units need to be powered on. On the transmitter, long press the
pair button for about 2 seconds until the unit gives of a slight vibration and the blue LED starts blinking.
On the receiver, long press both pair buttons simultaneously for approximately 2 seconds until the Rx DATA LED starts
blinking blue. Both units are now in pairing mode.
Pairing usually takes about 10 seconds and successful pairing is indicated by the blue LED’s on both units turning solid
blue.
A solid red Rx DATA LED on the receiver indicates that the unit is not receiving data. Usually meaning not paired or out of
range/contact. The LED’s just above the Rx DATA LED signifies data strength, where one solid yellow signifies a poor signal
and two green and one yellow signifies good signal strength.


