IP-010
Page
8
of
13
Revision 3
4.
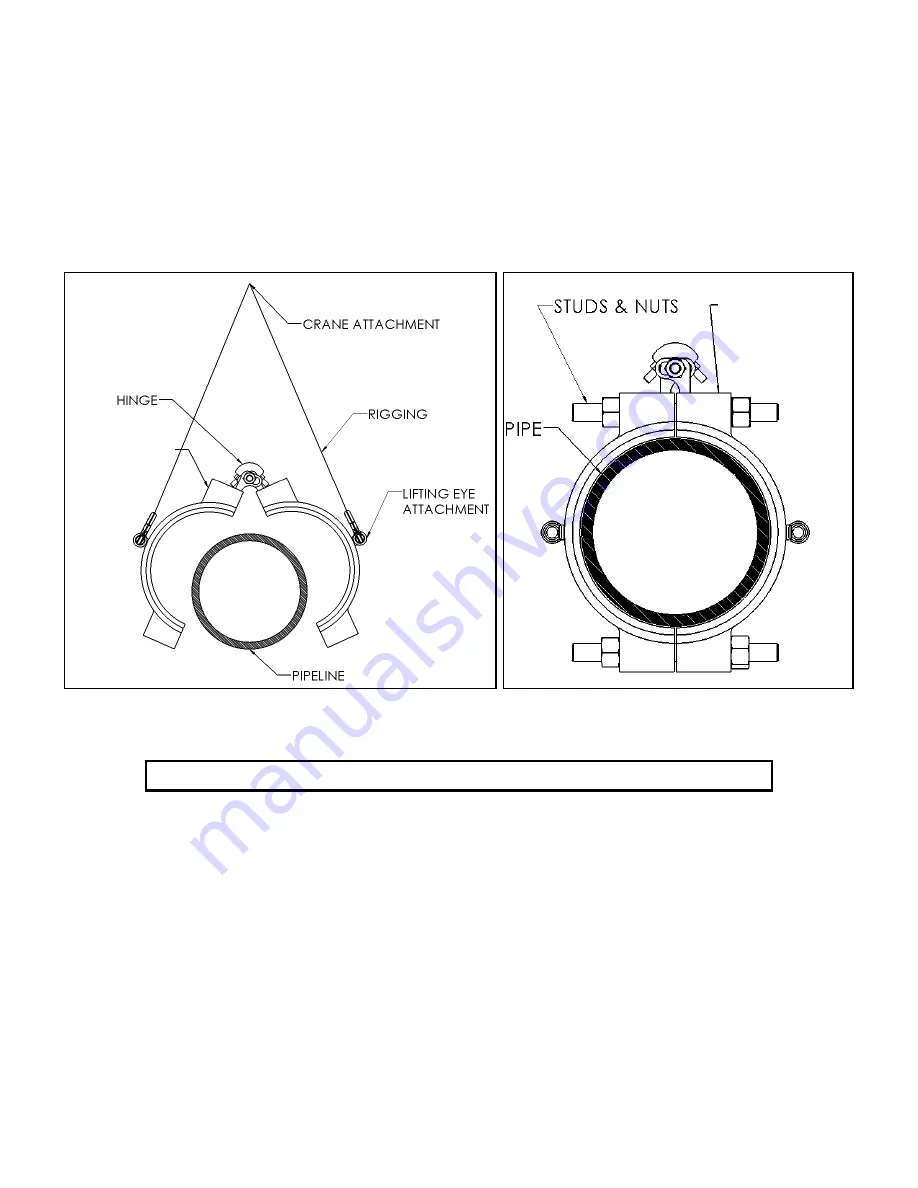
Lift the fitting up from the single point crane attachment. The Clamp+Sleeve will open up as shown
in Figure 10.
5.
Position the fitting over the pipeline and slowly lower the fitting onto the pipeline as shown in Figure
10. The inside of the fitting should come in contact with the pipeline, and the fitting will start to close
as it is lowered. Some fittings may require some additional side force to close the fitting around the
pipe. Keep all body parts clear of the inside of the fitting at all times as the fitting is being lowered
onto the pipe. This is to ensure safety in the event the that the fitting slams closed rapidly.
6.
Once the fitting is wrapped around the pipe, insert the studs through the bolt holes and thread on
the nuts as shown in Figure 11. Proceed to tighten the studs and nuts per these installation
instructions.
Figure 10
Figure 11
Sealant Injection
Sealant Injection is not required for a PLIDCO Clamp+Sleeve to achieve a leak tight seal provided the
sleeve was installed with elastomer seals, was installed per this installation instructions, and the
temperature and pressure of the pipeline are within the design limitations of the PLIDCO Clamp+Sleeve.
However, PLIDCO Clamp+Sleeves are capable of being injected with sealant, grout, hardenable epoxy,
or similar substance. Please note:
Clamp+Sleeves Installed with braiding style packing such as Kevlar,
Graphite, or Teflon require sealant injection in order to seal.
In-order for standard Clamp+Sleeves to be injected with sealant, the fitting must come from the factory
with a minimum of one vent in each half. For fittings without vents, please contact PLIDCO or an
authorized representative for options to add vents on existing fittings.
The Clamp+Sleeve must be installed and fully tightened prior to injecting sealant.
Please see IP-033,
PLIDCO Sealant Injection Instructions
, for additional information for injecting sealant.
CLAMP+SLEEVE
CLAMP+SLEEVE


