Installation manual SR85
2-11
1
2
3
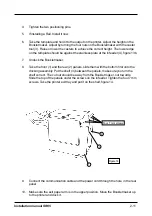
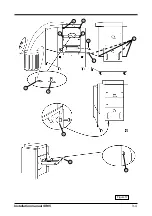
Four 7 mm screws
Figure 14
4.
Tighten the two positioning pins.
5.
If installing a Rail. Install it now.
6.
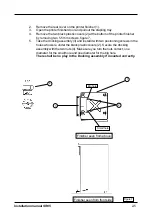
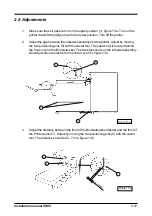
Take the template and hold it to the output on the printer. Adjust the height on the
Bookletmaker. Adjust by turning the four nuts on the Bookletmaker with the caster
tool (3). Raise or lower the casters to achieve the correct height. The lower edge
on the template should be against the stainless plate at the infeeder (4),figure 13b.
7.
Undock the Bookletmaker.
8.
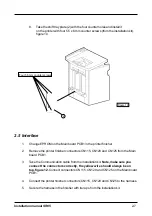
Take the front (1) and the rear (2) panels, slide them with the bottom first onto the
docking assembly. Put the shelf (3) between the panels, make sure you turn the
shelf correct. The cut out should be away from the Booklet maker, not towards.
Slide the top of the panels under the screws on the infeeder. Tighten the four 7 mm
screws. Take the printer exit tray and put it on the shelf, figure 14.
9.
Connect the communication cable and the power cord through the hole in the rear
panel.
10. Make sure the exit paper arm is in the upper position. Move the Bookletmaker up
to the printer and dock it.
Summary of Contents for SR 85
Page 1: ...Installation Manual Bookletmaker SR 85 and Trimmer TR 85 January 2002 x17030 ...
Page 12: ...Installation manual SR85 Figure 11 2 6 Wiring communication cable 2 8 ...
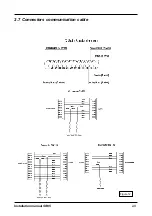
Page 13: ...Installation manual SR85 2 7 Connectors communication cable Figure 12 2 9 ...
Page 20: ...Installation manual SR85 2 3 4 7 2 Figure 17 3 4 10 11 9 1 1 6 8 ...

