E-59
Tools
Free Space: The free space on the CompactFlash card is displayed here in units of kilobytes.
Execute:
Select this to project the selected file.
When files of JPEG or bitmap format are executed, the input switches to the viewer input.
When the “Return” icon on the toolbar displayed in the bottom left corner of the picture is selected, the “PC Card
Files” window reappears.
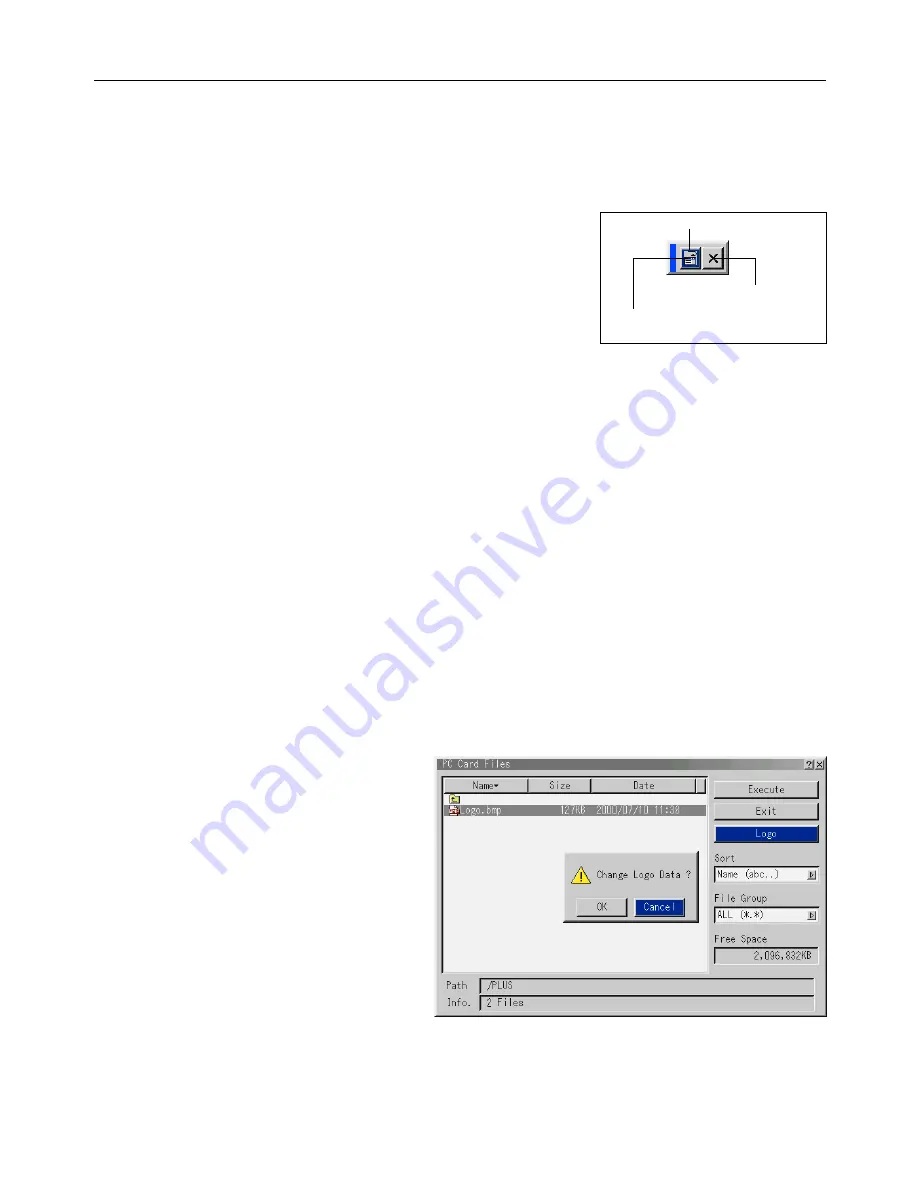
Selecting icons on the toolbar
Use the SELECT
buttons to move the cursor (blue frame) to the
desired icon, then press the ENTER button.
Cursor
Return: The “PC Card Files”
window reappears.
End: The toolbar closes.
Exit:
Select this to quit the PC card file mode and return to the menu
display.
Logo:
Select this to capture a logo (background) created on the com-
puter.
Using the PC card file function
1. Load a CompactFlash card into the PC card slot.
2. Display the “PC Card Files” window.
3. Use the SELECT
▲▼
buttons to select the file.
4. Use the SELECT
button to move the cursor (blue frame) to “Execute”, then press the ENTER button. The selected
file is projected.
•
When files other than JPEG and bitmap files are selected, the window is displayed over the entire screen.
Press the CANCEL button to return to the “PC Card Files” window.
•
When JPEG or bitmap files are selected, the input switches to the viewer input.
When the “Return” icon on the toolbar displayed in the bottom left corner of the picture is selected, the “PC Card Files”
window reappears.
•
To return to the file list, press the SELECT
button. A pull-down list appears when the SELECT
button is pressed. Select
using the SELECT
▲▼
buttons then press the ENTER button to select.
5. Set the cursor to “Exit” then press the ENTER button to close the “PC Card Files” window.
Setting the background logo
You can create your own background which is displayed when there is no signal. Create the background on a computer
and store it on a CompactFlash card.
Notice
• Create the background as an image file of JPG or bitmap
format, with a file size of 64 kb or less.
• When the logo data is changed, the original data can-
not be retrieved even by resetting the data.
Select the logo image you have created then set the cur-
sor to “Logo” and press the ENTER button. A confirma-
tion message appears. Select “OK” then press the EN-
TER button to change the logo.


