15
Using the Ethernet cable to connect the scanner and your computer in a network
environment with static IP allocation
a. Disconnect your computer from your network environment by unplugging the
network cable from your computer. Connect the scanner and your computer
using an Ethernet cable.
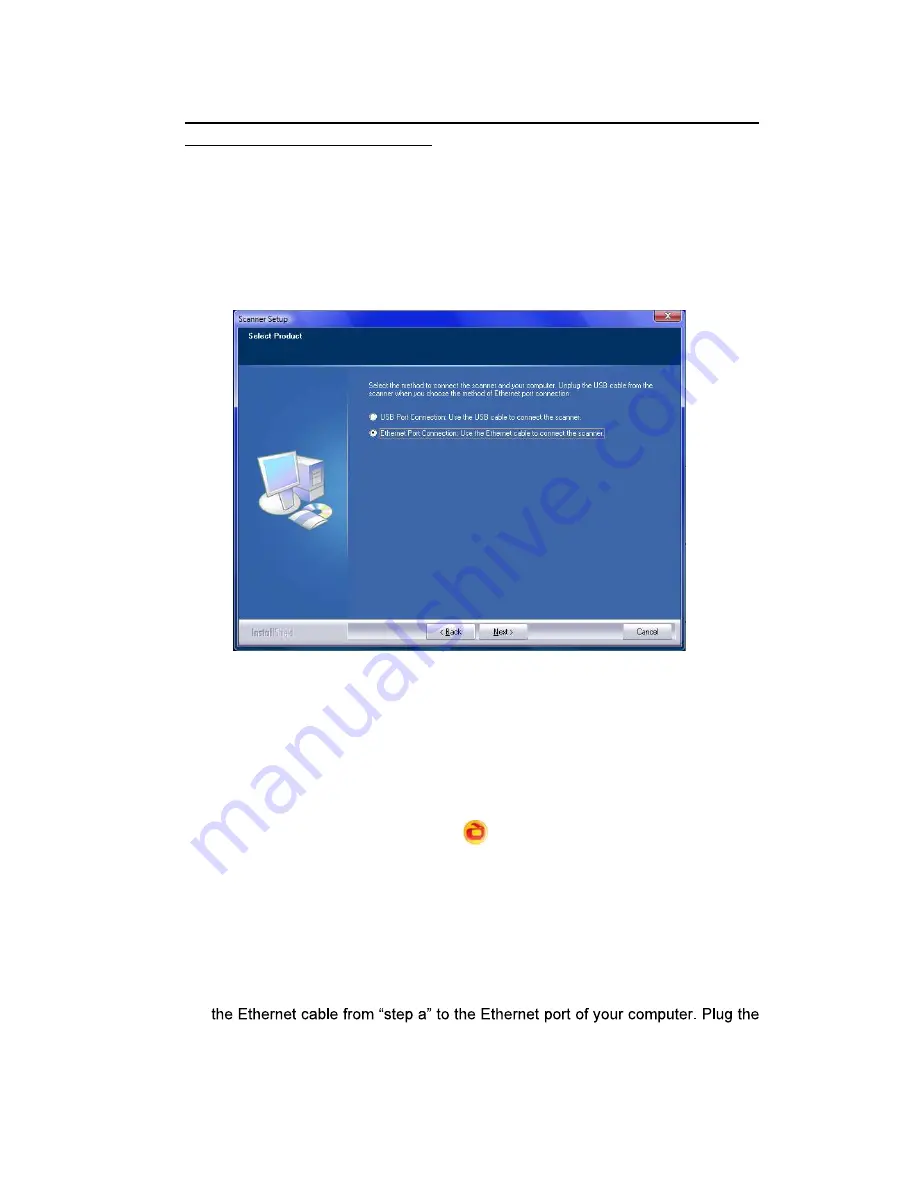
b. Select the
Ethernet Port Connection
option. Please make sure to unplug the
USB cable from the scanner when you choose this option.
c. Follow the on-screen installation instructions. Please use the
Scanner Search
Tool
to search available scanners. (If the Windows Security Alert window
appears during the search tool execution, please unblock the search tool from
the firewall to make sure the connecting process is working properly.) Refer to
the online help of
Scanner Search Tool
to explorer more about
Scanner
Search Tool
!
d. Select the desired server icon
in the scanner list. Click
Server
Configurations
from the
Options
menu. Untick the
Use DHCP
option and
modify the
IP Address
and
Subnet
to match your network environment. Please
consult your network administrator for the
IP Address
and
Subnet
. Please
make sure that the setting is valid and correct. Do not enter an IP address that
already exists in the network. Click the
Set
button to save settings.
e. Unplug the network cable from the scanner and your computer. Plug the end of
end of another Ethernet cable to the Ethernet port at the rear of the scanner.
Plug the other end of the Ethernet cable to an available port on the Ethernet
hub.


