If you don’t find such USB ports on your computer, then you need to purchase a
certified USB interface card to add USB capabilities to your computer.
Installing and Setting up the Scanner
Please follow the step-by-step procedures described below to install the USB
scanner.
S
S
t
t
e
e
p
p
1
1
.
.
C
C
o
o
n
n
n
n
e
e
c
c
t
t
i
i
n
n
g
g
t
t
h
h
e
e
S
S
c
c
a
a
n
n
n
n
e
e
r
r
t
t
o
o
Y
Y
o
o
u
u
r
r
C
C
o
o
m
m
p
p
u
u
t
t
e
e
r
r
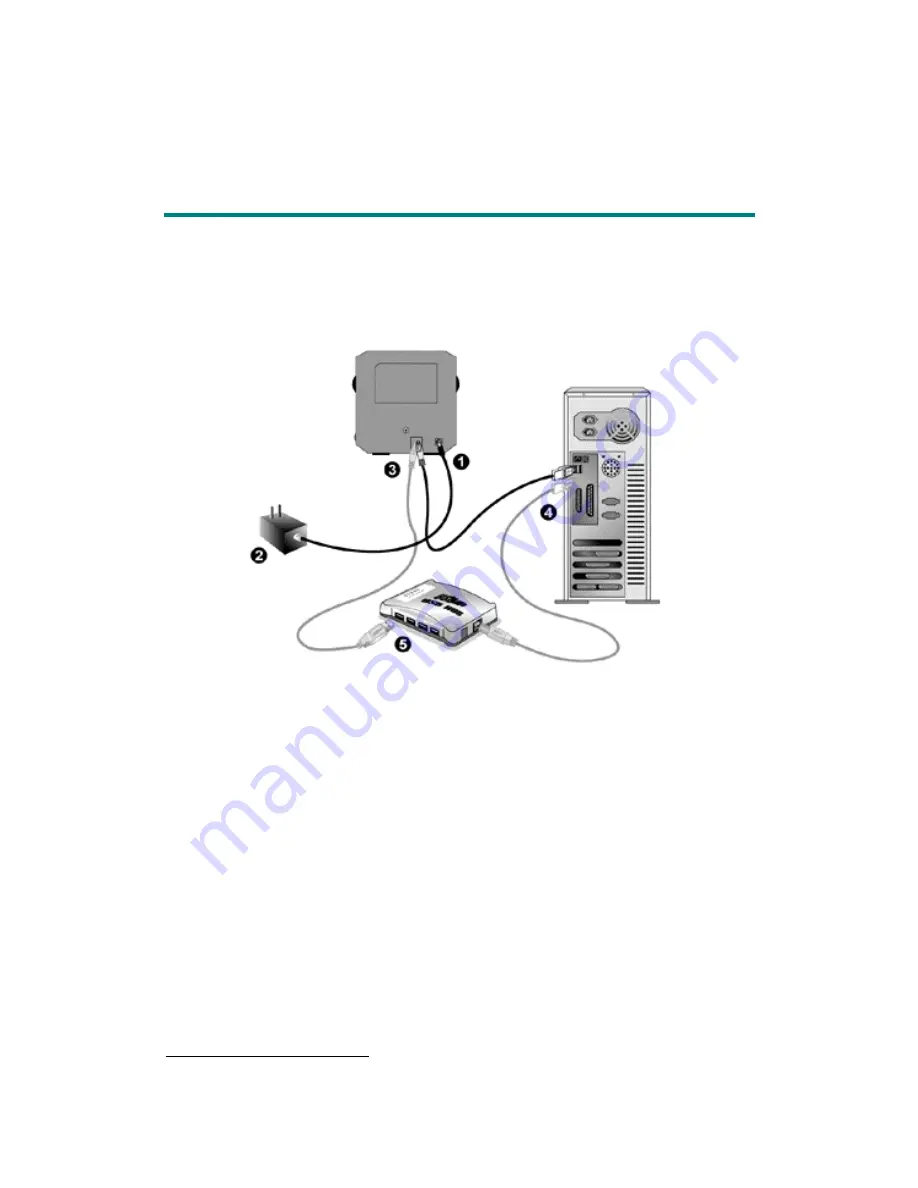
1. Plug the power adapter into the scanner’s power receptor.
2. Plug the other end of the power adapter into a standard AC power outlet.
3. Plug the square end of the included USB cable to the USB port at the rear of the
scanner.
4. Plug the rectangular end of the USB cable to the USB port on the back of your
computer.
Note:
If there is another USB device connected to the computer; connect the
scanner to an available USB port.
5. If you plan to connect your scanner to a USB hub
3
, make sure that the hub is
connected to the USB port in your computer. Next, connect the scanner to the
USB hub.
Note:
If you do not have a USB port available, you might need to buy a USB
port.
3
The USB hub is not included with the scanner
.
6


