S
S
t
t
e
e
p
p
2
2
.
.
C
C
o
o
n
n
n
n
e
e
c
c
t
t
i
i
n
n
g
g
t
t
h
h
e
e
S
S
c
c
a
a
n
n
n
n
e
e
r
r
t
t
o
o
Y
Y
o
o
u
u
r
r
C
C
o
o
m
m
p
p
u
u
t
t
e
e
r
r
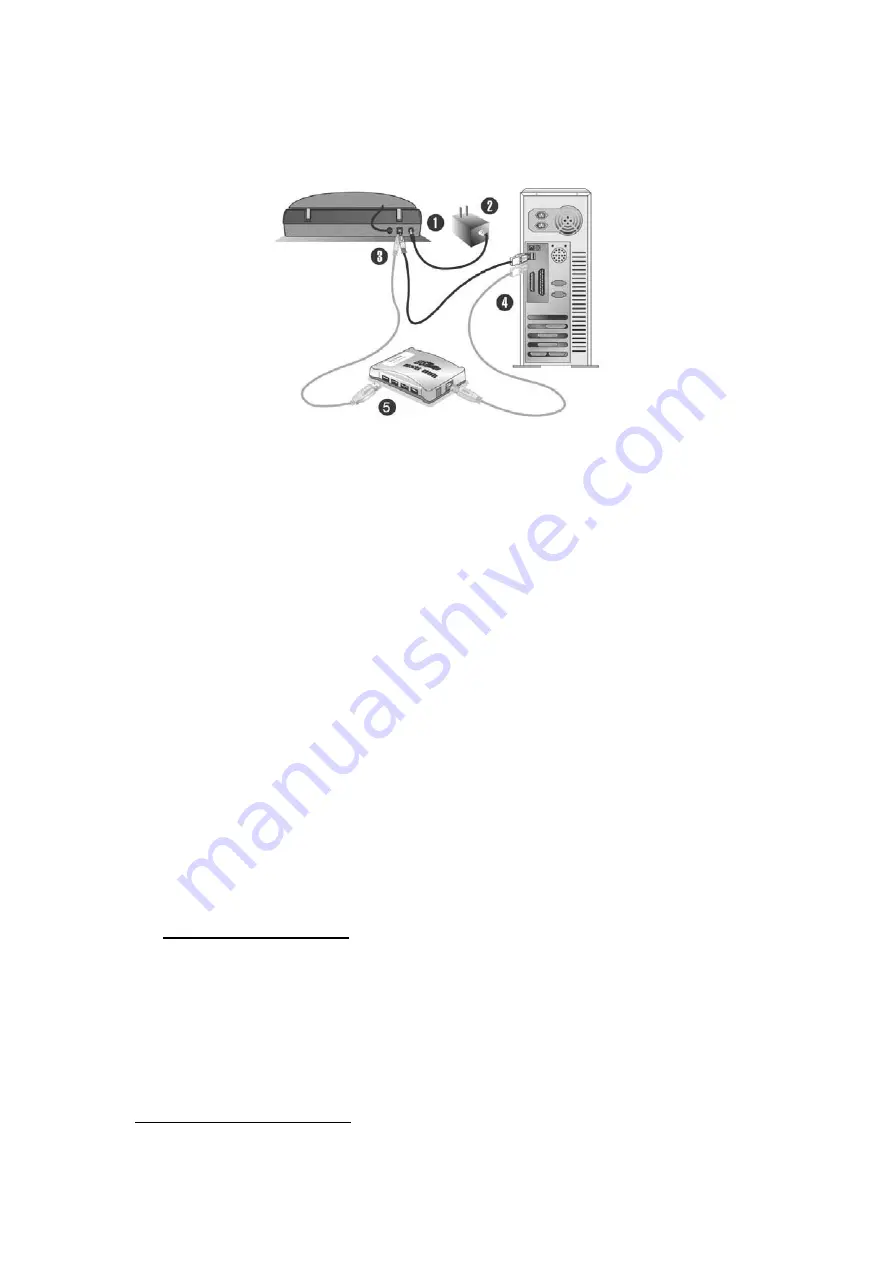
1. Plug the power adapter into the scanner’s power receptor.
2. Plug the other end of the power adapter into a standard AC power outlet.
3. Plug the square end of the included USB cable to the USB port at the rear of the
scanner.
4. Plug the rectangular end of the USB cable to an available USB port on the back of
your computer
.
5. If you plan to connect your scanner to a USB hub
, make sure that the hub is
connected to the USB port in your computer. Next, connect the scanner to the
USB hub.
S
S
t
t
e
e
p
p
3
3
.
.
I
I
n
n
s
s
t
t
a
a
l
l
l
l
i
i
n
n
g
g
t
t
h
h
e
e
S
S
o
o
f
f
t
t
w
w
a
a
r
r
e
e
1. If the USB components on your computer are functioning correctly, they will
automatically detect the scanner causing the “Add New Hardware Wizard” or
“Found New Hardware Wizard” to be launched. Note: If your computer was off
when you connected the scanner, the “Add New Hardware Wizard” message will
be displayed when you turn the computer on and when Windows starts.
2.
For Windows 98 & 2000
a. Click on the [Next] button when the “Add New Hardware Wizard” window
is displayed.
b. Select “SEARCH FOR THE BEST DRIVER FOR YOUR DEVICE
RECOMMENDED” and click on the [Next] button.
c. The next window will ask you where to search to find the drive. [Select CD-
ROM drive], and deselect [Floppy disk drives] if it is checked.
4
The USB hub is not included with the scanner
.
6
Summary of Contents for OPTICPRO ST64
Page 1: ...Installation Usage Maintenance Troubleshooting ...
Page 4: ......


