Atlas Developer’s Kit
Magellan Motion Processer Developer’s Kit Manual
61
A
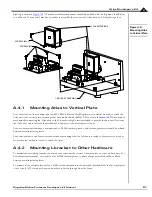
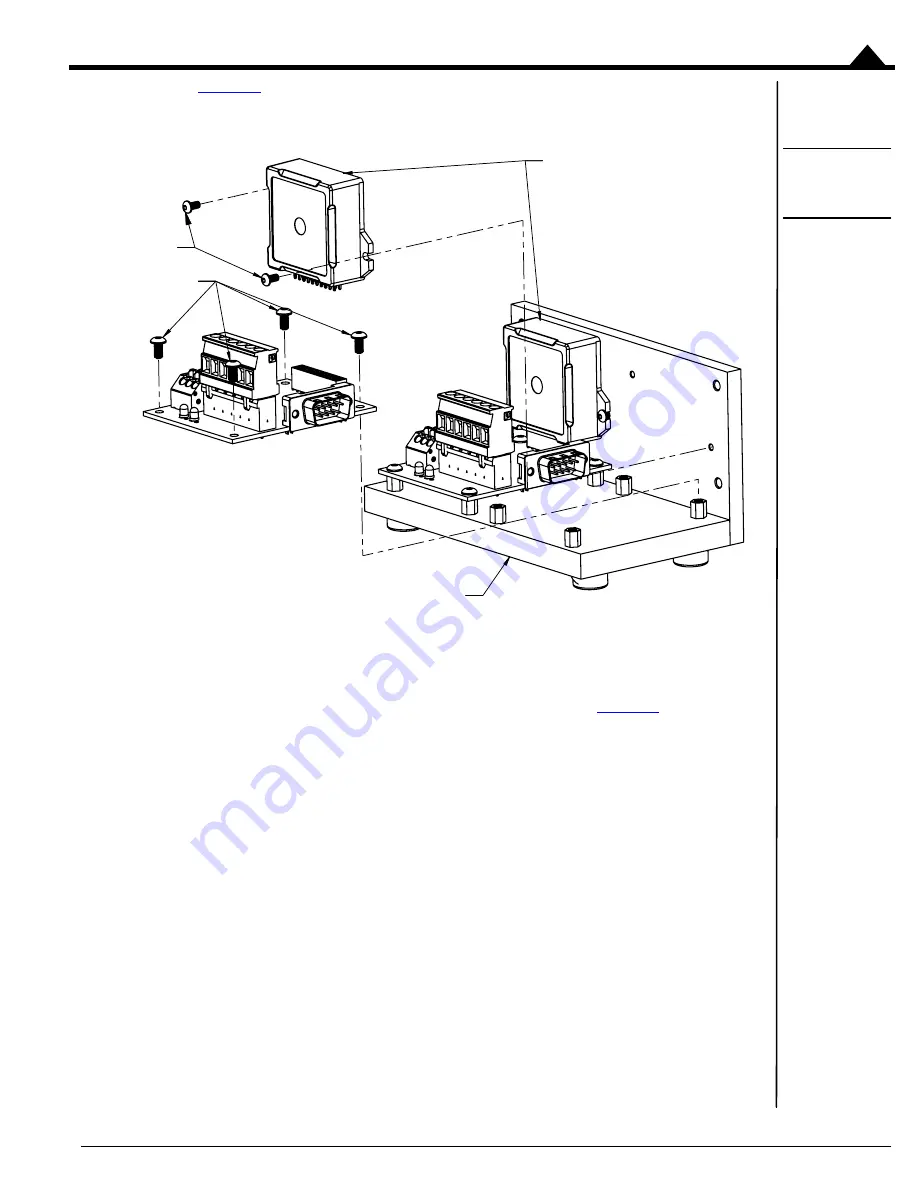
drawing is shown in
. All needed assembly components should be included with the shipment. In addition,
you will need 1.5 mm and 2 mm hex wrenches to assemble the carrier cards, Atlas units, and L-bracket together.
Figure A-8:
Mounting Atlas
to Vertical Plate
A.4.1
Mounting Atlas to Vertical Plate
For vertical units with mounting tabs, two M2.5 BHCS (Button Head Cap Screws) or similar are used to attach the
Atlas unit to the vertical plate, assuming it has been included with the DK. This is shown in
. While optional,
mechanically connecting the Atlas units to the L-bracket is highly recommended to provide the best heat flow from
the Atlas unit, and to increase the mechanical robustness of the development system.
For best thermal performance, a material such as Sil-Pad, thermal grease, or phase change material should be utilized
between metal interfacing layers.
For horizontal units, and for vertical units without mounting tabs, the Atlas unit is seated in the carrier via a socket.
No mechanical hardware is used to attach the Atlas.
A.4.2
Mounting L-bracket to Other Hardware
To maximize heat sinking capacity you may choose to mount the vertical L-bracket piece to your own hardware. For
best thermal performance, a material such as Sil-Pad thermal grease or phase change material should be utilized
between metal interfacing layers.
To connect to the vertical plate use four (4) M4 screws threaded into the provided threaded holes in the vertical plate
or use four (4) M3 screws with nuts and washers to fasten through from the front.
SCREWS (M2.5)
SCREWS (M3)
ATLAS AMPLIFIERS
L-BRACKET ASSEMBLY


