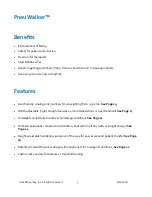
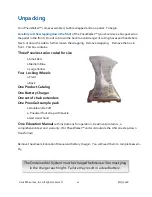
background image


© 

2018Pneumex, Inc. All rights reserved


9                      .                                                 8/27/2018


Control panel


Contained air system  


Locking Wheels


Handlebar


Upright


Back


Cylinder


Handlebar  


Air Box


Off

-

On switch


Lift Arm


Cylinder Ports


Patient Ports


Drain and Air Valve 


Summary of Contents for PneuGait FootStrap

Page 1: ... 2018Pneumex Inc All rights reserved 8 27 2018 PneuVest Ultima PneuGait Foot Strap Education Manual PneuWalker Pneumex Inc www pneumex com 800 447 5792 pneumex pneumex com Genuine Pneumex Equipment ...

Page 2: ...ack Chair PneuWeight PneuWalker and PneuVest are trademarks of Pneumex Inc This manual may be purchased for educational business or sales promotional use Pneumex Equipment 2605 North Boyer Ave Sandpoint Idaho 83864 Phone 1 800 447 5792 Fax 208 265 9651 Revision 2018 Revision Date August 21 2018 Printed Monday August 27 2018 Log on to www pneumex com to activate your warranty registration Your purc...

Page 3: ...em 14 15 Operating the PneuWalker Handlebars 16 Adjust Width 17 Adjust Height 18 Control Panel 19 Safety Straps 360 Degree Attachment 20 Lift Arm Hemiplegia Settings 21 PneuVest Ultima Diagram 22 23 Putting on the PneuVest Ultima 24 26 Putting on the PneuVest Ultima in Wheelchair 27 28 Using the PneuWalker 29 PneuGait Foot Straps 30 PneuGait Assist Bands 32 Transition to PneuWeight 33 Maintenance ...

Page 4: ...ment must be used in accordance withthe instructions for use It is suggested that operators of the PneuWalker receive approved training from Pneumex Inc or their designee before operating the equipment Please call Pneumex at 800 447 5792 to find out more about our training and certification programs Description The PneuWalker Unweighting System supports a person s body weight during use The pneuma...

Page 5: ...nweighting capacity of 0 to 300 lbs and can be used for full or partial weight bearing activities and is safe to use with a patient up to 400 lbs Indications for use Contraindications Respiratory conditions which are exacerbated by pressure on the rib cage Spinal fractures Tumors on the spine These contraindications can sometimes be compensated for by taking off more weight through the hips utiliz...

Page 6: ...rved 6 8 27 2018 ExtraordinaryVersatility Help to resume normal functions To commode In and out of Bed Lifts from Wheelchair Safely Lifts Width adjustable to fit through doorways or over treadmills Walk Safely Actual Product may vary ...

Page 7: ...nweighting from 0 300 lbs See Page 19 Width adjustable to go through doorways around wheelchairs or over treadmills See Page 17 Unweights unilaterally to address hemiplegic conditions See Page 21 Onboard pneumatic compressor with battery that will run all day with overnight charge See Page 14 Height adjustable handlebars swing out of the way for easy access and patient transfer See Page 16 Patente...

Page 8: ...idth Adjustment Cylinder Handlebar in swing position Air Box Off On switch Safety strap Safety strap Patient Ports 1 Maximum Height Intermediate Lift 2 Intermediate Height Maximum Lift A B Handlebar Height Adjustment Power Plug outlet Wheel Base 1 2 Lift Arm Cylinder Ports B Intermediate Height Maximum Lift A Maximum Height Intermediate Lift Front ...

Page 9: ...mex Inc All rights reserved 9 8 27 2018 Control panel Contained air system Locking Wheels Handlebar Upright Back Cylinder Handlebar Air Box Off On switch Lift Arm Cylinder Ports Patient Ports Drain and Air Valve ...

Page 10: ...6 68 cm Inside Dim 22 to 38 5 55 9 to 97 8 cm Depth 34 86 36 cm Height on Lift Arms Width Width Outside Inside Min Max Min Max Min Max 45 in 80 in 26 5 in 42 5 in 22 in 38 5 in 114 3 cm 203 2 cm 67 3 cm 108 cm 55 9 cm 97 8 cm Lifting Range Handle Bars Clearance Max 2 in Adj Floor up 300 lb 20 29 in 30 40 in 12 in 136 36 kgs 50 8 73 7 cm 76 2 101 6 cm 30 48 cm ...

Page 11: ...coded for size 1 Small Red 1 Medium Blue 1 Large Yellow Four LockingWheels 2 Front 2 Back One Product Catalog One Battery Charger One set of chain extenders One PneuGait sample pack 1 Double ankle Cuff 1 PneuGait foot strap with buckle 1 Gait Assist band One Education Manual with instructions for operation treatment protocols a comprehension test and warranty For PneuWalker units sold outside the ...

Page 12: ... rotate the handle bar to the forward position replace pin to hold handlebar Repeat on the other side Push or walk the unit to the edge of the pallet using the handlebars Attach wheels 1 Lay PneuWalker unit gently on it s side 2 Locate wheels in packing There are two marked front wheels and two marked back wheels 3 Lock wheels Wheels must be in locked position before screwing into threaded holes o...

Page 13: ...with foot Position the cylinder For most common uses the cylinders on the PneuWalker should be in the A port all the way to the end of the Lift arm See Components Front page 8 To change the cylinder position Locate the ring pin on the top end of the cylinder Pull the pin out securing the lift arm with your body and move the cylin der to the desired position Replace pin For normal use make sure bot...

Page 14: ...hen the Airbox is fully charged the light will show green Remove the plug from the Airbox Once the PneuWalker has been charged overnight it is ready to use Turn on the PneuWalker using the On Off button on the top of the air box At the end of a days use turn the Airbox off and plug the charger in overnight Charger Charger plug in CAUTION When removing the plug from the Airbox remember to loosen by...

Page 15: ... under the valve to catch any water The drain valve is located underneath the Airbox There are two valves Valve A drains the main tank This should be done once a week Pull down on the key ring to drain Valve B is the air fitting that directs air to the cylinders The air tank must be drained weekly Failure to do so may result in damage to Airbox systems A B ...

Page 16: ...out the pin swing the handlebar to the desired position If you need to maintain the handlebars in the selected position reinsert the pin to hold Pull out pin To raise or lower the handlebar pull out metal knob and lift the handlebar sleeve up or down as desired Replace knob pin to hold new position The handlebar height may be adjusted in 2 increments from 30 to 40 Make sure both handlebars are at ...

Page 17: ... hold desired position Make sure you use the same positions on each side to maintain proper bal ance of the PneuWalker There are 5 adjustment possibilities 2 apart Position 1 26 5 narrowest Position 2 30 5 Position 3 34 5 Position 4 38 5 Position 5 42 5 widest Pull both pins out and turn 1 2 revolution to unlock position Lock wheels on one side Standing inside the unit pull up on the handlebar hol...

Page 18: ...provide the ability to adjust height and weight capabilities of the Pneu Walker Make sure you use the same lift arm positions on each side and check the strap adjustment on the PneuVest to maintain proper balance To maximize weight lifting capacity Attach the patient to Port 2 To maximize height capacity attach the patient to Port 1 The exception is The lift arm options provide adjustment to the h...

Page 19: ...nd down steps Balance Mode Balance mode lets the user perform exercises involving less vertical movement without fear of fall ing The system supports the entire body weight during loss of balance allowing a fall of no more than three to six inches OFF OFF mode releases the air from the system quickly This mode can be used to re weight a person quickly if desired Pressure gauge Regulator knob Mode ...

Page 20: ...distance a patient can drop from 1 to 6 360 Degree Attachment The 360 degree option allows your patients to walk sideways and backwards as well as turn and change directions The unit will be attached to the patient ports via push button quick release pins and the vest will attach to the spreader bar For video instructions on the installation and use of the 360 Degree Attachment please go to the fo...

Page 21: ...example In Port A the cylinders remove equal weight on both sides As the cylinder is moved to wards the upright to position B less weight will be removed from that side of the patient reducing total weight lifted on that side by 33 To lift 100 of the patient s LEFT side attach patient to left Port 1 and the left cylinder to Port A Fig 1 To lift 67 of the patient s LEFT side move the left cylinder ...

Page 22: ... 2018Pneumex Inc All rights reserved 22 8 27 2018 Ultima Vest Patented Ultima Vest Thoracic Belt Leg Cuffs K G F C J D D B A A H M I L S T R U Actual product may vary N O P Q N ...

Page 23: ...sover Strap H Upper Left Anterior Crossover Buckle I Lower Left Anterior Crossover Strap J Lower Left Anterior Crossover Buckle K Lower Right Anterior Crossover Strap L Lower Right Anterior Crossover Buckle M Center Back Guide N 2 Leg Cuff Connector Buckles Gray tabs O Gait Strap connector Buckles P Sliding Center Leg Cuff Buckle Leg Cuff Q Sliding Center Leg Cuff Strap R 2 Connector Straps Gray S...

Page 24: ... together gray Thoracic con nector straps secured into the gray tabbed Thoracic connector buckles For ease of use keep the vest buckled in this configuration If they are separated re attach them by in serting the four gray straps into the corresponding gray tabbed buckles See diagram page 22 23 Due to the nature of the back elastic support it may be necessary to stretch the vest before putting on ...

Page 25: ...k into the vest Put their right arm through the right side of the vest and the left arm through the left side of the vest Position the elastic waist belt with it s center equal to T12 The vest should be positioned so that the Abdominal Buckles on the Thoracic Belt are centered side to side Pull the belt crossing the color side right over the Velcro side left Pull to snug Secure the front of the ve...

Page 26: ...ite side buckles Before adjusting the Anterior Tensioning Strap have the patient adjust the bra front to center the vest to a comfortable position Adjust the Anterior Tensioning Strap The front of the vest when correctly buckled The Ultima vest can be used with or without the Leg Cuffs If using the Leg Cuffs buckle to the vest matching grey leg strap to grey buckle tabs in the front and grey cente...

Page 27: ...ift arm or spreader bar closer to shoulders Adjust the Anterior Tension Straps to provide correct amount of lift Unweight to desired level Putting Ultima Vest on Wheelchair Patient Attach PneuVest to the unweighting system with Leg Cuffs connected to the Thoracic belt Lengthen all straps Wheel your patient under the unweighting system Tuck vest back down as low as possible in the back with the Leg...

Page 28: ...l fold Thoracic pressure tolerance will vary from patient to patient practice this with able bodied person first Secure the Leg cuffs around the thigh Lower your patient back into the wheel chair and tighten up all the straps if nec essary The tighter the grey straps the more pressure there will be on the Leg cuffs Unweight patient until in standing position Reduce the unweighting as necessary to ...

Page 29: ...d attach to the patient 5 Gradually remove desired weight using the regulator knob on the control panel 6 Choose exercise or balance mode 7 Tension safety straps as needed 8 Monitor patient use assisting as necessary 9 Gradually release patient using the regulator knob 10 Remove vest and straps The Contained Air System must be charged before use You must plug in the charger each night for use all ...

Page 30: ... 2 If pain shifts to lateral knee reduce tension on lateral strap StrappingTechnique Knee flexed to 90 degrees maximum dorsiflexion in ankle and exaggerated supinated bias at ankle the medial to lateral strap will cross over and will be completely stretched to a non elastic state maximum tension Fig 3 Lateral to medial strap will be stabilizer medium tension Fig 4 If pain shifts to medial knee red...

Page 31: ...irable in some cases Pull both straps tight If a patient has Externally rotated lateral heel strike Toe drag Medial push off Gait Analysis asTherapeutic Rehab Notes 1 In order to be most therapeutically relevant each patient should use the Vest and Foot Straps where appropriate at EACH visit 2 Remember that the Vest and Gait Straps work TOGETHER and using one without the other REDUCES the overall ...

Page 32: ...n by attaching the PneuGait Assist band to the bar on the PneuWalker using the black Velcro loop Fig 1 2 Attach PneuGait Foot Strap with buckle to patient with Unilateral or bilateral correction as required Fig 2 3 Attach PneuGait Assist bands to the buckle on the Foot Strap Fig 3 and tension as neces sary This tension becomes a baseline for the patient and will be reduced as the patient progresse...

Page 33: ...y are able Once the patient is ready for balance and speed training it is suggested that they are transitioned onto the Pneu Weight It is extremely important to work on balance Most falls happen when turn ing usually to their weak side Using 360 training walking sidewise backwards and for wards a therapist can specifically activate Dynamic Abductor and Extensor muscles which are literally shut off...

Page 34: ...ang to dry Disinfecting Use procedures established for your facility The vest can be washed with a mixture of water and disinfectant such as Lysol or equivalent Do not use bleach on the vest or the color will fade Schedule Service No scheduled service is required See Preventive Maintenance below For ser vice call PneumexTechnical Services 800 447 5792 Preventive Maintenance Routinely check the air...

Page 35: ...Do not use if the integrity of these items is questionable 1 I hear air coming out If it is from an air fitting push the hose in 2 Unit won t turn on The unit has to be charged every night or it won t hold its charge Plug charger in push button once and look at charger to see if battery connection button has come on if not call technical support 3 Only one side of the lift bars is lifting The airl...

Page 36: ...ting the unit 8 The unit won t lift a patient This happens when there is a leak somewhere usually in one of the air hoses Start by putting full air into the unit listen for air releasing Find the leak If it is an air hose to a fitting push the hose into the fitting 9 Nothing is turning on or working This happens on some models when the charger is still plugged in Unplug it 10 I can t adjust the wi...

Page 37: ...o the outside of the ankle cuff c Take the inside strap and pull it across and upward and attach it tightly to the out side of the ankle cuff attach the outside strap loosely across and upward to the in side ankle cuff d Take the outside strap and attach it loosely across and upward to the inside of the ankle cuff attach the inside strap pull it across and upward and attach tightly to the outside ...

Page 38: ...ng unit a Exercise mode is only used for exercise program b Exercise mode allows some travel whereas balance does not and will lock in the unit c Balance mode is only used for balance program d Balance mode requires safety straps 7 When a patient is walking forward what are the gait problems you should look for a Toeing in or toeing out poor pelvis stability circumduction lack of coor dination b L...

Page 39: ... maximum assist c Provide minimal assist d Adjust as necessary 11 The PneuWalker can be used to a Lift patient b Help patient in gait training c Help prevent injury to therapist d All of the above 12 To take more weight off the left side a Move left cylinder closer to post b Move right cylinder closer to post c Move vest attachment closer to post d Use a heel lift on right side 13 The PneuWalker w...

Page 40: ...plied including the warranty of fitness for any particular purpose Pneumex liability is in all cases limited to the replacement price of its product Pneumex shall not be liable for any other damages whether indirect consequential or incidental arising from the sale or use of its products Pneumex sales personnel may modify this warranty but only by signing a specific written description of any modi...

Reviews: