3
User manual
En
gli
sh
Warnings
For your safety and to obtain an automation system with a correct operation,
make sure that the following conditions are met:
»
The gate structure must be adequate for the automation system
»
Make sure that the gates move correctly and evenly, without friction,
along the entire length of their path
»
The wheels and rails of the gates must be in good condition, free of rust
and well greased
»
The gates must be able to open and close freely, without obstacles
»
It is recommended to install a gate stop for the open position
»
DO NOT weld when the bearing is on the bearing sets, because it does
not have perfect contact with the bearings and they get burr trying to
make the table.
»
DO NOT weld with the motor mounted, as the Mainboard will heat up
and the wiring on the board will fail.
Safety information
»
Do not replace components and accessories other than those included or
recommended by the manufacturer.
»
Before powering the system, make sure that all connections and cables
are in good condition.
»
Turn off the power when performing maintenance operations.
»
Avoid the water control panel to avoid short circuits.
»
Do not power the motor, control panel or other accessories directly to
the power source.
»
Do not pass through the gates when they open or close.
»
Keep the remote control in a safe place away from children.
»
Read all information and warnings in this manual carefully before putting
the system into operation.
»
During the installation of the automation system, take measures regarding
the safety of people and maintaining the integrity of the space in which
you work.
»
The system has an overvoltage protection function to prevent damage to
the device or injuries.
»
Install the automation system taking into account the weight, length and
Summary of Contents for AP800C
Page 2: ......
Page 15: ...15...
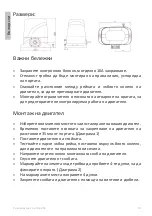
Page 16: ...16 2 x 2 1 6 1 1 x...
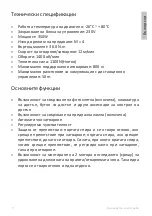
Page 17: ...17 26 C 80 C 230V 350W M 4 30 0 N m 12 1400 1100N 800 50 m 2...
Page 18: ...18 10A 35 1 4 2 4...
Page 19: ...19 2 3 mm...
Page 20: ...20 10A 1...
Page 21: ...21 13 1 Paring the remote control LEARN 13 1 D5 10 D5 D5 10 LEARN 6 D5 20 D5 5 1 2 1 2 3 4...
Page 23: ...23 10 8 ON 6 ON 30 2 4 2 4 2 4 5 10 30 2 4 7 ON 13 4...
Page 25: ...25 6 7 230V 3 4 5 4 5 3 4 5 3...
Page 26: ...26 14 15 15 COM 14 OUT 12 13 12 13...
Page 27: ...27 NO NO 11 10 11 12 13 3...
Page 28: ...28...
Page 133: ......
Page 134: ......


